

You are using an out of date browser. It may not display this or other websites correctly.
You should upgrade or use an alternative browser.
You should upgrade or use an alternative browser.
Rek-O-Kut "Rest-O-Ration" (part 1) Micropoise Tonearm
- Thread starter malden
- Start date
monkboughtlunch
Super Member
Viewing the tubes from the bottom, is there a thin wire spring clip tucked inside the outer tube and wrapped around the black inner tube?
I don't see one there...
monkboughtlunch
Super Member
Anyone have ideas on separating the tube?
monkboughtlunch
Super Member
I haven't solved the issue of disassembling the gimbal from the horizontal pivot tube to service the bearings yet.
However, I did figure out how to remove the RCA cable from the black plastic strain relief. I'll share the steps here for posterity. This process might interest folks who want to replace damaged or inferior phono cables with high quality ones.
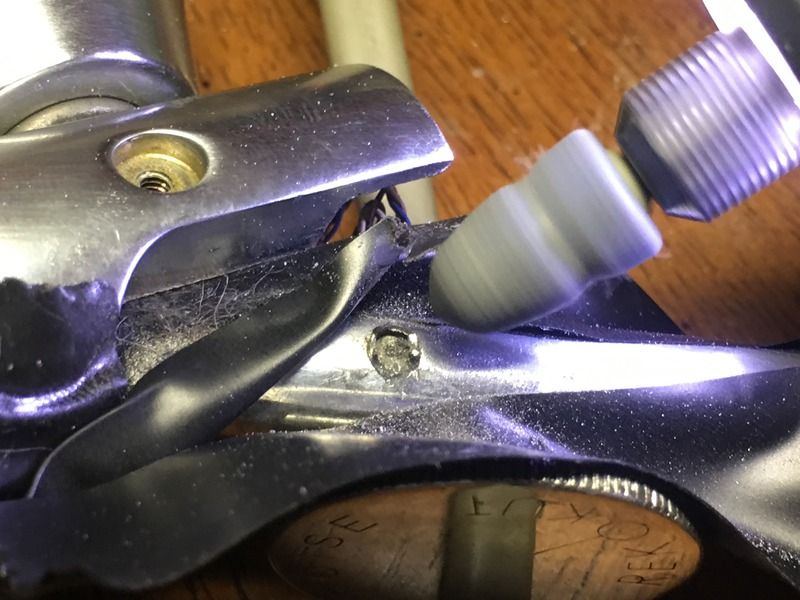
Here's a bottom view of the black plastic strain relief. You have to slide the inner part out a few millimeters and then squeeze down on the exposed sliver with a very narrow pair of pliers. This will allow you to disengage the locking mechanism and pull out the inner part of the black plastic strain relief. If you damage the parts of the strain relief, the original parts are still available for cheap on Mouser. If any part gets damaged during the extraction, it will most likely be 5-P4 which costs only 13 cents from Mouser.
Heyco SB-687-8 (part 2083 Mouser link )
Heyco 5-P4 (part 1147 Mouser link )


However, I did figure out how to remove the RCA cable from the black plastic strain relief. I'll share the steps here for posterity. This process might interest folks who want to replace damaged or inferior phono cables with high quality ones.
Here's a bottom view of the black plastic strain relief. You have to slide the inner part out a few millimeters and then squeeze down on the exposed sliver with a very narrow pair of pliers. This will allow you to disengage the locking mechanism and pull out the inner part of the black plastic strain relief. If you damage the parts of the strain relief, the original parts are still available for cheap on Mouser. If any part gets damaged during the extraction, it will most likely be 5-P4 which costs only 13 cents from Mouser.
Heyco SB-687-8 (part 2083 Mouser link )
Heyco 5-P4 (part 1147 Mouser link )
monkboughtlunch
Super Member
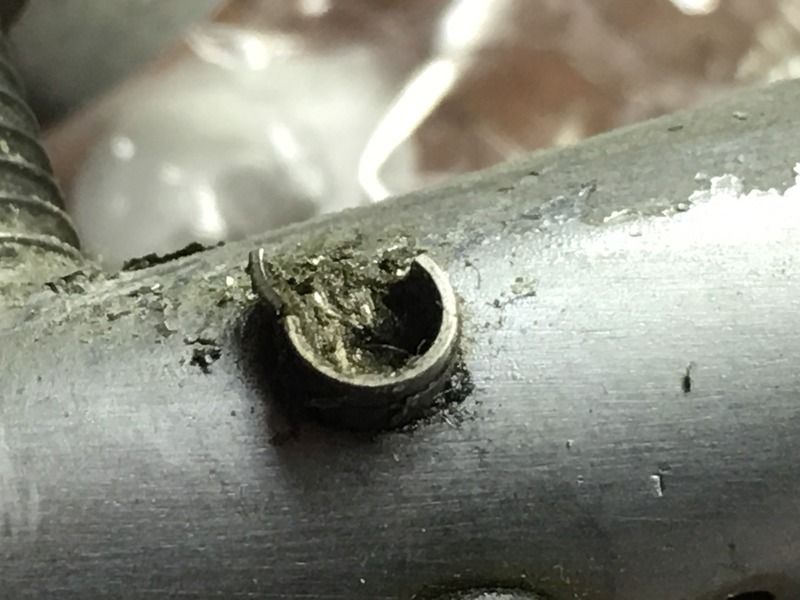
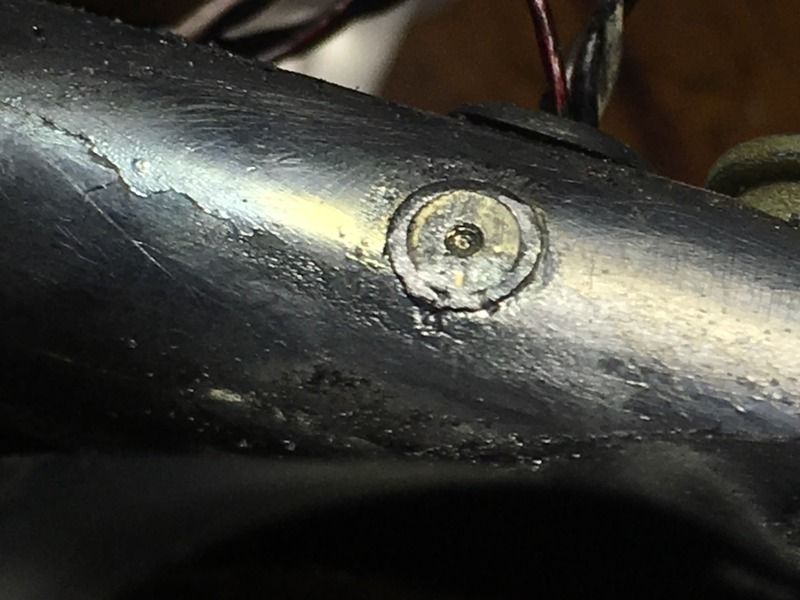
The outer tube has a hole in it, when you rotate it 360 degrees, do you see anything different on the inner black tube?
Yes, I can barely make out that there is an opening of some sort but I think one of those tiny screws is loose in there -- I can't get it out. It may be that that screw prevents the tonearm from moving past a certain point.
Anyone have any experience with removing this tube or have any further ideas on how I can get this tube separated from the gimbal so I can repack the bearings?

monkboughtlunch
Super Member
Bump -- anyone have ideas on how to separate the outer cylinder tube from the gimbal?
monkboughtlunch
Super Member
Did you try unscrewing it?
Yes, tried unscrewing it but to no avail...
monkboughtlunch
Super Member
That hole may be for a spanner type wrench....
I wonder if that hole is for a set screw to stop the tonearm from moving past a set point? Maybe it doesn't allow access to disengage the silver cylinder?
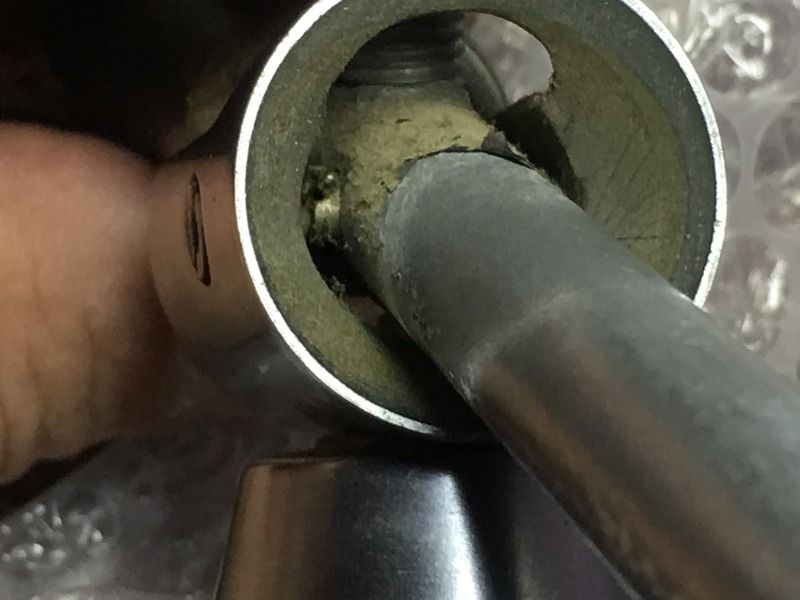
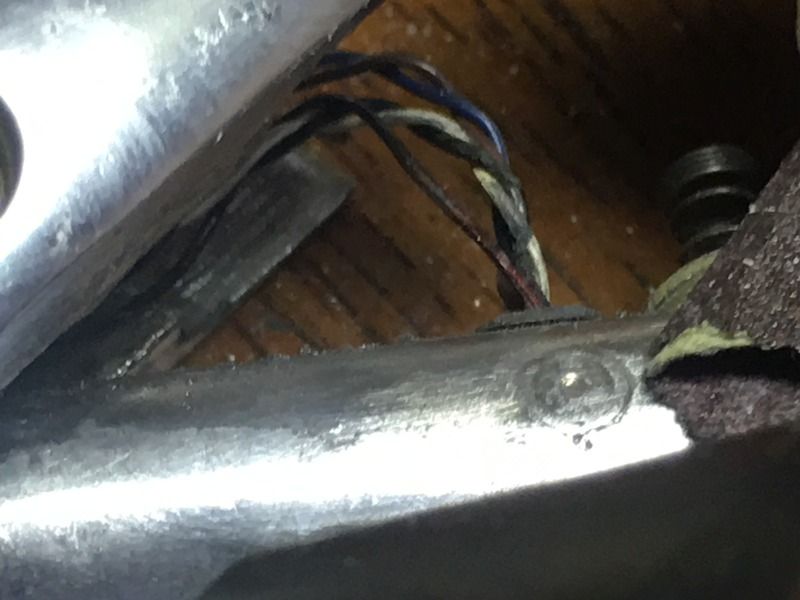
Any ideas on how the black tube is connected to the gimbal? Is it a press fit or screwed in?
monkboughtlunch
Super Member
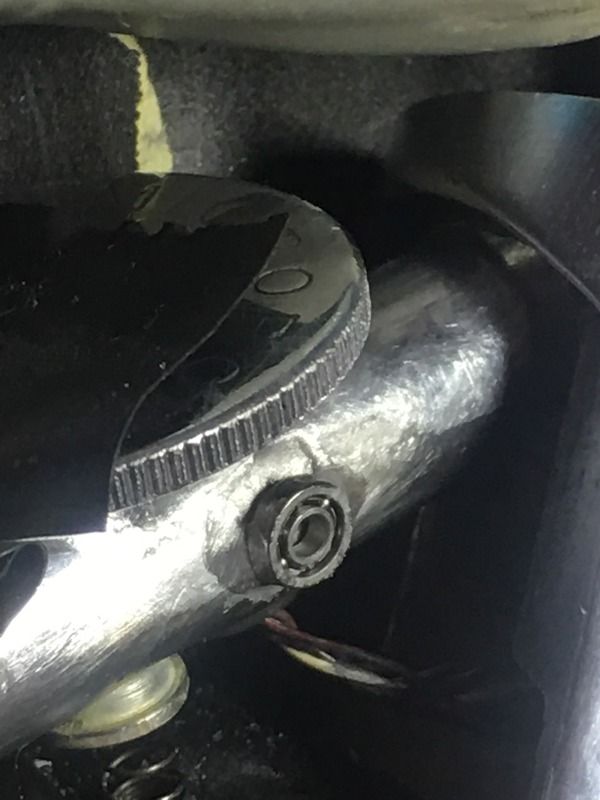
Anyone have ideas how how to separate these two pieces? I've annotated the photo below to better illustrate.

Last edited:
Very good documentation. If it's not too late, I'm most interested in what you did to the actual turntable as I just picked up a Rondine 2. I'm not sure what model arm it has but it's 12" long and has the "Autopoise" feature, which I'd been looking for. Hopefully, the tonearm work that you've done and photos you've provided will also translate to the arm that came on my Rondine 2. Thanks.
monkboughtlunch
Super Member
I simply dug out the bearings and cleaned them as well as the races and cone pivots with WD-40. I then inspected the loose parts with a machinists stereoscope under 40x magnification to look for defects but saw none. Bearings were repacked with white lithium grease and adjusted, just like I used to adjust Campagnolo hubs and bottom brackets...")
So was white lithium grease the only thing used to lubricate the ball bearings? Did ROK originally used grease for the ball bearings?
monkboughtlunch
Super Member
Found this promo for an S220 tonearm. Of special note:

- ROK used silicone damping for the horizontal bearings.
- Vertical bearings were two sets of five 1mm bearings.
- It doesn't mention the size of the horizontal bearings
monkboughtlunch
Super Member
Sorry, I'm about to put an arm s220 (oldie) arm back together, and the OP put LITHIUM GREASE in with the 1mm ball bearings. Is this correct?
The ad in post #56 suggests ROK used silicone damping.
chadbang
Well-Known Member
Well, here's my restoration. I bought an arm of ebay that was shot. I was going to send it back, but the seller just let me keep it. As you can see, the cup that holds the vertical pivot point was rusted and broke off -- rending the arm useless. I didn't want to even think about fixing it.
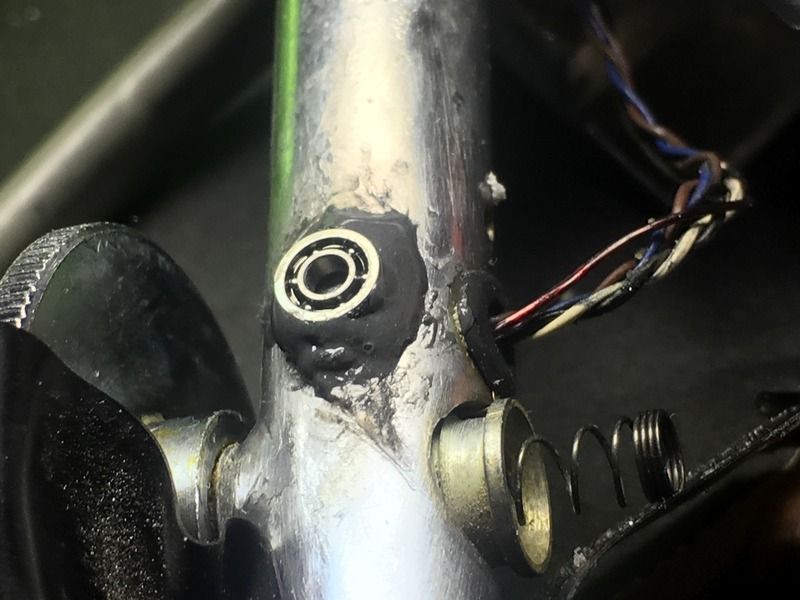
Here is the other side. This is what a whole cup looks like. THere is an outer tube that holds the ball bearing. The brass inner tube is there to keep the bearings in, it just tops the outer aluminum tube.

These "cups' are what the tips of the bearing screws ride in. They are on both sides of the arm.
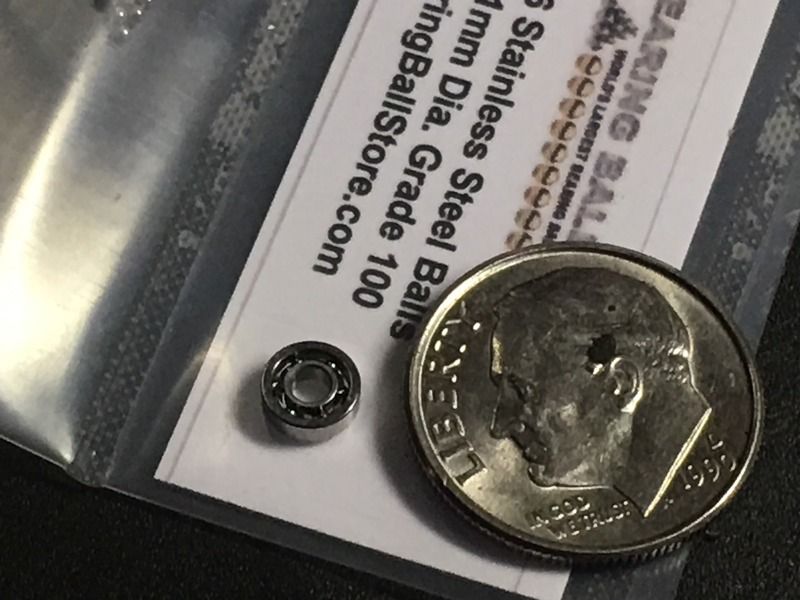
My first thought was to build a "cup" exactly like the remaining one. I gave up on that idea, but I later learned that it is not a straight tube, but rather drilled out in a contoured slope. Couple that with it's tiny size,3mm diameter x 2mm tall and the task of capping that will a brass fitting, I didn't think I had a chance. I was about ready to throw the arm away, when a search for the proper bearing size (1mm) turned up a photo a tiny, tiny Japanese bearings used in RC cars which are supposed to be of excellent quality.
So I measured the other cup and which as I said is 3mm in diameter, and the open hole in the center brass cap was 2mm in diameter. And that 2mm size, is exactly the width of the bearing screw on which the arm pivots. (Will get a picture up), so the bearing screw is meant to fit through that hole, riding on the bearings, and the just the point of the screw riding in that little hole drilled in the center of the bearing cup. Phew. Yeah, good luck McQuyering that!
So this bearing idea hit me. If I could find a 2mm tall bearing (the most crucial dimension as it had to fit between the arm posts, and having an open center hole of slightly LESS that 2mm, because, instead of riding directly on the bearing, with this bearing design, I wanted the top of the screw's sloped tip to ride on the bearing's inner ring, instead of directly on the bearing. So I figured I needed a slightly to rest my screw on.
So I bought this: S682 EZO BEARING STAINLESS https://www.ebay.com/itm/S682-EZO-BEARING-STAINLESS/152147746590?ssPageName=STRK:MEBIDX:IT&_trksid=p2057872.m2749.l2649
S682 EZO STAINLESS STEEL BEARING
DIMENSIONS: BORE: 0.0787" / 2mm O.D.: 0.1696" / 5mm WIDTH: 0.0591" / 1.5mm

First step would be to Dremel off the remains of the broken cup.
This is where I screwed. I thought the bearing was small enough that the curvature of the tonearm would let it sit flat. No quite. Because of the cylindrical shape of the tonearm tube, the cup needed to be concave on the bottom. I couldnt carve down this bearing (which is 5mm wide, instead of the orignal 3mm wide, because width didn't matter. There was plenty of clearance inside the arm support, but the width of the bearing had to be exactly 2mm, which it was.
I screwed up because, as you can see, I cleaned the old cup completely away down to the tube. I should have left two upraised points on either side to compensate for the curvature of the tube. Oh, well. Next time. But it made it more of a struggle later, believe me!
Here you can see how the edge of the bearing "overhangs" the arm tube. BUT the height at the center was still 2mm and that's what was important!

Well, let me tell you, the hard part came next. Attaching that damn bearing. It took me about a half dozen tries over three very frustrating hours. Here's the first attempt, which I tried three times and couldn't pull off. This was using my favorite adhesive DAP Rapid Fuse. Great gel/crazy glue. Works great. Strong. BUT... it was not thick enough, and every attempt wound up with some crazy glue slipping into the overhand and glueing the bearing to a halt. Then came the repeated acetone washings. Messy. Here's a failed Rapid Fuse attempt.
So I went with my other fav, JB Weld, the classic 2-part epoxy. I thought the thicker paste might keep in from leeching into the bearing. Wrong! Some leeched in and then back to endless clearing to get that bearing clean again! The first failed JB Weld:
For the second JB Weld try, I used a little Rapid fuse just to steady the bearing, the tiniest amount and that wasn't so bad to pull off. With bearing held by the crazy glue, I carefull applied JB Weld going nowhere near that overhand and was able to successful attach the bearing, It was easy to center the bearing, with pivot hole in the center of the old cup still being there. Oh, BTW, when I place the bearing screw into the bearing -- it rest on the edge of the bearing nicely with just 1mm of the point of the screw extending! Pure luck! EXACTLY the amount that needed to clear the bearing!
And there she be! The successful JB Welding. Bearing spinning clean and free. No goo.
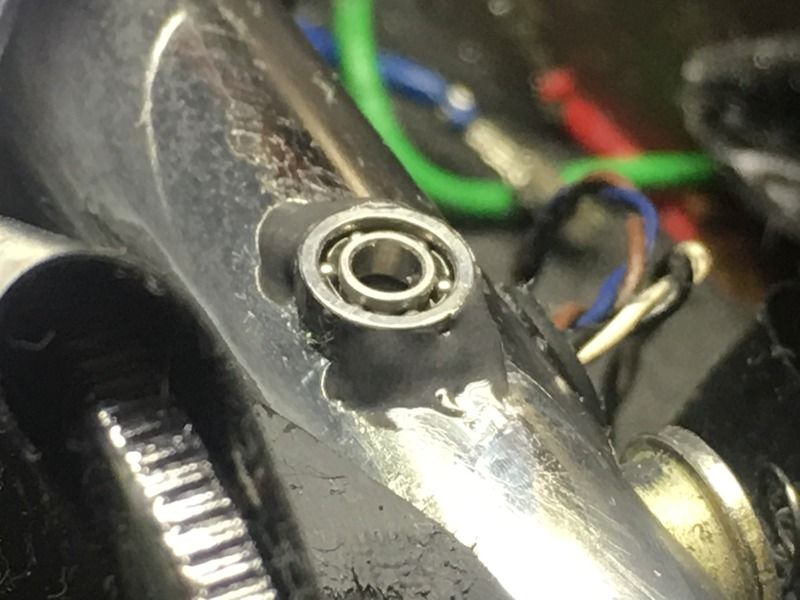
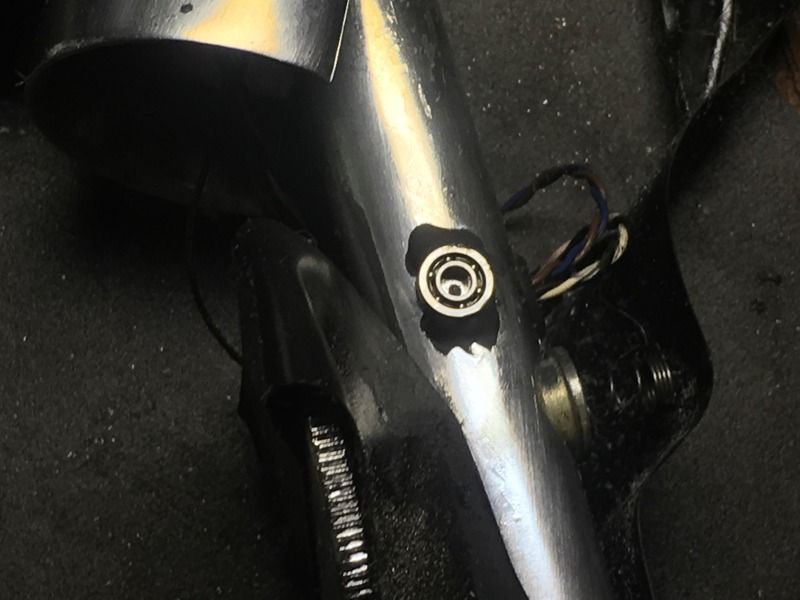


Here is the other side. This is what a whole cup looks like. THere is an outer tube that holds the ball bearing. The brass inner tube is there to keep the bearings in, it just tops the outer aluminum tube.

These "cups' are what the tips of the bearing screws ride in. They are on both sides of the arm.

My first thought was to build a "cup" exactly like the remaining one. I gave up on that idea, but I later learned that it is not a straight tube, but rather drilled out in a contoured slope. Couple that with it's tiny size,3mm diameter x 2mm tall and the task of capping that will a brass fitting, I didn't think I had a chance. I was about ready to throw the arm away, when a search for the proper bearing size (1mm) turned up a photo a tiny, tiny Japanese bearings used in RC cars which are supposed to be of excellent quality.
So I measured the other cup and which as I said is 3mm in diameter, and the open hole in the center brass cap was 2mm in diameter. And that 2mm size, is exactly the width of the bearing screw on which the arm pivots. (Will get a picture up), so the bearing screw is meant to fit through that hole, riding on the bearings, and the just the point of the screw riding in that little hole drilled in the center of the bearing cup. Phew. Yeah, good luck McQuyering that!
So this bearing idea hit me. If I could find a 2mm tall bearing (the most crucial dimension as it had to fit between the arm posts, and having an open center hole of slightly LESS that 2mm, because, instead of riding directly on the bearing, with this bearing design, I wanted the top of the screw's sloped tip to ride on the bearing's inner ring, instead of directly on the bearing. So I figured I needed a slightly to rest my screw on.

So I bought this: S682 EZO BEARING STAINLESS https://www.ebay.com/itm/S682-EZO-BEARING-STAINLESS/152147746590?ssPageName=STRK:MEBIDX:IT&_trksid=p2057872.m2749.l2649
S682 EZO STAINLESS STEEL BEARING
DIMENSIONS: BORE: 0.0787" / 2mm O.D.: 0.1696" / 5mm WIDTH: 0.0591" / 1.5mm


First step would be to Dremel off the remains of the broken cup.


This is where I screwed. I thought the bearing was small enough that the curvature of the tonearm would let it sit flat. No quite. Because of the cylindrical shape of the tonearm tube, the cup needed to be concave on the bottom. I couldnt carve down this bearing (which is 5mm wide, instead of the orignal 3mm wide, because width didn't matter. There was plenty of clearance inside the arm support, but the width of the bearing had to be exactly 2mm, which it was.
I screwed up because, as you can see, I cleaned the old cup completely away down to the tube. I should have left two upraised points on either side to compensate for the curvature of the tube. Oh, well. Next time. But it made it more of a struggle later, believe me!

Here you can see how the edge of the bearing "overhangs" the arm tube. BUT the height at the center was still 2mm and that's what was important!

Well, let me tell you, the hard part came next. Attaching that damn bearing. It took me about a half dozen tries over three very frustrating hours. Here's the first attempt, which I tried three times and couldn't pull off. This was using my favorite adhesive DAP Rapid Fuse. Great gel/crazy glue. Works great. Strong. BUT... it was not thick enough, and every attempt wound up with some crazy glue slipping into the overhand and glueing the bearing to a halt. Then came the repeated acetone washings. Messy. Here's a failed Rapid Fuse attempt.

So I went with my other fav, JB Weld, the classic 2-part epoxy. I thought the thicker paste might keep in from leeching into the bearing. Wrong! Some leeched in and then back to endless clearing to get that bearing clean again! The first failed JB Weld:

For the second JB Weld try, I used a little Rapid fuse just to steady the bearing, the tiniest amount and that wasn't so bad to pull off. With bearing held by the crazy glue, I carefull applied JB Weld going nowhere near that overhand and was able to successful attach the bearing, It was easy to center the bearing, with pivot hole in the center of the old cup still being there. Oh, BTW, when I place the bearing screw into the bearing -- it rest on the edge of the bearing nicely with just 1mm of the point of the screw extending! Pure luck! EXACTLY the amount that needed to clear the bearing!
And there she be! The successful JB Welding. Bearing spinning clean and free. No goo.


Last edited:
Similar threads
- Replies
- 0
- Views
- 158