Erik Tracy
Everyone's happy when the wizard walks by
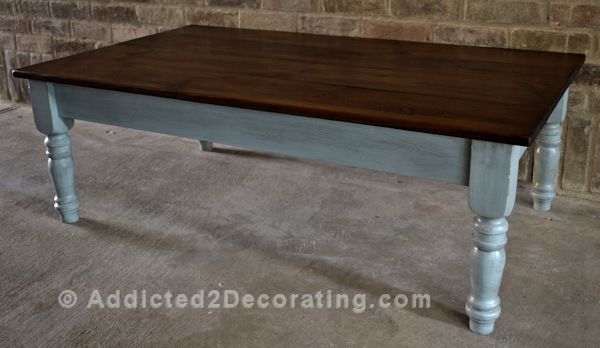
I picked up a heavy, solid construction, solid wood topped "country style" kitchen table that someone was giving away free on Nextdoor.
It was totally whitewashed and distressed - which is ok for the legs and sides, but I wanted to refinish the top.
I got an orbital sander and some 220 and 100 grit paper and went at it today stripping off the old finish.
I used the 100 Grit paper to strip the white/distressed finish off the top, then used 220 grit with the grain to try and even out the appearance.
But some areas just refuse to lighten and stay a bit darker.
Here's a shot

My question is if I plan on using a stain as dark as the darkest patches still on the top will they blend?
I'm whacked for the day, and the clean up was a b!tch. The orbital my friend loaned me had no vac nozzle and there is wood dust as fine as volcanic ash *everywhere*. I really want to be done sanding!
It was totally whitewashed and distressed - which is ok for the legs and sides, but I wanted to refinish the top.
I got an orbital sander and some 220 and 100 grit paper and went at it today stripping off the old finish.
I used the 100 Grit paper to strip the white/distressed finish off the top, then used 220 grit with the grain to try and even out the appearance.
But some areas just refuse to lighten and stay a bit darker.
Here's a shot
My question is if I plan on using a stain as dark as the darkest patches still on the top will they blend?
I'm whacked for the day, and the clean up was a b!tch. The orbital my friend loaned me had no vac nozzle and there is wood dust as fine as volcanic ash *everywhere*. I really want to be done sanding!