DIY high-end 80/20 equipment rack

Thanks everyone for the comments. Yeah, bending down every time I wanted to play something was discouraging me from playing music often enough. Will post some more info when I start veneering.

I think I may build an isolation platform for my TT from the Baltic birch as well. If I do, I'll post that in here too. Anyone have and design leads on good, effective non-sandbox isolation platforms?
 
No design leads, but you should probably start with the characteristics of what you're trying to isolate the TT from. Footfalls on a 100-year-old house's substandard living room floor framing? Or impact noise from traffic or garage air compressor via a slab-on-grade construction. Frequency and amplitude of interference will inform your path. One quick and dirty way to tell is get an old cartridge/stylus assembly, turn on your machines, and put the stylus down right on the plinth. Fire up some headphones and have a listen. Have someone walk around a bit. Listen at various times -- day, night, weekend. Find out what your TT is hearing in the way of interference. Falls short of datalogging accelerometers, but it'll give you an idea of what you're up against.

You can record it, and then analyze with one of the audio edit/eq packages out there. Should be able to do spectrum analysis.

Chip
 
Dumb question: what holds it all together - do you screw the L brackets into the bottom of the wood shelves?
 
Someone had to say it: nice rack. Seriously though, that looks really good.

-Dave

I literally laughed out loud on that one!

Dumb question: what holds it all together - do you screw the L brackets into the bottom of the wood shelves?

Yes, the bottom of the brackets are screwed directly into the shelves with 1" #12 pan head wood screws - pre drilled of course. Because I'm so OCD, I'm probably going to look for black 1# screws when I finish the veneer work over the summer.
 
Spring break was very productive. Just finished a pair of holders / cradles for my Altec horns and drivers. This is the most beautiful material I've ever worked with. 2 1/2" thick figured Bastogne walnut. There was a lot of milling in this little project. When this material is sanded to 600, it's as smooth as glass. I know this is unrelated to the rack, but I just thought I'd share.

20170318_194729.jpeg

20170318_195819.jpeg

20170318_195836.jpeg
 
Now build backs to hide & manage the cables.

Nicely done though, the racks look great.

Thanks guys! The nice thing about the 80/20 stuff is that they make a bewildering array of bits and bobs to help you do just that. Right now, my diy interconnects from my preamp to my amp are a bit too short to rout properly, but I bought four of these to help out with cable management... if they work out well, I'll probably end up buying 4 more.

AC-015-C-462x392.jpg


Now, what to do with a leftover 8 x 8 x 2.5" chunk of beautiful Bastogne walnut?
 
jcolletteiii wrote: "Now, what to do with a leftover 8 x 8 x 2.5" chunk of beautiful Bastogne walnut?"
Hmmm... Base for headshell holder, to fit glass top (jar) from cooking store, etc. Headphone rack. Album jacket stand for current playing disk. Business card stand. Box for misc. remotes. Elevating feet for amps -- cooling clearance.
Horn stands for your other two speakers for when you go Quad.

Replacement/contrasting top caps for the 80/20 to coordinate with the horn supports.

Chip
 
jcolletteiii wrote: "Now, what to do with a leftover 8 x 8 x 2.5" chunk of beautiful Bastogne walnut?"
Hmmm... Base for headshell holder, to fit glass top (jar) from cooking store, etc. Headphone rack. Album jacket stand for current playing disk. Business card stand. Box for misc. remotes. Elevating feet for amps -- cooling clearance.
Horn stands for your other two speakers for when you go Quad.

Replacement/contrasting top caps for the 80/20 to coordinate with the horn supports.
Chip

My headshell is permanently affixed to the arm. That's the only thing really that I dislike about the Luxman table. Too small for a headphone rack. Hmmm... interesting idea about the album jacket cover. I like the idea about the top caps for the aluminum extrusions - that bears some consideration!
 
Other projects (around the house, work, in the garden, painting, etc.) have taken time out of my busy audio DIY schedule, so sorry for the delay.

The veneering method I use is both practical and easy. It's practical from the standpoint of not requiring a vacuum bag, or long open-time adhesives; and easy from the perspective of application - it uses an iron. It is important to make sure, if you decide to use this method, that you use *ONLY* paper-backed veneer only - now raw flitches! I don't recommend anyone ever use the 'iron on' veneer adhesive that is available - I tried that stuff once and it is utter crap. I had to completely rebuild a ruined speaker box. My process uses regular old Titebond original yellow wood glue (I bought a gallon, and have done multiple large projects).

I cut the veneer down to slightly oversized - about an inch total in both directions - that gives me some wiggle room for positioning. Then you just apply a nice, even, fairly thick coat of glue to the paper backer side of the veneer, and also to the face of the plywood blank. Then you just let both pieces dry until there is no indication of any wet glue - the color will be uniform - any areas of wet glue under the surface will appear to be lighter in color. Once the glue is dry, position the veneer on the panel where you want it, cover the surface with a cotton sheet or rag (cotton won't melt at high temps), set your iron to it's highest setting, and starting in the middle of the panel and working along the grain in one direction, apply pressure and slowly move along the panel. Go back to the middle, and go along the veneer grain in the opposite direction. Continue outward until the entire panel has been covered. At this point, I go over everything a second time with as much pressure on the iron as possible. I go fairly slowly - each piece of veneer is covered by the iron for maybe 8-10 seconds or so. I also do this on the floor, that way I can get the mass of my upper body bearing down on the iron so that good contact is made between the two surfaces as the glue reactivates. I then do an additional pass around the edges. You cannot reposition the veneer once it has been ironed in one place, so be sure it's positioned correctly before you apply any heat! If you try, your panel will be ruined!

Once the ironing is done, I use an exacto with a *NEW* blade to very carefully trim the veneer down to just a few hairs from the edge of the panel all the way around. I then use my table belt sander to sand the veneer flush to the finished edge of the panel. I did this before I had a belt sander with a sanding block and some 120 grit sandpaper. Works just as well, just takes a bit longer. I then check for air bubbles under the veneer. You can do this by gently rubbing your fingers over the surface of the newly-veneered panel and listening for changes in the tone of the noise produced. If you hit a 'hollow' spot and the tone changes, you know you have a void, and that spot needs re-ironing. If you re-iron and the spot still lifts, I use a large stainless steel serving spoon to burninsh the spot down. Heat up the spot with your iron for 5 seconds or so, then without removing the cotton cloth and using the spoon, apply pressure and rub the spoon over the area in question sever times in a back and forth manner. This usually does the trick! For stubborn areas along the edges, you can use a bit of veneer to squish some glue under any voids, then heat it up with the iron to adhere them down.

This method works great! I've done a rather large set of DIY Altec speakers this way, and they came out nice. You want to make sure of a couple of things though. The glue only has about a day or two of reactivation time - after that, the glue will not melt and re-set. I do my veneering *AS SOON AS THE GLUE IS COMPLETELY SET* - this way I maximize the flexibility and reactivation potential of the adhesive. I usually end up with one or two small areas that need to be re-melted - but I use a lot of pressure and go over the surface twice and the edges a third time.

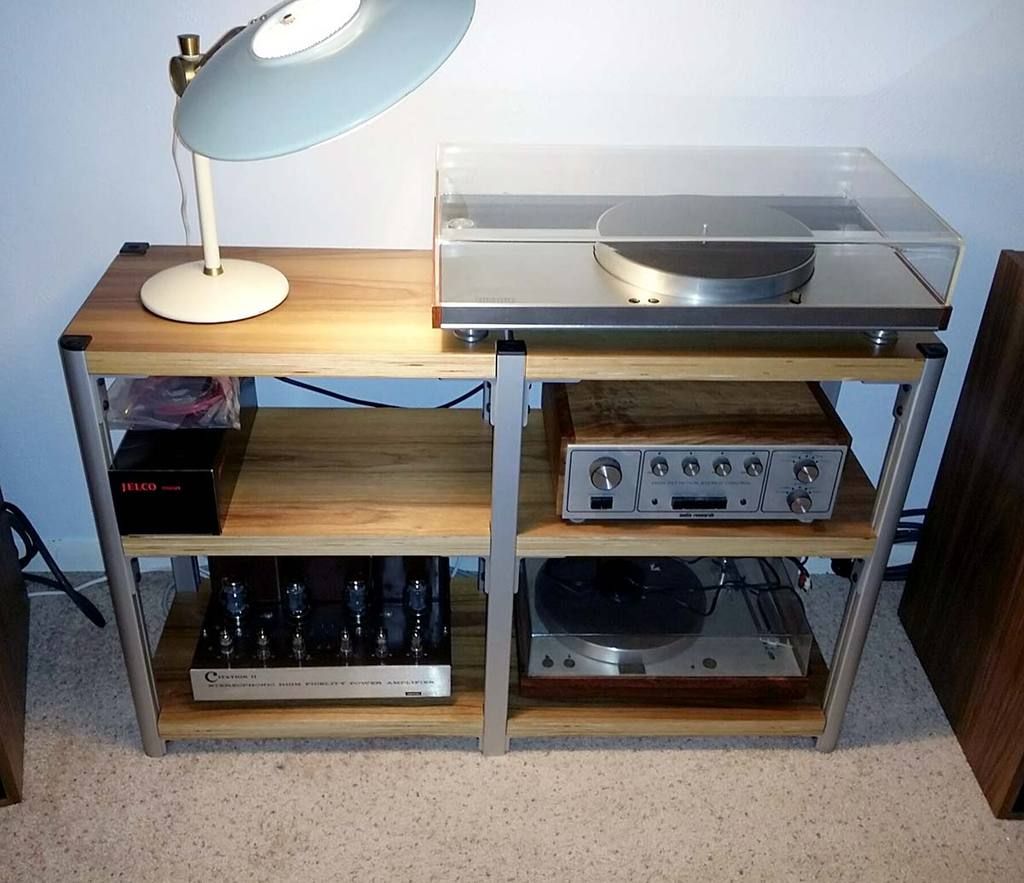
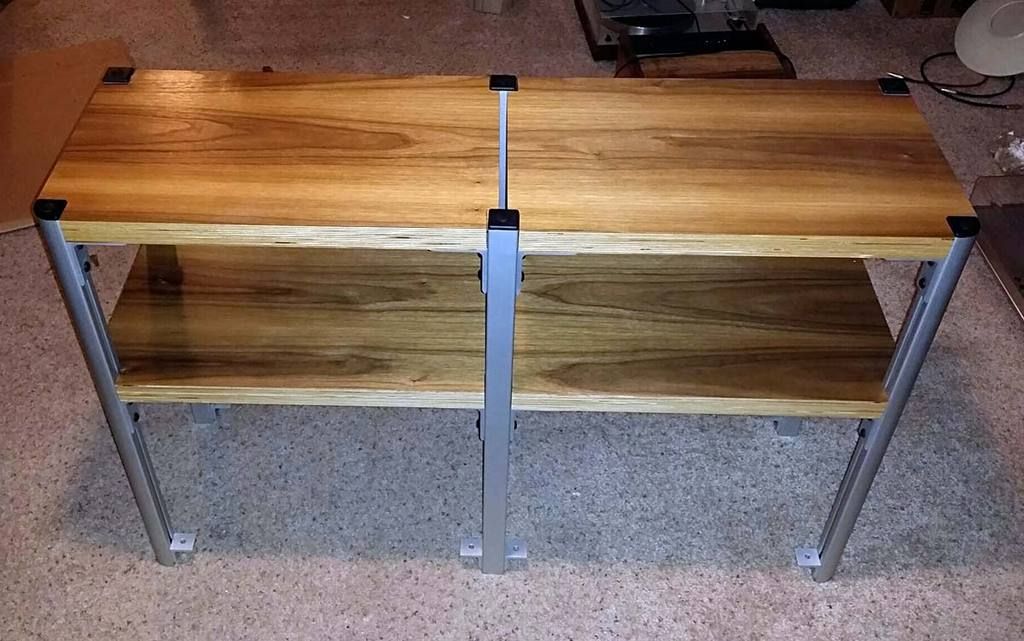
For a finish, I sand the veneer lightly with a sanding block or a random orbital sander (depending on the wood thickness of the veneer) first with 220, then by hand with 400. DON'T GET CARRIED AWAY with the sandpaper. You can very easily sand right through the wood and then your project is ruined. I really like minwax spar urathane. It's a nice fast-drying oil based urathane with superior water-resistance. I have used it on four audio projects now, and an *very* happy with the results. I usually do four thin coats with a light sanding to 400 grit between the third and final coat. I'm still waiting for the final coat of urathane to dry on the last two shelves, but here is where this project is right now.

stand.jpg


Will post up some more photos when it's all back together!
 
One more with stuff starting to get stacked back on. I need to order four more of the twist-lock wire organizers. They are so awesome, but I need a few more for wire routing flexibility. This was a pretty easy project to build, and I am really very happy with the results. There is no way that you could buy something as rock steady and massive as this thing is for 3 or 4 times what I paid to build this. The tools I used included: Table saw, table belt/spindle saw, hand held plunge router, cordless drill driver, random orbital sander, straight edge clamps, the set of laminating cawls that I built to glue the shelves together (I will get a lot of use out of those!), an iron, an exacto knife, sandpaper sheets in 120, 220, and 400 grit, and a disposable paintbrush (for laying on the glue). Many of these I could have done without. For example, I knew I would be veneering the shelves, so I could have simply screwed the shelves together using 1" wood screws instead of making the laminating cawls. Then just fill in the screw holes with epoxy filler and sand flush before doing the veneer. Totally don't need a table sander, or even a table saw to do this. In fact, I did most of the cutting using my circular saw and a straight-edge clamp. The one absolutely indisposable necessity if you decide to do a similar project - a *good* plywood/crosscut blade. I use a Diablo blade in my circular saw, and it produces nearly finish-quality cuts in plywood that generates nearly no tear-out, even when cutting across the grain of the outer plies. If you don't make the 'pockets' that I put the legs in, then you don't need a router. You could make a slightly simplified version of this stand with only a handheld circular saw (with a good plywood blade), a straight edge clamp, a drill driver, a sander of some sort, an exacto knife, and an iron. All of the other tools and jigs just make things easier. If you don't want to add veneer, then you can get rid of the exacto knife and the iron too!

stand3.jpg

Here's what it looks like with some stuff stacked back on.
 
Awesome work! I'm remodeling a house right now that I will be moving into in a month or so. I'm going to give one of these a try for my listening room. Thanks for the detailed info on building it. :thumbsup:
 
Back
Top Bottom