harman/kardon hk775 amplifier restoration

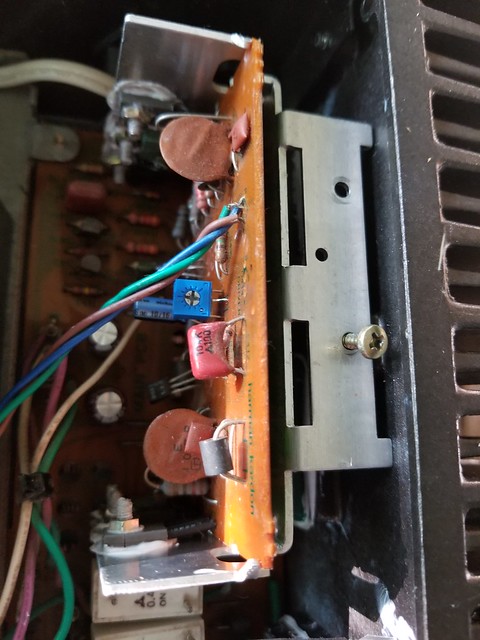
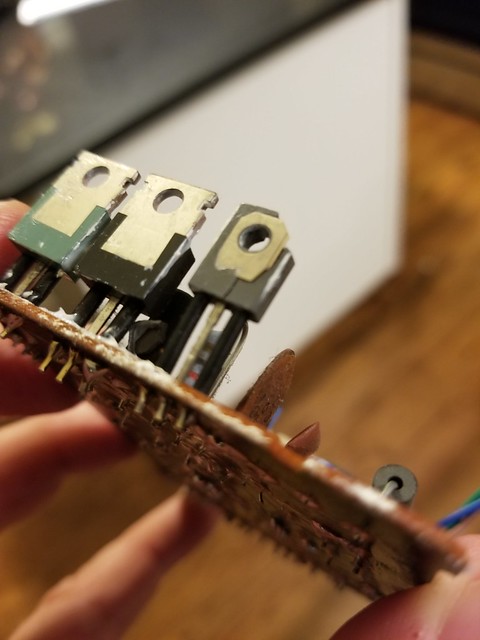
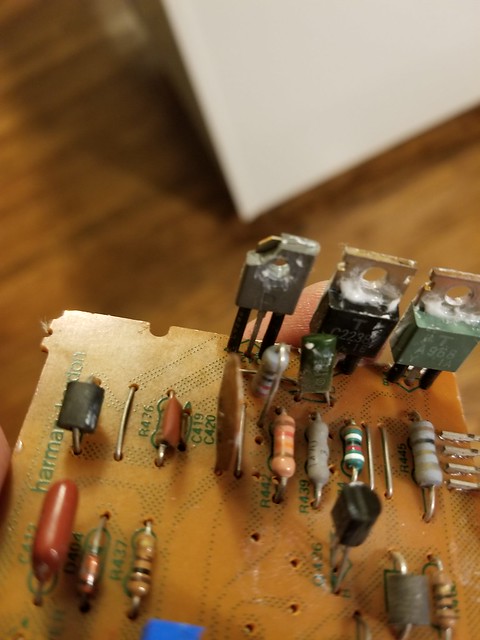
Yes, it's bright because of too much current...a short somewhere most likely, but what procedure did you use when installing the trimmers? Some questions...

1. Was that specific amp working when you got it? If so, something you did in your restoration caused this.

2. Did you measure where the originals were set and "preset" the new ones to those readings? Typically, new trimmers will be factory preset at around the mid point, but no guarantees.

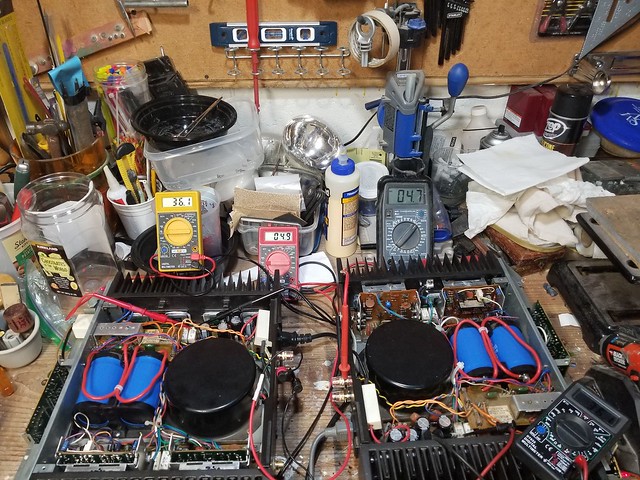
3. Did you check the bias when you turned it on on the DBT?

What I'd do to see if it is a bias problem is get your meter set up on the test points prior to turning the amp on on the dbt. You should be able to see what the bias is currently at and start turning it down to 0mV while watching to see if the bulb dims at all. I'm guessing you have a transistor installed incorrectly though.

Search "tickle the dragon" in the Pioneer forum for Mark the Fixer's recommended way of checking/setting bias after an amp rebuild.
 
Last edited:
Amp was working. Something I did has caused this. I paid no attention to where the original trimmers were set. Nor did I look at where the new trimmers were set. All I did was measure the old and new to confirm they matched. I did not check bias.

I never removed any transistors. I removed heat sinks though (new heat sink compound, cleaned everything up, installed micas).
 
Here is the power supply board, if there is a short, I don't see it. I did continuity tests all over and no trace has continuity with any other trace.
 

Attachments

  • 1499540775097993536775.jpg
    1499540775097993536775.jpg
    56.3 KB · Views: 71
  • 1499540893702-841383264.jpg
    1499540893702-841383264.jpg
    118.8 KB · Views: 71
You really need to check and set the bias IAW the SM before assuming there's some other issue. Did you search for how to do it like I asked? Do you have a higher wattage bulb in case it's a simple matter of it being a high current amp.

There was absolutely NO dimming at all? Not even after caps charged?

I'm not thrilled by the masses of solder I'm seeing in these pics, but I know you were having issues getting it all connected. It appears that the positive and negative leads are correct by comparing before/after shots. But I can't see if there's a rogue stranded wire touching something it shouldn't.
 
The solder is not as much as it looks like in the pics and the way it was from the factory, the solder was pretty thick as well. I am not thrilled either, but I didn't have much alternative with that 10 gauge cable. Continuity testing with help of the manual leaves me fairly certain that there are no shorts at the power supply. I will look at it more closely again since it is apart.

What wattage of a bulb would you suggest? I have not tried anything other than 150. Again, it draws 400 watts which seems high for a 130w mono amp.

How long should I let the amp idle with the bright bulb? How long does it take for caps to charge? After about 10 seconds I get worried enough to where I shut it off.

I played around briefly with the vr that adjusts bias, and I got no noteworthy change. By that I mean I had it all the way up, all the way down and the bulb definitely did not go dim during that time.
 
[QUOTE="z-adamson, post: 10685164, member: 256990"
I played around briefly with the vr that adjusts bias, and I got no noteworthy change. By that I mean I had it all the way up, all the way down and the bulb definitely did not go dim during that time.[/QUOTE]

Did you put your DMM on the test points and see if the actual reading changed? I feel you're pushing ahead without really attempting what needs to be done. You need to set up your meter probes according to the service manual at at least try to get the bias close to what is called for. With the DBT you should at least be able to see if the circuit is responding.
 
I did not use a meter. I just went from one and to the other, slowly, and back again looking for change in brightness of the bulb...there wasn't one. I will put a meter on thr test points and try again.

I am still wondering about bulb wattage....any suggestions? I could connect a strip to the bulb recepticle and hook up two 150w bulbs.
 
Last edited:
The extra bulb idea may work. Have never done it but I'm sure if you search the site you could find some info on it.

That COULD be the only issue, but you still need to set the bias and make sure it's responding properly. IF it does respond to the trim pot, and IF by adding an extra bulb you find that the bulbs dim somewhat and don't pulse or flicker, etc, THEN and only then should you dial the bias pot to zero mV and go to wall power to set the correct bias.
 
Ok, two bulbs hooked up, meter at the test point, 0.46 volts dc no matter the pot position. The circuit is unresponsive to the VR. The bulbs remain bright. So that's 460 millivolts when I should have 36.
 

Attachments

  • 1499563059746-579969526.jpg
    1499563059746-579969526.jpg
    26.9 KB · Views: 23
One thing I don't understand....bias is the measurement of current draw with the amp at idle, right? So why am I measuring in millivolts instead of amps or milliamps? The manual clearly states volts. Is this an error?
 

Attachments

  • 1499564157447-1800067784.jpg
    1499564157447-1800067784.jpg
    21.2 KB · Views: 16
  • 1499564191436635437466.jpg
    1499564191436635437466.jpg
    27.6 KB · Views: 15
Not an error. While some may actually have you measure mA, most will have you measuring/setting mV.

So, now the troubleshooting begins. No change to the bias setting. Were these trimmers the ones on extension legs, and if so, do you have the originals? While not normally an issue with new parts, perhaps you have a bad trimmer.

With power off, unit unplugged, and main caps discharged (test with a meter)

Check Q413
R435 150ohm
R437 100ohm

Compare them to the other original amp (you haven't messed with that one yet have you???).

Have you confirmed the functionality and secure solder connections on the double cement resistors?
 
The trimmer that sets bias is the single turn trimmer that did not need extensions. With an ohm meter I can sweep test this trimmer in circuit. I did such and it works well, is within spec etc. All indications are that it is not faulty.

I did mess with the other amp, not those components though. Q413, r435, r437 are untouched in both amps. The only components that were removed in these amps are the caps and vrs.

I will check the 3 components you mention. The cement double resistors appear functional. I will meter them out though.

Another thought, is it possible to overtighten the heat sink mounted transistors to the heat sinks and cause this sort of problem? As I was tightening them down I was not sure how tight to go. I was using a typical hand held screwdriver, so there is no way I applied THAT much torque, but I was still not sure how tight is too tight.
 
Not exactly the info you requested, the predriver board has obvious signs of damage. While looking for the resistors you specified, I noticed this. The board is darkened, and at least one resistor is cracked. This was not there before. Affected resistors are r481, r427, r425.
 

Attachments

  • 1499567986282-94469610.jpg
    1499567986282-94469610.jpg
    122.3 KB · Views: 59
That other amp was supposed to be your baseline amp to compare the first one to. Sort of like checking L vs R channels in a stereo amp with one bad channel to diagnose problems. Oh well. I know your excited to work on these things, but please try to slow down a bit and be more methodical. Before you do any other work on the other amp, I suggest you put it back together and try turning it on on the DBT also (it worked correctly also yes?).

That pre driver board definitely has issues or has been negatively affected by work elsewhere you did. You'll need to check all those components and replace a bunch of them due to the overheat condition. Perhaps there's a solder bridge on that board that you didn't see. Also, only removing the heat sinks and then replacing them and tightening could have caused some cracked solder joints on the transistors.

Check the following resistors also:
R403,404,409,410 1.5K 1/4W fuse resistor
R431,432 56ohm 1/4W fuse resistor

Also check the other fuse resistors on the driver board as listed in the SM.

When I do these I'll desolder the transistor while the heatsink is still attached and then remove the whole assembly. Leaving the heatsink attached while desoldering helps protect the transistor a bit. Unscrew, clean, regrease, reattach Q to the heatsink and then resolder. Tin the iron with solder and "tack" one transistor leg in place while holding the whole assembly to the board. Then solder the other two legs. Finally, go back to the tacked leg to make a complete joint.
 
Last edited:
Looking further, it appears that this predriver board is the one you asked questions about in another thread about soldering closely spaced pins. You may need to recheck your work there. When you pull this board, I'd suggest getting a soft bristled paint brush (can even be a 1" chip brush) and cut the bristles to about 1/2" - 3/4" and clean that board of the dust and grime. What won't come off doing just that, use 91% or stronger isopropyl alcohol and gently scrub around those components and the trace side of the board then rinse with more alcohol. Let the excess drip onto some paper towels to soak up. If you're going to all the trouble of recapping, etc., take that extra step to make things look clean too. It may also help you find bad solder joints, etc.

One further suggestion...

You've created multiple threads on different topics for this one piece of gear. While it's tempting to separate them, it can lead to confusion and extra posts about what amp, etc. you're having the issue with. So, as questions come up, keep them in the main thread, or at least provide a link back to the main thread that generated the question. It will help the rest of us help you.
 
What about that three-leaded capacitor? I replaced them with a standard two-leaded caps. Any chance this could be causing problems?
 
That other amp was supposed to be your baseline amp to compare the first one to. Sort of like checking L vs R channels in a stereo amp with one bad channel to diagnose problems. Oh well. I know your excited to work on these things, but please try to slow down a bit and be more methodical. Before you do any other work on the other amp, I suggest you put it back together and try turning it on on the DBT also (it worked correctly also yes?).

That pre driver board definitely has issues or has been negatively affected by work elsewhere you did. You'll need to check all those components and replace a bunch of them due to the overheat condition. Perhaps there's a solder bridge on that board that you didn't see. Also, only removing the heat sinks and then replacing them and tightening could have caused some cracked solder joints on the transistors.

Check the following resistors also:
R403,404,409,410 1.5K 1/4W fuse resistor
R431,432 56ohm 1/4W fuse resistor

Also check the other fuse resistors on the driver board as listed in the SM.

When I do these I'll desolder the transistor while the heatsink is still attached and then remove the whole assembly. Leaving the heatsink attached while desoldering helps protect the transistor a bit. Unscrew, clean, regrease, reattach Q to the heatsink and then resolder. Tin the iron with solder and "tack" one transistor leg in place while holding the whole assembly to the board. Then solder the other two legs. Finally, go back to the tacked leg to make a complete joint.

I will check those resistors. Since I only replaced the caps in the other amp, does that render it useless to use as a baseline for resistors and anything else? Yes the other amp did work.
 
I will check those resistors. Since I only replaced the caps in the other amp, does that render it useless to use as a baseline for resistors and anything else? Yes the other amp did work.

No, it won't render it useless as a baseline as long as you didn't commit the same mistake (which it might not even be) as with this amp. Just don't make any MORE changes to it, but try to see how it responds to power up on the DBT. Be very watchful of that same board when you do, and kill the power if you see any smoke or glowing parts. Also, check and or set this amp's bias like you tried to do with the now broken one, only using the original trimmers. Hopefully, since it was functional, you won't need to adjust the trimmer. If all goes well, this will give you something to compare voltage readings, etc during troubleshooting of the inop one.

As to the three leg cap, remember that third leg was not connected to any circuit, it just had a stabilization pad. So, unless you soldered the replacement cap's negative lead to the dummy pad (thus leaving the negative pad empty) there shouldn't be any issue whatsoever by using a 2-leg cap.
 
I thought I might update this thread

I had bought 2 HK775's locally with the intention of restoring them. After following this thread, I was a little concerned that they might not be the easiest amps to work on so I contacted z-adamson and he kindly sold me the amps he had been working on as a test bed to see how they came apart. I have some experience building and restoring amps so once I had disassembled the amp I thought I would see if there was anything obvious which might be fixable and then I would have a backup set of amps.

I found 2 obvious things which could have caused the crazy current draw


These wires had frayed and could potentially have caused a short - this is a small off-board transistor on the bias board.

The other was this


These are now rare hitachi transistors that are critical for the biasing circuit. I managed to find a thread on DIYA which indicated that B&D had stock 4 years ago and luckily they still did. As the type was not the same ( A vs C) and hfe range was different, I bought the complimentary pair and replaced them.

Long story short - success, brought it up with a variac while monitoring several key test voltages and set the bias and offset as per service manual and all looks to be back to spec.

I will do the real test of listening to them once I have the other one back together as well.

Thanks to z-adamson for being willing to sell them on ( I nearly didn't bite given the high shipping costs ) but glad I did.

Next up is to build some OB PAP Trio type speakers and use these for the bass units.

..dB
 
Final update - got both working today


Not tested yet because I want to make sure they are stable for a while.


..dB
 
Last edited:
Back
Top Bottom