JBL 4410 restoration

Nice set-up. :thumbsup:
Looks like speakers have been recently sanded/treated?

Some pics from my finnishing-practise: 1-sanded 2-sanded/lacquered 3-sanded/stained/lacquered 4-tabletop reference

rsz_dsc02306.jpg rsz_dsc02305.jpg rsz_dsc02304.jpg rsz_dsc02266.jpg

Hm. :idea:
 
Crossover caps...well,there are no obvious faults in how they perform.
I have no doubt that paying attention to room acoustics and setting them together with the right electronics,
they will be really good-with caps as is.
And with really good I mean they will be able to compete with modern high-end stuff,
like Sonus Faber,Martin Logan and Kef`s I`ve had.
Although with their own charachter,like the others also have.

Getting these for a song and fixing them up,
will (hopefully) in time free more money to spend on as good a cdp or dac as I can possibly pay for,
and the RIGHT amp for these.

But that will have to wait until I find a job and a place to live.
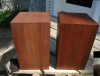
For now I am stuck sanding,
and F me how leighbouring that baffle plate is.
That black crap on the baffle really don`t wanna come off.
Happy to see that underneath it they have veneered-though I do not follow their logic in doing so..

rsz_dsc02313.jpg
 
Finally...one cabinet sanded,
and a good start on the next.

rsz_dsc02316.jpg rsz_dsc02317.jpg

This sanded look is closer to what I want than the sample results on the test cabinet:
I bought another lacquer today-graphite black.
But still not convinced.Will take som days to think about it before choosing what finnish to go for.
Maybee sand down the colour before clear-coat.

rsz_dsc02318.jpg rsz_dsc02319.jpg
 
While doing these JBL`s I`m also sanding down and re-lacquering some old furnitures.

rsz_dsc02345.jpg rsz_dsc02346.jpg

While lacquering I saw some drops falling from the cup in my left hand,
and figured I had moved to fast.
I slowed down and continued-but soon felt my hand getting wet.
Here is why:

rsz_dsc02344.jpg

The lacquer I am using is very fat,so I decided to use a thinner,
to make it go off faster.
The mixture melted the plastic cups while I was working with them.

I`ll go back to paper-cups again.
 
So after starting another thread asking for inputs about oiling or lacquering the cabinets,
I have oiled away.
Here is how they took to the first layer of oil,
man did they soak it up!

rsz_dsc02348.jpg rsz_dsc02347.jpg rsz_dsc02349.jpg rsz_dsc02350.jpg rsz_dsc02351.jpg rsz_dsc02352.jpg rsz_dsc02353.jpg

Much happier with how it looks now.

Yes,I know this is not the same cabinet as i did the tests on,
but I think it is similar enough for the tests to have relevance.
And for deciding what option to go for.
 
So after starting another thread asking for inputs about oiling or lacquering the cabinets,
I have oiled away.
Here is how they took to the first layer of oil,
man did they soak it up!

View attachment 1010101 View attachment 1010102 View attachment 1010103 View attachment 1010104 View attachment 1010105 View attachment 1010106 View attachment 1010108

Much happier with how it looks now.

Yes,I know this is not the same cabinet as i did the tests on,
but I think it is similar enough for the tests to have relevance.
And for deciding what option to go for.

Good choice. Lacquer really doesn't belong on JBLs.
 
So after starting another thread asking for inputs about oiling or lacquering the cabinets,
I have oiled away.
Here is how they took to the first layer of oil,
man did they soak it up!

View attachment 1010101 View attachment 1010102 View attachment 1010103 View attachment 1010104 View attachment 1010105 View attachment 1010106 View attachment 1010108

Much happier with how it looks now.

Yes,I know this is not the same cabinet as i did the tests on,
but I think it is similar enough for the tests to have relevance.
And for deciding what option to go for.


Looks good. Which oil did you use, the standard JBL boiled linseed + turp recipe, Whatco (which color), etc.?

I have some little 4301Bs that are going to need some attention and was thinking about just going with the Whatco Natural.
 
Looks good. Which oil did you use, the standard JBL boiled linseed + turp recipe, Whatco (which color), etc.?

I have some little 4301Bs that are going to need some attention and was thinking about just going with the Whatco Natural.

I used "Liberon Finishing oil".
Natural finish-no extra colour.
I hadn`t expected it to even out the colour differences this good,
or indeed bring back this much glow to the old veneer.

rsz_dsc02347.jpg rsz_dsc02355.jpg

Will need another layer or two.

One thing that puzzled me while working with these speakers was how good they smelled,
I mean they smelled really,really nice.
Them guys at JBL sure think about everything!

It was a week later before I realized that the smell came from a perfumed candlelight,
found inside the cabinet together with som more stuff.

rsz_dsc02356.jpg
 
Wax might be up a little later.
Now it is time to get the speakers together again,
before parts go missing from the touch of uneducated hands.

This is the cream part-when all is coming together:

rsz_dsc02357.jpg rsz_dsc02358.jpg

And then one of the forks for the tweeter termination broke:

rsz_dsc02359.jpg rsz_dsc02360.jpg rsz_dsc02362.jpg
 

Attachments

  • rsz_dsc02363.jpg
    rsz_dsc02363.jpg
    45.7 KB · Views: 30
All right,now lets move forward:

rsz_dsc02363.jpg rsz_dsc02364.jpg rsz_dsc02366.jpg

I think oil did it for me.And for the JBL`s.
The character is a bit changed with the oiled veneer instead of the black baffel.

rsz_dsc02370.jpg rsz_dsc02371.jpg

Also have these laying around:

rsz_dsc02372.jpg rsz_dsc02367.jpg

Is the last pic out of focus or am I getting emotional...?
 
Still have some estetichal issues.
I found a tip in another JBL restoration thread:
http://audiokarma.org/forums/index.php?threads/my-jbl-4311-2-days-restoration-project-part-1.436777/

This guy used softener to get at those hard,pushed-in dustcaps on the mids.
"Hey...didn`t I have bottle in excess after one of my veneering projects..??"
Turns out I did.
Lets have a go at them!

Even with softener It still took 45 minutes and some hardcore vacuuming to get them out
-but out they came!
Great!One step further towards completion.

rsz_dsc02383.jpg rsz_dsc02390.jpg rsz_dsc02391.jpg
 
Applying the oil is my favorite part of a restoration. Seeing that beautiful grain revealing itself is incredibly satisfying.
Your cabs look great! Very nice work.
Glenn
 
Thank you!
I totally agree with the oil part-instant satisfaction.
I once poured oil onto the exteriour on a girlfriend-that also turned into a very rewarding experience!:naughty:
 
Looks good. Which oil did you use, the standard JBL boiled linseed + turp recipe, Whatco (which color), etc.?

I have some little 4301Bs that are going to need some attention and was thinking about just going with the Whatco Natural.
I used Watco natural color on my 4301b's, and they are gorgeous. It was amazing how much better they looked after 2-3 applications. They hadn't been touched since they left the factory.
 
A couple pics for reference.
One shows one cab with oil applied, the other original shows the imporvement.
 

Attachments

  • JBL 4301b_2.png
    JBL 4301b_2.png
    458.4 KB · Views: 23
  • JBL 4301b_3.png
    JBL 4301b_3.png
    606.2 KB · Views: 23
  • JBL 4301b_1.png
    JBL 4301b_1.png
    622.7 KB · Views: 25
Back
Top Bottom