Marantz 2220B Restoration. Follow Along!

basil13

Active Member
Marantz 2220B Restoration. Follow Along

lHi All,

I recently posted seeking recommendations and clarifications on my Marantz 2220B restoration project and thought I would invite you to watch my journey.

A bit of a background on me and the receiver. I am an electronics technician who graduated from Fanshawe College in London, Ontario, Canada in 1992. I have worked in the telecom and office equipment industries as a technician but never in consumer electronics. Home audio is an interest that directed me towards studying electronics in college, and my interest never stopped. More recently, I developed in interest in restoration of vintage gear as a hobby. My first project was a few years ago, when I returned to life a Pioneer SX-1080 (not the easiest to start with) with some assistance from the Pioneer forum.

Since then I have accumulated a large collection of vintage gear working and not. I am returning to the site with the 2220B since it is a piece that has easier access to the boards and simpler circuit design. As I gain more confidence, I will tackle the bigger boys.

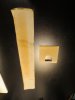
The 2220B is in good working condition, but tired looking. My before pics are not the best because I didn't decide to start this thread until I already begun the work.

I always enjoy watching the restoration process of others, so I thought I would share this one (and soon many more) with the site members.

Attached are some initial pics and will post more today with my parts list. I would like to place an order with Mouser early this week, and would appreciate any feedback on the parts selection, tips, and recommendations.

So welcome and enjoy the thread! I am looking forward to your input and comments!
 

Attachments

  • IMG_5651.jpg
    IMG_5651.jpg
    70.8 KB · Views: 360
  • IMG_5664.jpg
    IMG_5664.jpg
    87.3 KB · Views: 354
  • IMG_5663.jpg
    IMG_5663.jpg
    87.4 KB · Views: 329
  • IMG_5665.jpg
    IMG_5665.jpg
    88.6 KB · Views: 326
Last edited:
To Do List

-Complete cleaning of internal
-Remove and Hand wash faceplate and knobs
-Polish faceplate and knobs
-Deoxit all pots and switches internally
-Replace vellum paper on dial and signal meter
-Replace all lamps
-Re-cap power supply
-Add thermal compound to voltage regulator
-Remove/clean/replace thermal compound on output transistors
-Rebuild phono board (replace tantalum, transistors, e-caps)
-Replace 2 main filter caps
-Replace relay
-Set power supply voltage, DC offset, and Idle current to spec

Parts List


P400 Phono Amp
2—22uF 50V-Elna Silmic II
2—47uF 50V-Elna Silmic II
100uF 50V-Elna Silmic II

Replace all bipolar transistors
Replace tantalums-WIMA Film 50V 2.2uF

P700 Main Amp

2—3.3uF 100V-Elna Silmic II
3—47uF 25V-Elna Silmic II
2—47uF 50V-Elna Silmic II
220uF 50V-Elna Silmic II
10uF 35V-Elna Silmic II
220uF 25V -Elna Silmic II

Replace all bipolar transistors
Replace relay-MY2-02-DC24

P800 Power Supply

-Completed with Panasonic FC

PE01 Tone Amp

2—10uF 35V-Elna Silmic II
2—4.7 25V-Elna Silmic II
2—1uF 50V-WIMA Film
2—3.3uF 50V-Elna Silmic II
220uF 35V-Elna Silmic II
2—1uF 50V-Nichicon ES

Filter Caps

2—6800uF 35V-Nichicon LGU1J682MELC
There are not many options with Mouser or Digikey

I am not looking at the AM/FM boards at this time. Am I missing anything? Suggestions? Comments?
 
Last edited:
3 poor quality pics of the face before and a pic after the hand wash. There are too many preferred methods to polish/finish the face and knobs. I will have to decide at some point. Right now I am leaning towards McGuires Cleaner Wax.
 

Attachments

  • IMG_5668.jpg
    IMG_5668.jpg
    62.2 KB · Views: 187
  • IMG_5647.jpg
    IMG_5647.jpg
    44.4 KB · Views: 167
  • IMG_5666.jpg
    IMG_5666.jpg
    63.3 KB · Views: 172
  • IMG_1850.jpg
    IMG_1850.jpg
    61.8 KB · Views: 180
Thanks for posting a thread on the rebuild! I did a 2220B not long ago so holler for any help or pictures. Speaking of, one tip is to take a good digital pic of each area before doing work as a reference. It's saved my bacon many a time. Also mark each cap with a red Sharpie that you intend to replace on a board before starting, none get missed that way.

I would not use the cleaner wax as there is some mild abrasive in there. You don't want to harm the lettering. Some pure carnauba wax if you want to is okay.
 
Thanks to all for your tips and recommendations. I found of local source for most of the parts and they should be here Wed/Thurs, the rest from Mouser.

I am looking forward to this! I will do some listening tests before and after each board and post my thoughts.
 
This is awesome! Yes Thank you for posting this I will be following closely as I know very little about this stuff and I am trying to resurrect my 2215b. I am sure I will learn a lot from this. I you think you would be willing to help me in my endeavor directly, please have a look at my thread (no worries if you don't I get that you are busy with this refurb).
 
Blue is Back!

I hope to have some parts today and I need to pick up some Isopropyl for board cleaning.

I didn't get a picture of the lighting before but you can see by the removed vellum it was greenish. Vellum was replaced behind both the signal meter and dial returning a nice Marantz blue. All lamps were replaced while in there whether they needed it or not including the dial pointer lamp..
 

Attachments

  • IMG_1863.jpg
    IMG_1863.jpg
    75.3 KB · Views: 240
  • IMG_1861.jpg
    IMG_1861.jpg
    50.9 KB · Views: 198
Parts are In!

The power supply board in now complete with new Panasonic FCs and 1 FM. Transistor pulled, cleaned and thermal compound added. Top of board has been cleaned, glue removed and bottom flux removed. Dim bulb and line voltage passed.

Now off for some critical listening prior to more board work.
 

Attachments

  • IMG_1867.jpg
    IMG_1867.jpg
    84 KB · Views: 272
  • IMG_1870.jpg
    IMG_1870.jpg
    101.1 KB · Views: 252
Board Labelling Error

I'm sure this is reported somewhere, but just in case. My power supply board had two J814s and one is supposed to be J812 for the power supply adjustment along with J811 for 35V.
 

Attachments

  • IMG_1872.jpg
    IMG_1872.jpg
    59.5 KB · Views: 204
  • IMG_1871.jpg
    IMG_1871.jpg
    76.3 KB · Views: 187
There is a place! A sticky thread called service manual errors but it's where I'd suggest posting it. Good eye there!!
 
First Problem

Before I got into recapping the phono and amp boards I wanted to give the receiver a good listen since it has been sitting for a few months.

It sounds wonderful at regular listening levels, but once I start turning up the volume knob I am hearing some popping (sounding similiar to clicks on vinyl) on both the aux and phono inputs.

No pre/amp jumpers on this receiver to separate. My first thought is leaky transistors. Anyone with experience with something similar?
 
Some more notes. It seems to be both channels and occurs at higher volume with the FM input as well.
 
I'd vote for:
- cleaning the pots and switches. My 2220B volume pot need a good dousing of cleaning fluid before it started behaving. If you think you've got it clean then do it again :)
- solder joints gone bad
- caps going bad
 
It is easy to drive low powered gear into clipping. Perhaps more efficient speakers would allow you to get more volume before clipping occurs.

Tom
 
It is easy to drive low powered gear into clipping. Perhaps more efficient speakers would allow you to get more volume before clipping occurs.

Tom

Thanks Tom, it is possible I was clipping the receiver. I guess I am too used to much larger pieces and forgot I was working with 20 watts. hahaha. It does sound wonderful, so I will check the output once I get some more test gear.

Bob
 
Some Progress

AM/FM Boards cleaned. Lots of Q-tips needed to get rid of the flux on top of the board and years of grime.

Phono board cleaned, glue removed, and recapped with 4 Elna Silmic and 1 Nichicon Muze. Flux removed. Dim bulb passed. I am replacing the tantalums and transistors when my Mouser order arrives.

Now I am awaiting the postman to continue. Hopefully early this week.

Until then I am off to spin some records.
 

Attachments

  • IMG_1880.jpg
    IMG_1880.jpg
    107.2 KB · Views: 248
  • IMG_1881.jpg
    IMG_1881.jpg
    80.2 KB · Views: 234
  • IMG_1879.jpg
    IMG_1879.jpg
    93.2 KB · Views: 246
  • IMG_1878.jpg
    IMG_1878.jpg
    106.6 KB · Views: 238
Wow! makes me wanna clean up the 2215b I'm trying to resurrect. One thing at a time though I suppose. How do you keep the wet cotton swabs from disintegrating and leaving stringy cotton bit on the resistors edges etc?
 
Back
Top Bottom