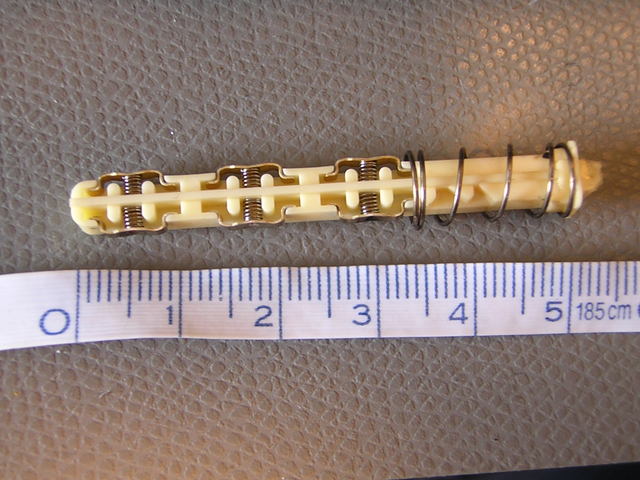
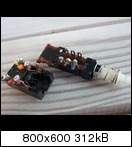
Mini-tutorial: How to disassemble Marantz pushswitches for better cleaning/de-Oxiting

Thank you Jan, this is a wonderful tutorial.

Because of your inspiration, I have bought several new push-button switches and I plan to practice disassembling, cleaning and assembling them first. These switches are very cheap, about $0.50 each. I will not start cleaning my beloved receivers until I believe I am skillful enough. Once started, if any of the springs, contacts or hooks escapes, those new switches can serve as parts units.
 

Attachments

  • IMG_3318b.jpg
    IMG_3318b.jpg
    28.4 KB · Views: 436
  • IMG_3396.jpg
    IMG_3396.jpg
    34 KB · Views: 383
  • IMG_3397.jpg
    IMG_3397.jpg
    32.9 KB · Views: 367
  • IMG_3401.jpg
    IMG_3401.jpg
    46.5 KB · Views: 388
Last edited:
Great idea!
This is a great switch! Looks like fully compatible to the old Marantz switches!
Could you give me a link, where you bought this switch?
Sometimes at the old Marantz receivers, the shaft is broken, and with the switch you have, it's easy to replace it! Only the shaft needs to b replaced... Great!
Thank you very much!

I only found switches, that are slightly different inside and not compatible with the old Marantz switches.

I am especially looking for this kind of shaft:


:thmbsp:
Yes, it's a good idea to replace the whole shaft. How come it never occurred to me.

I bought the switches from an electronic components store in Taipei. Look like they are new old stocks, but the store has plenty of these. Glad to know that they are fully compatible to old Marantz switches. Maybe I should buy more, because my collection of Marantz receivers is increasing, with the fourth one, a 2330, just arrived. If I remember correctly, you have two near mint 2330's. Any advice from you regarding 2330 will be highly appreciated.
 
Last edited:
Hi,

congrats for the 2330! That is a really nice beast! :thmbsp:

As far as I remember, the 2330 has different kind of switches. They have a more comfortable feeling than the older style ones in the 2325 e.g.

But I havent dissassembled them yet, so I cannot give further information. But they have a slightly modified mechanism I think. They look slightly different from outside, too.

Maybe they are more reliable concerning oxidation. I didn't have problems with mine. I think, the 2265 shares the same improved kind of switches, but I am not sure right now.

:beerchug:
 
fantastic tutorial, thanks so much - I am wondering if the switched/unswitched outlets could be removed in the same way and cleaned to improve contact?
 
Sorry for maybe stupid question, but do you mean the 110V (240V) outlets?

Some are impossible to remove from the back, others are. But for me, there is no need to do so. Well, I dont use them at all and so I can't say, if they ever make bad contacts---but I don't think so. They are high voltage outlets.

The old plastic breaks easily. I would not remove them, you risk to damage them.
If yours are really bad (what I dont believe) I would suggest to try to clean them with deoxit and a Mascara stick first.

Regards,

Jan.

:beerchug:
 
How can we find that store?

Yes, it's a good idea to replace the whole shaft. How come it never occurred to me.

I bought the switches from an electronic components store in Taipei. Look like they are new old stocks, but the store has plenty of these. Glad to know that they are fully compatible to old Marantz switches. Maybe I should buy more, because my collection of Marantz receivers is increasing, with the fourth one, a 2330, just arrived. If I remember correctly, you have two near mint 2330's. Any advice from you regarding 2330 will be highly appreciated.

I'm looking for a 2235B Dolby switch shaft. Does the store in Taipei you reference have a website?
 
Does anybody have any experience with disassembling (AND re-assembling to working state again :D) the power switch from Marantz receivers or amps?

Im haveing issues with mine on 2226B and trying to figure out how to disassemble it for cleaning. Spraying and working out the switch (with analogue of Deoxyit) didnt work...

Its the switch on the pic... anyone :scratch2:

thx :thmbsp:

IMG_2235.jpg


/edit - the white plastic bit is blocking the access to the metal pin, and it has a small metal spring between the pin and white plastic part... and the problem is on the other end, where two blue wires come to the switch, it works every 5th time or so ...
 
Hi,

I think it is impossible to open that switch and better to be replaced with a new one. The top part of the rear part is glued and riveted together with the bottom part.

I once had a switch like that (broken) and tried to open it just for fun and learning reasons. But I did not carefully unsoldered everything and so I broke the back part. Could be possible to open, if you unsolder it carefully and open the glue and riveted things. Hard. Maybe the pictures will help, but please do not blame me if you fail. I would not do it!:


What issues do you have? I doubt that the switch is defective. Maybe just replace the anti-spark capacitors? Just a suggestion....:scratch2:
 
Thx for the pics Leicalover :thmbsp:

One side of the switch is broken, I confirmed it with multimeter...

I managed to obtain a new one, but mounting holes wouldnt match so I used old one as a donor for the part... and voila, everything working again, flawlessly :music::banana:

after that I opened old switch just for learning purposes as you said, and yes, it cannot be disassembled without opening it from the top side... and the contacts on the 220V side (the wider side) were worn off and not just dirty. I suppose I could open it, clean the contacts and then glue the parts for further use, but cannot say how long it wold take to fail again... probably not too long :smoke:

all in all, heres a few pics, the switch was about 5$ ... I was more than happy when I found the one that match :banana:

IMG_2262.jpg


IMG_2264.jpg


IMG_2270.jpg
 
Nice work! :thmbsp: Thank you for the feedback!

Where did you buy the switch? Would be nice, if you let me know, maybe with part number, thanks!
 
I was lucky to find the switch locally in one TV repair shop, I was carrying the old one as a model... but first I was pointed to this site from a croatian hifi forum, and lately I found some on Conrad too ...

Unfortunately, Im not familiar with online shops of this type in USA so someone better qualified will have to chime in on this :yes:

Hope this helps :thmbsp:
 
Oh yes, Conrad has it! I am kind of stupid, could have figured this out for myself--I am in the north of Germany.

Greetings to Croatia. :thmbsp:
 
:lmao: oh, youre not the only one... the first place I started to look was the auction site... not thinking local at all :beerchug: ... I saw you are from Germany thats why I looked on Conrad site :thmbsp:

Here are the few more pics, and the reason why the switch wouldnt enagage every time... the small axle holding the brown "drum" in place broke and it wouldnt push the contact every time... so the cleaning wouldnt help anyway :sigh:

now Im even more happy that I found (and replaced) the switch :banana:

fully disassembled switch, all parts

IMG_2281.jpg


contacts and plastic carrier

IMG_2279.jpg


and the macro shot of the carrier

IMG_2278.jpg


/edit - just one more thing to mention, the switch has to be this way - four pole for mains and three pole in front - because when the switch is in OFF position, the small part (thin wires) are IN CONTACT, and when the switch is in ON position, mains are connected and the thin wires are NOT in contact... one should be careful and check with the multimeter before disassembling...
 
Last edited:
Better than any illustrated repair manual I use on commercial aircraft. Well done. I'm going to have a crack at my daughters 2238 which requires lots of cycling sometimes to get clear sound......too much for a 9 year old to deal with.
 
Outstanding pictures. These are the kind of details that truly speak a thousand words. Kudos indeed. Make me want to try this at home :)
 
Jan, thanks for this great thread. My 2270 had some flakiness in
the pushbutton switches and I found that the contact resistance
was uneven and rather high.

I opened up a couple of the switches and cleaned them as per your
instructions. However, it took me a long time as one of tiny springs
flew away and I spent an hour searching for it. Then the little U shaped
metal piece popped out in the other switch and would not go back in,
but I finally managed to put both switches back together and working fine too!

I have a few tips to add from my experience cleaning my 2270 -

1) If the little spring behind the metal contact pops out, tie
a thread around it before attempting to fit it back, so it
won't fly out and disappear. Believe me, it can save you a few hours :)
After the spring is back in place, you can pull out the thread easily.

2) Hold the contact down with your finger while cleaning, so you
can prevent it coming out and losing the tiny spring.

3) For most of the pushbutton switches, you don't need to open them
to clean them.
There are a hole or two on the top of the switch. I found that injecting
Isopropyl Alcohol into these holes using a hypodermic syringe and
then operating the switch about 10 times fixes the contact issues.
I went from contact resistances of over 50 ohms to under a ohm with
this procedure.

4) There a few switches hidden under the volume and balance pots
in the 2270. To reach them, I first removed the pots from the front
panel , and then had to undo a couple of screws to remove a metal
shielding plate. The holes in the switches are now accessible, and
my syringe trick worked fine to clean them up.
There are also some switches under the selector switch, which
I could access and clean thanks to the syringe.

After cleaning all switches and the dubbing jacks, both channels are
working perfectly and the low volume on one channel issue is now fixed!
 
Back
Top Bottom