JT-3
Super Member
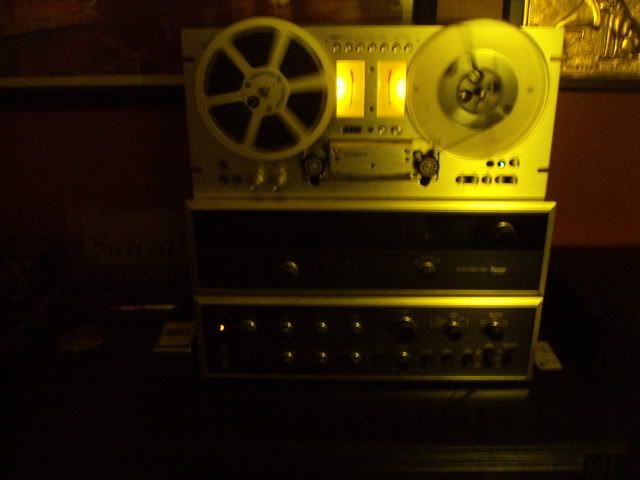
So I finally decided to buy a R2R, I know my Dad has recordings of me as a kid and I wanted one to complete the stack. I spent time reading about this model and chose it since it has a reputation for being reliable. I searched all the posts here and thought I'd post some general posts/advice to common issues from very knowledgeable folks on this site - Skylab, tapetech, Rich P, Pioneervato, GPS16, and others...
RT707 Details:
This deck has 3 motors and is a direct-drive capstan. That means the capstan motor and capstan shaft are the same item. Only belt in the machine is for the counter.
The 707 is a great sounding deck. It's only limitations versus bigger decks are no 10" reels, and its 2-track playback is only fair, since it is a 4-track deck. But stick to 4-track reels, which are the majority of pre-recorded reels, and you will be in great shape.
For recording, the RT-707 records in the forward direction only, but plays back in both directions. To record side 2, you must swap the reels at the end of side 1 and record side 2 in the forward direction.
Auto shut off mechanism:
The 707 has an "auto shut-off mechanism" that engages when there is no tape or when the tape has run out. It is located between the left playback head and the erase head. When tape is present and taught it moves the spring loaded wire upwards and keeps it there during play back. When the tape runs out or when there is no tape present the spring loaded trip wire descends downward and engages the auto shut off mechanism.
The deck will never work without tape loaded. Even if the deck is 100% functional.
If you are having issues with playing, try this: use your left thumb or finger push up on the trip wire and hold it in the retracted position and then press "Play". If your auto shut off mechanism is working properly the tape will continue in play mode for as long as you keep the trip wire in the retracted position. Now, once you have determined that your machine is working just as it should be release the trip wire and within a second or two the trip wire should descend downward and cause your machine to disengage from "Play" mode. The trip wire should move freely without sticking. It is not under heavy spring tension but instead very slight tension and takes only very light pressure to move up under tape tension. This bar should be in the tape path so that when the tape is threaded it will push up on the sensor wire and allow it to operate the transport section. It's that little hoop next to the reverse playback head. Make sure it moves up and down (it is supposed to be damped so that it won't return too quickly and cause nuisance shut offs). Make sure that you hear a slight "click" when you move it up, otherwise your transport mechanism ain't gonna budge.
If the above does not work in keeping the 707 in play mode then there is an issue with the relay that governs the auto shut off mechanism. It may not be disengaging properly.
About the Pinch Roller:
With the RT-707, the pinch roller on the left is different, made of a hard plastic material and is an anti-flutter roller. The pinch roller on the right is made with normal rubber. The 707 only has one pinch roller.
You may be able to restore the pinch roller:
Put a piece of 400 grit sandpaper on a flat surface.
Hold the pinch roller so the working surface contacts the sandpaper, and move it in small circles, while constantly turning the roller so as to buff it uniformly and make no flat spots. When it is evenly dull all around, clean it with ethanol to get the dust off, then treat it with CAIG RBR. This will work if the roller is resilient to begin with. If the roller is really hard, you need a new one. If you need a new pinch roller and usually it's best to simply replace it, send it to Terry's Rubber Rollers.
Speed Issue:
The speed problem that is a very common issue with the RT-707 and 701 is in the molex style mulit pin connector, facing the machine and on the right side, underneath and upside down under the servo control board. There are 6 wires coming out of the capstan motor. They go to the speed-servo board. Clean the board-plug connector for those six wires. Clean the speed-change switch with Deoxit. If the machine has stood for any time the connections in the switch may be tarnished. Change the state of the speed switch about 20 times. This sliding action may clean them up enough to get any movement out of the capstan motor. A critical thing to make sure of is that if your machine suddenly has speedup problems is to clean the pitch control pot with Deoxit fader lube. The white plastic multi pin connector is often the culprit for the dreaded runaway capstan disorder.
Tape skew / tape rolling off capstan:
Causes are too low back-tension or excessive take-up tension (or both). Low back tension also can cause also cause the problem you were having with the left record channel drop-outs. Sometimes a defective pinch roller or incorrect pinch pressure can cause skew. Wrong tension arm alignment can cause skew as well.
Head Alignment:
Do not mess with the head alignment screws. Ever. The factory alignment is usually spot-on and should never be touched. Head alignment does not drift or change over time, but if someone has mis-aligned the heads, then this can cause skew as well as the record drop-out defect. Getting the heads back to the factory-set position is a job for an experienced RTR technician. If the deck has been played a lot with the heads in the wrong position, this with usually ruin the head surface. It's relap time or new head time. Head installation should always be left to a good technician if you want it done right, one option is to send the whole head-block assembly to JRF Magnetics.
Adjusting Playback Level:
Page 39 of the manual tells you which pots adjust playback level. You need to buy an MRL test tape (250 nWb/m). With the tape and an audio millivolt meter connected to the output of your deck, you adjust the pots for -4.5 dbV. (spec is -7dbV, but the test tape is 2.5 db higher in output than the specified tape). On the same page is meter cal, which should also be set. With the MRL tape, the meters should read +2.5 db. Or if you have an audio oscillator, you adjust the meters for zero when there is -7dbV on the deck's output. Lastly, before you start turning pots, make sure the tape monitor switch is good. Clean it with deoxit spray.
Cleaning:
Look at the output level controls, which are on the back panel, and make sure they are set the same for each channel. Try cleaning those controls, as well as the "line" control on the front.
Don't spray the motors with Deoxit switch cleaner and the motor does not need to be lubed. Clean/lube the pinch roller bearing.
With this deck, this problem is usually nothing more than a pitch pot with dirty contacts. A shot of Deoxit into this pot after taking the front panel off and you should be in business.
Make sure the capstan "spins" by hand. If it doesn't than you either have a frozen motor due to old, dried-out lube, or it has fried. Make sure the fuses are good.
Faceplate Removal:
In order:
remove the case
remove the bottom plate screws
remove the bottom plate
remove the face plate screws
remove the knobs for the MIC and LINE controls
remove the face plate
There is a good tip in the manual for removing the front panel. Use a rubber band around both rollers to pull them towards center. This helps keep them out of the way as you remove the panel.
Tape counter belt replacement:
The tape belt is the only belt in this deck. You will need to remove the front panel to access it. Be careful when removing or replacing as the buttons have plastics in them. You do not need to remove that brake c-clip.
Just push in the brake solenoid which releases the brake and feed the belt around the hub, between it and the brake band. You'll see the belt as soon as you get the face off. You'll need to remove both rollers, head cover, and knobs, then finagle the tape guides around until the faceplate comes off. You don't need to remove the guides. They will move forward enough for you to get the faceplate off.
Start with removing the left tape base and brake strap guard.
1) Luckily the counter spindle pulley itself is open so the belt can slip over from the back. This is the first step. This step can be time-consuming, but this is the end you want to put on first. You should not have to remove any of the counter assembly to do this. It is a bit tricky, but can be done.
2) Guide the belt back behind the counter mechanism from the front using my hand. Once you can see the belt from the back, take a long screwdriver, and gently slipped it over the counter pulley from the rear.
3) Next, from the front of the deck bring the other end of the belt under the right lower side of the brake strap and proceed to stretch it up and around the left tape base between it and brake strap. You will have to stretch the belt a little, but you can work it around the tape base and strap, by having a third hand moving the brake level/mechanism to loosen the strap as you work the belt around the tape base.
4) Once the belt is behind the tape base spindle that last step is putting it into the small pulley.
Feel free to post additions or any have other advice...I really like this deck. Now the hunt is on to find some playing material.")
RT707 Details:
This deck has 3 motors and is a direct-drive capstan. That means the capstan motor and capstan shaft are the same item. Only belt in the machine is for the counter.
The 707 is a great sounding deck. It's only limitations versus bigger decks are no 10" reels, and its 2-track playback is only fair, since it is a 4-track deck. But stick to 4-track reels, which are the majority of pre-recorded reels, and you will be in great shape.
For recording, the RT-707 records in the forward direction only, but plays back in both directions. To record side 2, you must swap the reels at the end of side 1 and record side 2 in the forward direction.
Auto shut off mechanism:
The 707 has an "auto shut-off mechanism" that engages when there is no tape or when the tape has run out. It is located between the left playback head and the erase head. When tape is present and taught it moves the spring loaded wire upwards and keeps it there during play back. When the tape runs out or when there is no tape present the spring loaded trip wire descends downward and engages the auto shut off mechanism.
The deck will never work without tape loaded. Even if the deck is 100% functional.
If you are having issues with playing, try this: use your left thumb or finger push up on the trip wire and hold it in the retracted position and then press "Play". If your auto shut off mechanism is working properly the tape will continue in play mode for as long as you keep the trip wire in the retracted position. Now, once you have determined that your machine is working just as it should be release the trip wire and within a second or two the trip wire should descend downward and cause your machine to disengage from "Play" mode. The trip wire should move freely without sticking. It is not under heavy spring tension but instead very slight tension and takes only very light pressure to move up under tape tension. This bar should be in the tape path so that when the tape is threaded it will push up on the sensor wire and allow it to operate the transport section. It's that little hoop next to the reverse playback head. Make sure it moves up and down (it is supposed to be damped so that it won't return too quickly and cause nuisance shut offs). Make sure that you hear a slight "click" when you move it up, otherwise your transport mechanism ain't gonna budge.
If the above does not work in keeping the 707 in play mode then there is an issue with the relay that governs the auto shut off mechanism. It may not be disengaging properly.
About the Pinch Roller:
With the RT-707, the pinch roller on the left is different, made of a hard plastic material and is an anti-flutter roller. The pinch roller on the right is made with normal rubber. The 707 only has one pinch roller.
You may be able to restore the pinch roller:
Put a piece of 400 grit sandpaper on a flat surface.
Hold the pinch roller so the working surface contacts the sandpaper, and move it in small circles, while constantly turning the roller so as to buff it uniformly and make no flat spots. When it is evenly dull all around, clean it with ethanol to get the dust off, then treat it with CAIG RBR. This will work if the roller is resilient to begin with. If the roller is really hard, you need a new one. If you need a new pinch roller and usually it's best to simply replace it, send it to Terry's Rubber Rollers.
Speed Issue:
The speed problem that is a very common issue with the RT-707 and 701 is in the molex style mulit pin connector, facing the machine and on the right side, underneath and upside down under the servo control board. There are 6 wires coming out of the capstan motor. They go to the speed-servo board. Clean the board-plug connector for those six wires. Clean the speed-change switch with Deoxit. If the machine has stood for any time the connections in the switch may be tarnished. Change the state of the speed switch about 20 times. This sliding action may clean them up enough to get any movement out of the capstan motor. A critical thing to make sure of is that if your machine suddenly has speedup problems is to clean the pitch control pot with Deoxit fader lube. The white plastic multi pin connector is often the culprit for the dreaded runaway capstan disorder.
Tape skew / tape rolling off capstan:
Causes are too low back-tension or excessive take-up tension (or both). Low back tension also can cause also cause the problem you were having with the left record channel drop-outs. Sometimes a defective pinch roller or incorrect pinch pressure can cause skew. Wrong tension arm alignment can cause skew as well.
Head Alignment:
Do not mess with the head alignment screws. Ever. The factory alignment is usually spot-on and should never be touched. Head alignment does not drift or change over time, but if someone has mis-aligned the heads, then this can cause skew as well as the record drop-out defect. Getting the heads back to the factory-set position is a job for an experienced RTR technician. If the deck has been played a lot with the heads in the wrong position, this with usually ruin the head surface. It's relap time or new head time. Head installation should always be left to a good technician if you want it done right, one option is to send the whole head-block assembly to JRF Magnetics.
Adjusting Playback Level:
Page 39 of the manual tells you which pots adjust playback level. You need to buy an MRL test tape (250 nWb/m). With the tape and an audio millivolt meter connected to the output of your deck, you adjust the pots for -4.5 dbV. (spec is -7dbV, but the test tape is 2.5 db higher in output than the specified tape). On the same page is meter cal, which should also be set. With the MRL tape, the meters should read +2.5 db. Or if you have an audio oscillator, you adjust the meters for zero when there is -7dbV on the deck's output. Lastly, before you start turning pots, make sure the tape monitor switch is good. Clean it with deoxit spray.
Cleaning:
Look at the output level controls, which are on the back panel, and make sure they are set the same for each channel. Try cleaning those controls, as well as the "line" control on the front.
Don't spray the motors with Deoxit switch cleaner and the motor does not need to be lubed. Clean/lube the pinch roller bearing.
With this deck, this problem is usually nothing more than a pitch pot with dirty contacts. A shot of Deoxit into this pot after taking the front panel off and you should be in business.
Make sure the capstan "spins" by hand. If it doesn't than you either have a frozen motor due to old, dried-out lube, or it has fried. Make sure the fuses are good.
Faceplate Removal:
In order:
remove the case
remove the bottom plate screws
remove the bottom plate
remove the face plate screws
remove the knobs for the MIC and LINE controls
remove the face plate
There is a good tip in the manual for removing the front panel. Use a rubber band around both rollers to pull them towards center. This helps keep them out of the way as you remove the panel.
Tape counter belt replacement:
The tape belt is the only belt in this deck. You will need to remove the front panel to access it. Be careful when removing or replacing as the buttons have plastics in them. You do not need to remove that brake c-clip.
Just push in the brake solenoid which releases the brake and feed the belt around the hub, between it and the brake band. You'll see the belt as soon as you get the face off. You'll need to remove both rollers, head cover, and knobs, then finagle the tape guides around until the faceplate comes off. You don't need to remove the guides. They will move forward enough for you to get the faceplate off.
Start with removing the left tape base and brake strap guard.
1) Luckily the counter spindle pulley itself is open so the belt can slip over from the back. This is the first step. This step can be time-consuming, but this is the end you want to put on first. You should not have to remove any of the counter assembly to do this. It is a bit tricky, but can be done.
2) Guide the belt back behind the counter mechanism from the front using my hand. Once you can see the belt from the back, take a long screwdriver, and gently slipped it over the counter pulley from the rear.
3) Next, from the front of the deck bring the other end of the belt under the right lower side of the brake strap and proceed to stretch it up and around the left tape base between it and brake strap. You will have to stretch the belt a little, but you can work it around the tape base and strap, by having a third hand moving the brake level/mechanism to loosen the strap as you work the belt around the tape base.
4) Once the belt is behind the tape base spindle that last step is putting it into the small pulley.
Feel free to post additions or any have other advice...I really like this deck. Now the hunt is on to find some playing material.