Bose 1800 series 1 : I did it AGAIN

Thierry

Tape with a passion
Hi,

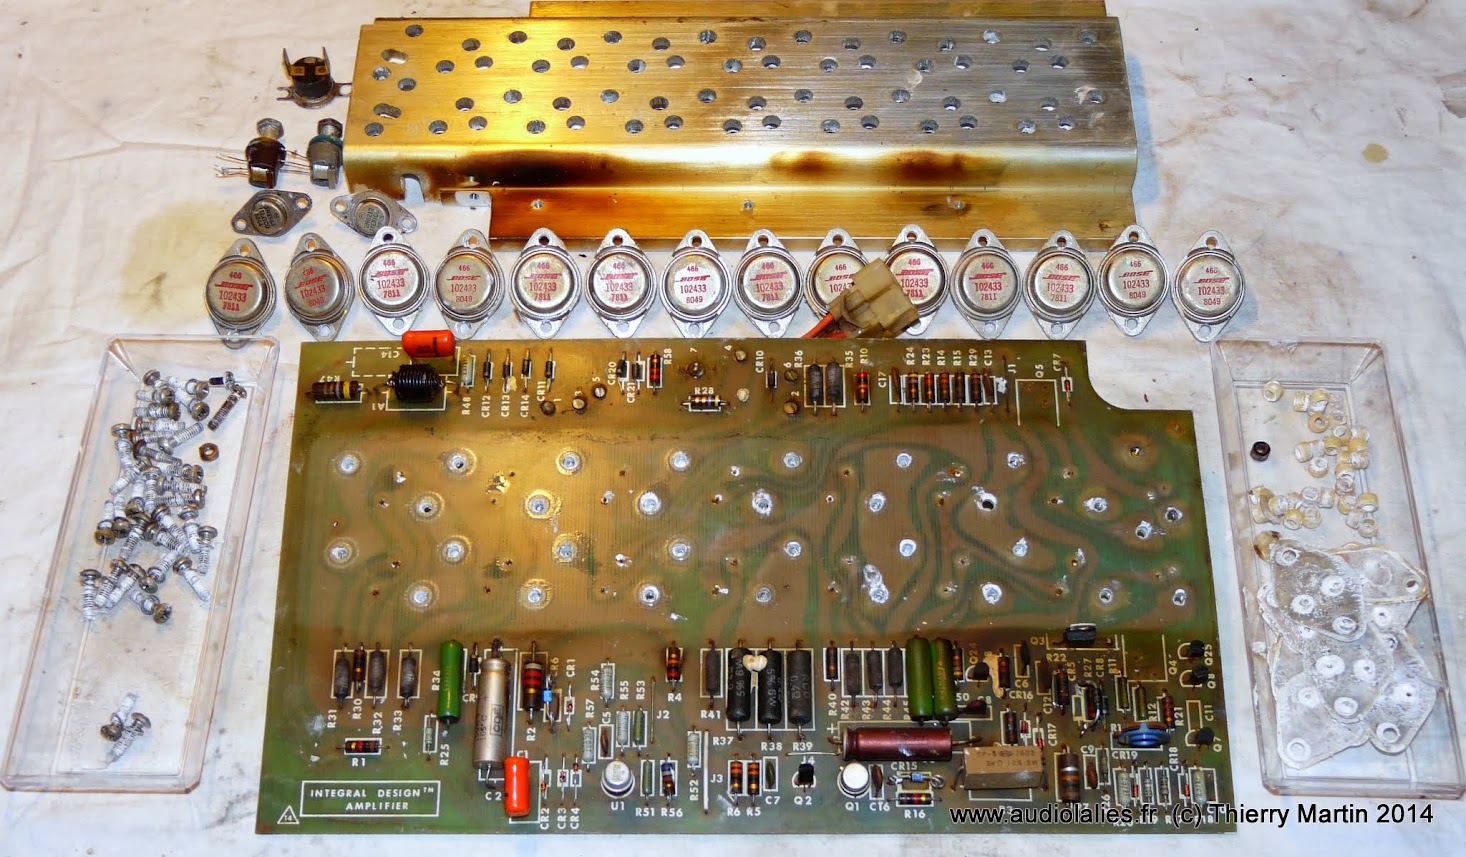
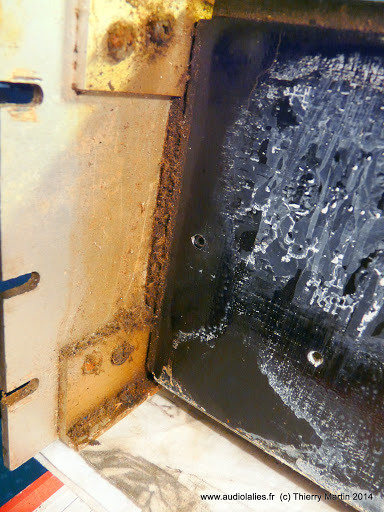
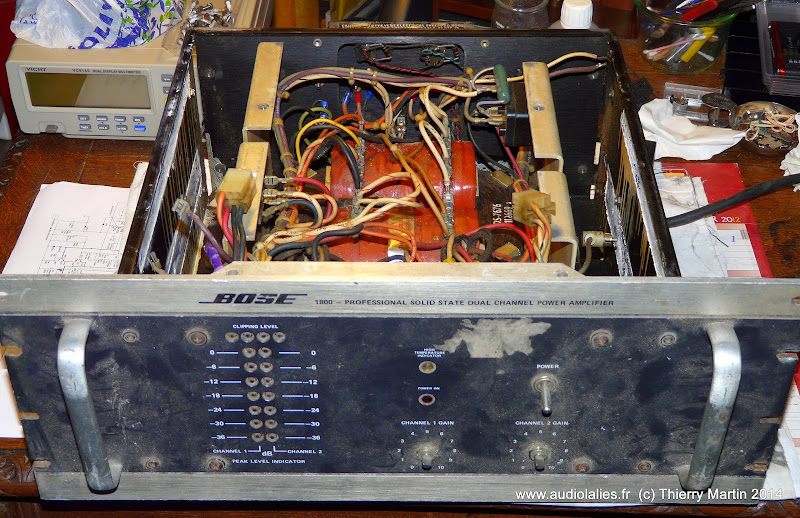
This one was rotting away in a basement and I just couldn't leave it there.

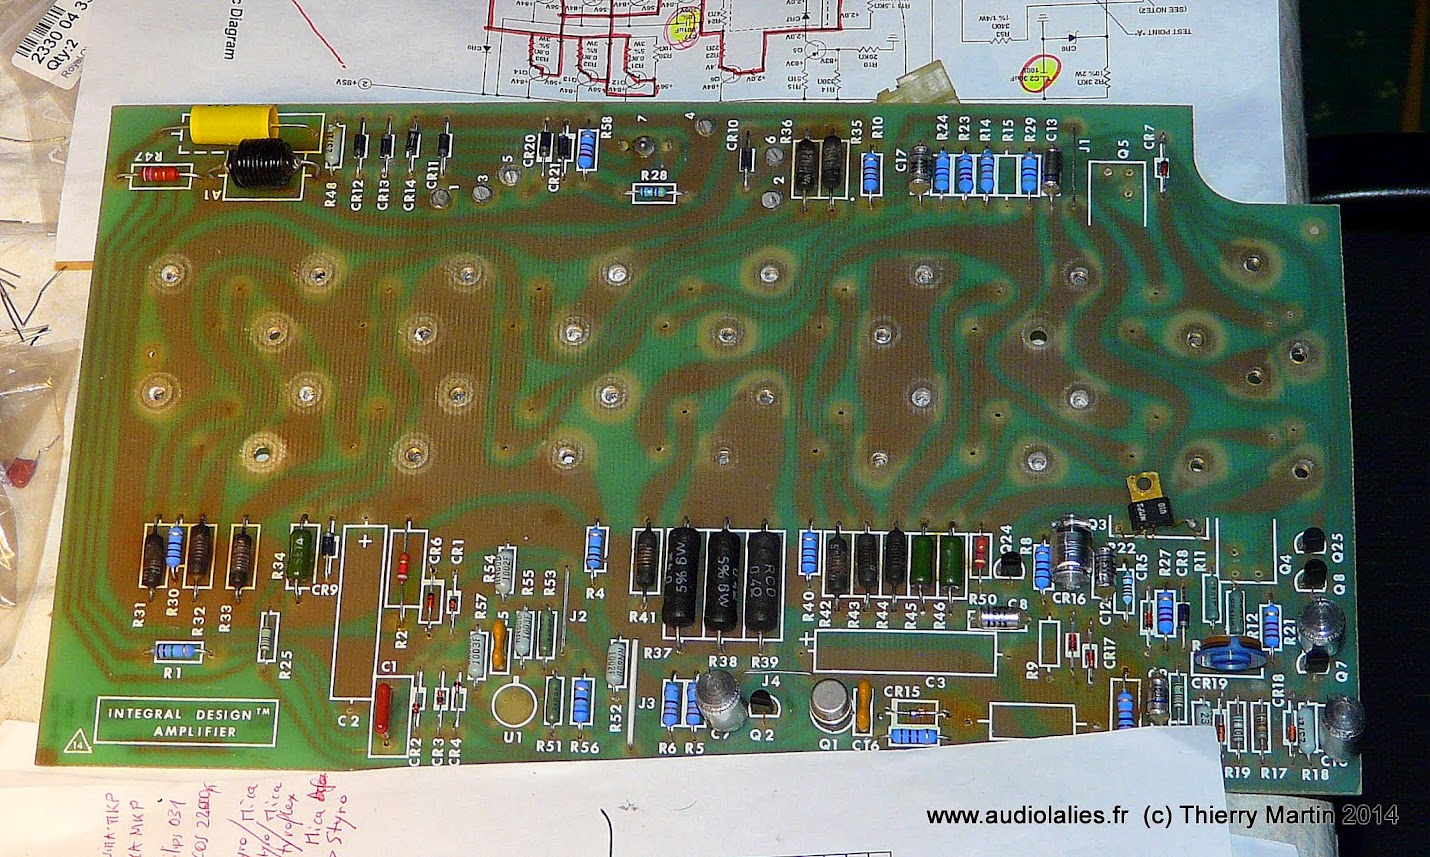
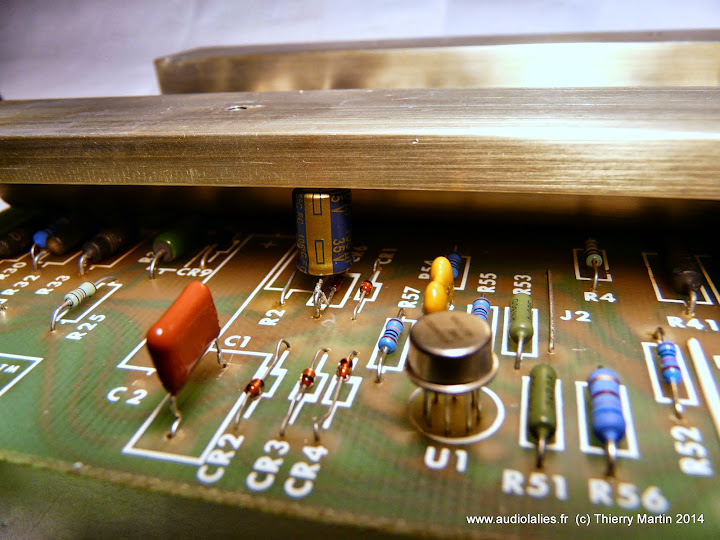
Got it for 20 euros (actually I gave twice this to the seller, I felt it was more honest) and stripped it down to the tiniest bit.

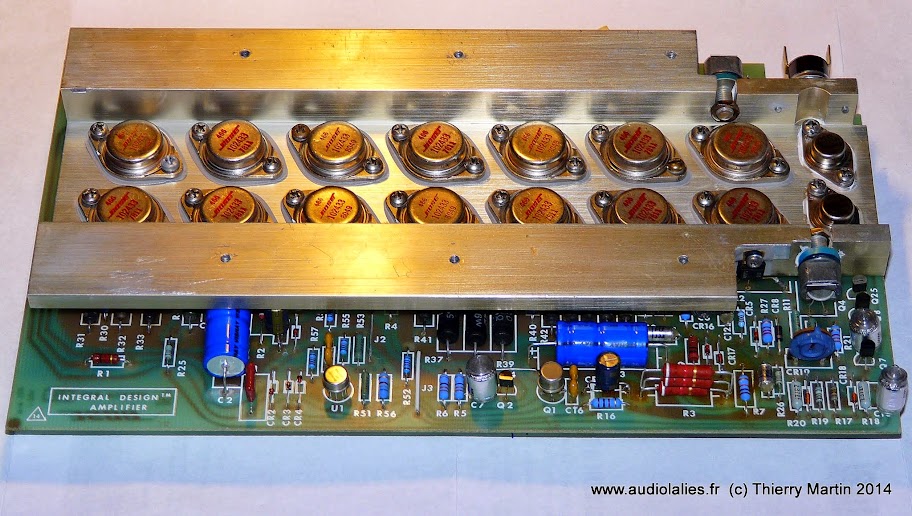
As you'll see it has been battered, pounded, abused and raped, but I guarantee that in the end it will look and sound better than new.

P1150942.JPG


Watch this space https://picasaweb.google.com/109296933751482509949/Bose1800#slideshow/5987728582514331522 the saga continues !


Thierry
 
I've got my popcorn and soda ready. Let the resto begin.

Mon dieu! You DID strip it down. Just now saw the link.

Bonne chance!
 
Mon dieu! You DID strip it down. Just now saw the link.

Bonne chance!

Yes, I did :D

This is one channel (only partly stripped when I took the picture) :

P1160002.JPG


And here it is partly rebuilt :

P1160049.JPG


Some important modifications are planned.

Thierry
 
Last edited:
Good God, Thierry! Dig you dig that up somewhere??? Like the local cemetary??? That's about the worst 1800 I've ever seen. But having seen previous cadavers come from your "MAGIC" shop, it'll outlive my grandkids!

(BTW I found the problem on the spatial control receiver I wrote you about 2 months ago. I overlooked a diode! Runs great.)
Larry

Pictures says it all...

P1150952.JPG
P1150948.JPG


It has been forgotten for 15 years in a damp basement in Britany. Owner , who is running a sound business (concerts, events) , had placed an ad on something similar to the CL to no avail. After a while he decided to bring it to the junkyard. That's the reason I offered him twice the initial 20€ he wanted to dissuade him as I live 400 miles from there, to convince him to keep it a few days more so I had time to organize pickup.
I had the Bose delivered by Mr UPS and when I saw it I adopted it immediately.

That's the story and this was about 8 weeks ago. Now, most parts have been restored to new condition and I'm currently in the process of rebuilding it.

I am still awaiting for some parts, particularly the heavy duty LS protection system I will install.

Thierry
 
Some of the modifications are visible here :

  • CR5 and CR6 (the opamp PS negative and positive rails) parallelled with 100µF Panasonic FC capacitors. Goal of this modification is to diminish the diodes noise and to store energy for the opamp during the Zener effect breakdown.
  • Opamp replaced with TI LME49710. It is a drop in replacement (http://www.ti.com.cn/cn/lit/ds/symlink/lme49710.pdf)
P1160068.JPG


  • Here's the dreaded "Fireworks R3" replaced with 3 parallelled 9.1K 3W metal oxide resistors. This is to prevent a well known failure mode of the 1800/1801 amps : when R3 goes bust it will take CR5 and CR6 with it and the amp will blast any speaker connected to it because of full rail voltage being applied at the output. Ouch.
  • 1% tolerance polystyrene capacitors took place of the crappy ceramic disc caps found throughout the board.
  • One of the silver mica coupling capacitors (C16) is visible close to Q1 :

P1160070.JPG


  • Upper side of the board. Metal oxyde resistors and polystyrene capacitors all round :
P1160072.JPG


  • 100nf ceramic capacitors are decoupling the U1 positive and negative rails to ground.
  • Speaker output tracks reinforced with AWG13 copper wire soldered in three places where the tracks were way too thin for my taste (highlighted in red) :
P1160071.JPG


  • new 50A/1000V rectifier bridge, decoupled with 10nF/1000V ceramics :
P1160033.JPG


  • EPCOS 22000µF/100V low ESR reservoir caps :
P1160034.JPG


To be continued...

Thierry
 
Last edited:
As part of the final rebuild comes the loudspeaker protection circuitry.

It consists in a NEC µPC1237, an IC specialized in DC detection ( http://www.ic-on-line.cn/download.php?id=1032927&pdfid=ED96EF6FB7AD9D3CE23723E0447952D0&file=0004\upc1237_34084.pdf )driving an OMRON 16 ampere relay.

Most of the DC protection systems I have used in my projects hadn't such a beefy relay (keep in mind the kind of power we have to deal with the Bose 1800).

In case a flimsy relay is employed here is what may happen with the Bose :

Contacts_-_new_and_used.jpg


This is the best situation. In the worst mishaps, contact points weld each other => 85V DC keeps flowing to the speakers terminals => result : blown drivers although a DC protection was installed.

System comes in two separate boards, one per channel. they are built with an heavy duty PCB, thick copper tracks and high quality parts. 15V AC or 18V DC is need to power 'em up.
This system also provides a power-on delay (adjustable) which is a usefull feature in case of a mains AC power failure

1935_G_1284237230712.jpg


Thierry
 
Last edited:
Wow, talk about bringing something back from the dead.

I'm definitely sticking around :lurk: to see the progress and finished results.

And, yes they sure don't make'em like that anymore.

P1150942.JPG
 
:lurk: will also keep an eye on this, these Bose 1800/1801 rebuilds are fascinating!

May I suggest putting some space between the stacked resistors to allow for airflow around them, maybe a 3 dimensional triangle so when horizontal, air will flow around each easily. That is unless you wish them coupled together for temp coefficient purposes.

As part of the final rebuild comes the loudspeaker protection circuitry.

It consists in a NEC µPC1237, an IC specialized in DC detection ( http://www.ic-on-line.cn/download.php?id=1032927&pdfid=ED96EF6FB7AD9D3CE23723E0447952D0&file=0004\upc1237_34084.pdf )driving an OMRON 16 ampere relay.

Most of the DC protection systems I have used in my projects hadn't such a beefy relay (keep in mind the kind of power we have to deal with the Bose 1800).

In case a flimsy relay is employed here is what may happen with the Bose :

Contacts_-_new_and_used.jpg


This is the best situation. In the worst mishaps, contact points weld each other => 85V DC keeps flowing to the speakers terminals => result : blown drivers although a DC protection was installed.

System comes in two separate boards, one per channel. they are built with an heavy duty PCB, thick copper tracks and high quality parts. 15V AC or 18V DC is need to power 'em up.
This system also provides a power-on delay (adjustable) which is a usefull feature in case of a mains AC power failure

1935_G_1284237230712.jpg


Thierry

Do you have a link to where you got the protection system from? Looks very useful and interesting, a nice addition to many amps that lack protection. Is there another system with both channels on one board for a compact addition in case space is a premium?

How did you go about cleaning the metal work and heat sinks? Also, in washing the boards, did you then clean with alcohol or other solvent, and then bake till dry?
 
May I suggest putting some space between the stacked resistors to allow for airflow around them, maybe a 3 dimensional triangle so when horizontal, air will flow around each easily. That is unless you wish them coupled together for temp coefficient purposes.

Indeed I wish them to stay thermically coupled. They are installed exactly the same in my 1801 since over 20 years and so far it works a wonder, picture below :
Copie%2520de%2520R3_mod.jpg


Do you have a link to where you got the protection system from? Looks very useful and interesting, a nice addition to many amps that lack protection. Is there another system with both channels on one board for a compact addition in case space is a premium?

Of course I can, I didn't want to infringe audiokarma laws about commercial links but if requested, no problem : http://www.analogmetric.com/goods.php?id=1935

I dont think they have dual relay setup but anyway, this one is by far the best I have ever used since I build amps (over 30) or restore vintage gear. It is the sturdiest and best built design I came accross and it works perfectly. And it is affordable. If I didn't find this, I would have ended building my own with the same business requirements.

How did you go about cleaning the metal work and heat sinks? Also, in washing the boards, did you then clean with alcohol or other solvent, and then bake till dry?
I soaked everything, including wiring harness but the power transformer, with WD40 and let it alone for 15 minutes. Then I flushed the dirt with my high pressure cleaner.
Heat sinks thermal compound has been removed with automotive fuel, then with dishwashing liduid and hot water.
Boards were soaked with a powerful home detergent, brushed and rinced with warm water. Then I dryed with compressed air.
Power transformer has been processed separately (they don't like water ingress) by brushing it carefully to remove dust and wipe it with a cloth impregnated with isopropylic alcohol.
Nothing magical nor secret there, only time and effort.

Thierry
 
Last edited:
Today I received the ultra difficult to find capacitors I was waiting for (special order).
Datasheet here : http://www.vishay.com/docs/28334/118aht.pdf

P1160081.JPG


Of course they are now soldered to the board, they were the last parts needed to have one board completed.

Half work done, I have to start all over again for the other half of the 1800 :D

(before you ask : no, the left blue cap doesn't touch the heatsink)

P1160083.JPG


Oh, and I have used rubber interfaces between the transformer mounting plate and the chassis, just because I like to do so :

P1160077.JPG
 
...Oh, and I have used rubber interfaces between the transformer mounting plate and the chassis, just because I like to do so :............

You sir, I consider a "Perfectionist" :D

Press on! :thmbsp:
 
Last edited:
...Press on! :thmbsp:

I wouldn't recommend that just yet - he's not finished rebuilding it yet! :smoke:

Thierry, it is great to have guys who will document their work so well. I know you are a true mentor for others to follow.

Cheers,

David
 
Back
Top Bottom