• The move to the new server is done. There are some software and database maintenance updates in process. This has us passing the hat around to help out. We appreciate any donations. Seriously, even a dollar helps. The payment page may be found here - https://www.audiokarma.org/support.html

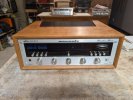
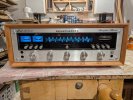
Budget minded case for Marantz

MegaHurts

Super Member
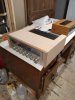
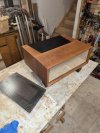
Had someone wanting a case for a lower end Marantz and wanted something less spendy than building a full WC-22 reproduction case.
I came up with this design at about 1/2 the cost of the WC-22.
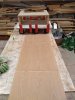
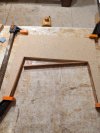
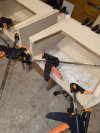
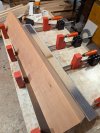
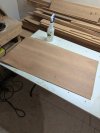
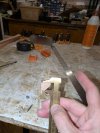
Glued up particle board for shell and applied beveled cherry strips with mitered joints on front and around vent and then resawed veneer to wrap. Saves on doing extra bottom layer and also angle cutting top and slotting and fitting perforated sheet metal for vent. I also did not veneer inside case nor bottom/back edges to cut costs.
 

Attachments

  • IMG_20230512_125601980.jpg
    IMG_20230512_125601980.jpg
    118.2 KB · Views: 184
  • IMG_20230513_163417811.jpg
    IMG_20230513_163417811.jpg
    91 KB · Views: 176
  • IMG_20230514_075715393.jpg
    IMG_20230514_075715393.jpg
    99.3 KB · Views: 185
  • IMG_20230516_175517039.jpg
    IMG_20230516_175517039.jpg
    98.9 KB · Views: 187
Register to hide this ad
Soooo, I've now done a half dozen of these cases similar to WC22 for 2225, 2230b and have refined my method/steps to both save time and reduce cost while improving the look. I'd mentioned on an AK woodwork thread that I'd post all the gory details in case it helps someone else out, so here it is. I'll be making several posts here as there are tons of pics of all the steps.

The case is done with butt joints and then a mitered hardwood front edge before veneering. I typically just veneer the top and sides (optionally the rear face too if it were for myself)

To start off, for one case I buy two particle board stair risers from HD as the surface is very smooth and glues well (PVA) with just but joints and takes poly glue for the veneer well. This is a good side with little waste. (pic1)

Parts:
2 X 3/4-inch x 7 1/2-inch x 36-inch Unfinished Pressboard Stair Riser @ $6.98 Cdn.

The main carcass before hardwood edge cutlist is as follows.
2 sides @ 6-3/4" wide by 13-7/8" long
2 top/bottom parts @ 5-7/8" wide by 17" long (you can add 1/16" or so to the length if you want more play with the fit for the sides - the Marantz faceplate is 17-3/8" long so after the front hardwood edge is applied you need to ensure there is enough room to fit or you will need to chisel/sand out a bit - don't ask how I know this)

2 top tails cut from leftover 8"x8" piece that tapesr from 3/4" to 1-3/4" cut at 7 degrees - trapezoid in shape
1 bottom rail @ 1-1/2" wide by 17" long (make sure it matches the 2 top/bottom parts if cut longer above)
2 bottom triangle braces about 2" x 2"

Front hardwood face:
top/bottom - 3/4" by 5/8" by 19" rough - will be mitered to size
sides - 3/4" by 5/8" by 8" rough - will be mitered to size
(pieces can be cut a 1/16" more than 3/4" and be planed flush with veneer side of carcass)

Venting hardwood edges:
2 x 3/4" by 1/4" by 9" rough - will be trimmed to size
1 x 3/4 by 1/4" by 14" rough - will be mitered to size
(pieces can be cut a 1/16" more than 3/4" and be planed flush with veneer side of carcass)

Procedure:
Cut parts above - I did two cabinets at the same time so you will see twice the number of parts. (pic2, pic3)
Glue and clamp the sides to bottom making sure seams are perfectly flush. Note: The reason I have the top/bottom between the sides instead of a longer top with the sides in between is that you would need to add extra strips on the bottom to have it run full depth - I find this is the quickest way. (pic 4)
Start putting the top together. Mark each piece to indicate the top side (veneer side)
Glue hardwood pieces to the insides of the the tail pieces - make sure edge is flush to veneer side (I glue a bit proud and plane/sand flush). In the pic I am clamping 2 pairs at the same time. (pic5)
Trim the hardwood edges on the tails. (pic6)
Clamp the tails in place and trim the long vent edge at 7 degrees at ends to fit (pic7)
Glue and clamp the vent edge piece making sure it is flush with veneer side
Plane or sand the vent edges perfectly flush with the veneer side of the top parts
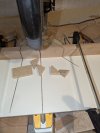
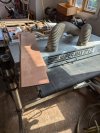
Cut the slots for the vent grill - ensure you maintain the same orientation against the fence. I cut the slot about 1/8" from the veneer side of the top. I use a thin kerf blade on the table saw raised about 3/8". The tails are cut full across. The top edge piece could be cut straight across (ends would be covered by veneer) but I lower the piece on the blade and raise it after the cut before it reaches the ends. (pic8)
Note: I find the table saw and the method above is the easiest and gives best results. You can use a slot cutter on a router to do it either before after the tails are glued to the top but the slot is either looser or a thin slot cutter I had tried before ended up warping and almost ruined the top.

Continued next post
 

Attachments

  • 8-cut_vent_slots.jpg
    8-cut_vent_slots.jpg
    135.2 KB · Views: 43
  • 7-fit_vent_edge.jpg
    7-fit_vent_edge.jpg
    165.7 KB · Views: 38
  • 6-trim_tails.jpg
    6-trim_tails.jpg
    106.8 KB · Views: 37
  • 5-two_pair_of_tails_edges.jpg
    5-two_pair_of_tails_edges.jpg
    153 KB · Views: 39
  • 4-glue_sides_to_bottom.jpg
    4-glue_sides_to_bottom.jpg
    136.7 KB · Views: 38
  • 3-tails_cut.jpg
    3-tails_cut.jpg
    107.6 KB · Views: 38
  • 2-first_cuts-for -2-cabs.jpg
    2-first_cuts-for -2-cabs.jpg
    134.3 KB · Views: 38
  • 1-material.jpg
    1-material.jpg
    143.3 KB · Views: 39
Procedures continued:
Assemble the top pieces - glue and clamp flush (pic9)
Glue the top to the sides (pic10) - the bottom backs have already been glued in
At this point, if the top and sides are not perfectly flush, the cabinet can but trimmed on the table saw to ensure that 1/32" is made to be flush - no pic

Hardwood face edging:
Cut stock in strips to make the 3/4" by 5/8" pieces. 5/8" is the depth and the 3/4" is the glue side to the 3/4" case - obvious right - so mark the strips that way.
I notch out on the table saw, but it can also be done with router for the face of the Marantz to fit in. The chamfer is done after. I leave about 1/8" of the 5/8" depth and remove about 3/16" - 1/4" of the 3/4" width - this is the part you need to make sure is enough for the faceplate to fit in once it is mitered and glued in place. You need minimum 17-3/8" inside the chamfer to fit the width. The height should not be an issue with the cutlist dimensions. (pics 11, 12, 13)
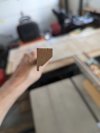
Next step is to rout the chamfer/bevel - my bit is 45 degrees - you could also cut with the table saw at a different angle (38? might be orig WC22 - not sure), but cherry burns easily and the sanding afterwards is a pain with the table saw. (pics 14,15)
Sand the front edge pieces now before mitrer/glue up.
Should have done this earlier, but I put in the 2" bottom back triangle pieces to better support the rear feet. (pics 16, 17)

Continued next post
 

Attachments

  • 17_clamp_braces.jpg
    17_clamp_braces.jpg
    147.3 KB · Views: 30
  • 16_bottom_braces.jpg
    16_bottom_braces.jpg
    93.4 KB · Views: 29
  • 15-front_edge_profile.jpg
    15-front_edge_profile.jpg
    43.2 KB · Views: 29
  • 14-rout_edges.jpg
    14-rout_edges.jpg
    143.5 KB · Views: 31
  • 13-front_edges.jpg
    13-front_edges.jpg
    53 KB · Views: 31
  • 12_front_edges.jpg
    12_front_edges.jpg
    87.5 KB · Views: 31
  • 11-front_edges.jpg
    11-front_edges.jpg
    57.3 KB · Views: 31
  • 10-glue_top_and_sides.jpg
    10-glue_top_and_sides.jpg
    163.8 KB · Views: 31
  • 9-assemble_top.jpg
    9-assemble_top.jpg
    162.6 KB · Views: 28
Procedures continued:

Time to glue up the front edge pieces.
Cut 45 degree miters on front edge pieces. I trim a bit long and sneak up on a good fit that is about 1/16" proud of the the case (1/32" each end) - this is to ensure I can plane it down and be flush with the case. Once one top or side is done I set a stop and cut the next one to the same size. My method is to glue one at a time allowing for minor corrections if needed and ensuring that each piece is flush or just proud of the veneer surface. The whole front could be be put together first and then glued to the cabinet, but this is how I prefer to do it. (pics18, 19, 20)

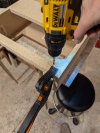
Next I drill holes for the feet.
From the bottom of the case the front feet are 1-1/2" from the front and 1-3/4" from the sides. The back holes are 11-3/4" back from the front holes or

Next up is the veneer.
I cut my own veneer and prefer not having paper/fabric backed for my seems, but skip ahead if you have sheets avail already.
 

Attachments

  • 18-clamp_mitered_fronts.jpg
    18-clamp_mitered_fronts.jpg
    128.7 KB · Views: 26
  • 19-front_edges.jpg
    19-front_edges.jpg
    140.8 KB · Views: 24
  • 20_place_edge_flush.jpg
    20_place_edge_flush.jpg
    143.6 KB · Views: 26
  • 21-drill_foot_holes.jpg
    21-drill_foot_holes.jpg
    98.3 KB · Views: 28
  • 22-peeling_veneers.jpg
    22-peeling_veneers.jpg
    86.5 KB · Views: 28
  • 23-sanding_veneer.jpg
    23-sanding_veneer.jpg
    125.2 KB · Views: 28
  • 24-veneer_tape.jpg
    24-veneer_tape.jpg
    121.2 KB · Views: 28
  • 25-veneer_glueup.jpg
    25-veneer_glueup.jpg
    130.1 KB · Views: 28
  • 26-veneer_panel.jpg
    26-veneer_panel.jpg
    95.7 KB · Views: 27
Procedures continued:

With the veneer panel done, I mark it off and cut the sides and top noting orientation of each piece. (pic 27)
I cut the left and right side pieces from the center and then trim the side pieces for glue up. The center piece is cut just a bit longer than the width of the cabinet + the thickness of the two side pieces. The side pieces are cut about 1/8"-3/16" longer/wider than the case. I use the RAS to cut the bulk of the vent area out - this allows for lots of clamps to press the veneer. (pic 28)
I use boards and clamps (lots and lots of clamps) to press the veneer with glue-up and use a thin foam in between in case the glue seeps through so as not to stick to the board press. I prefer to use polyurethane glue for veneering - it only needs a very thin coat and has enough tack that I don't worry about the veneer creeping out of place when clamped. I use a spray bottle to mist the air above the glue prior to veneering to get a good cure. (pic 29, 30, 31)
I use a block plane to trim up the edge/overhang of each veneer piece before gluing up the next one. (pic 32)
Next is the router table with a flush trim bit with bearing to clean up the vent area veneer. (pic 33)
After that I sand all the veneer with the ROS using 120, 150, 180, 220, 320 and then a final pass by hand with 320 grit and break/ease all the corners and sharp edges (pic 34)

Last steps continued next post
 

Attachments

  • 34-veneer_sand.jpg
    34-veneer_sand.jpg
    102.5 KB · Views: 25
  • 33-flush_rout_vent.jpg
    33-flush_rout_vent.jpg
    127.6 KB · Views: 27
  • 32-veneer_trim.jpg
    32-veneer_trim.jpg
    102.2 KB · Views: 30
  • 31-veneer_press.jpg
    31-veneer_press.jpg
    175.4 KB · Views: 30
  • 30-poly_glue.jpg
    30-poly_glue.jpg
    120.8 KB · Views: 29
  • 29-veneering.jpg
    29-veneering.jpg
    133.2 KB · Views: 28
  • 28-trim_for_vent.jpg
    28-trim_for_vent.jpg
    104.5 KB · Views: 28
  • 27-marking_up_veneer_shet.jpg
    27-marking_up_veneer_shet.jpg
    117.6 KB · Views: 28
Procedures continued - the homestretch!
With the case sanded nice and smooth, I apply a coat of double boiled linseed oil and allow that to dry for 3-4 days before applying a coat of beeswax polish (pic 35)

While the finish is drying we need to make up the vent grill. I had a local metal shop cut me 9 pieces from an discounted offcut they had to save some bucks (just need to make 9 cases - haha) So, this case may not be the exact size of an original WC22, but it's close enough to maximize the number of grills I could get from this order.
[1840CSH16 X] COLD ROLLED PERFORATED SHEET ASTM-A366 0.125" HOLEON 0.188" CENTRE STG x 16GA (1@24.25"x48" cut to 9@8"x16")

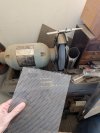
I cut the steel grills with the same 7 degree angle with the metal cutoff saw. The length should be just a bit less than the widest slot width in the top - so it depends on how deep the slot was cut or in my case it was a max of 16" wide perforated steel. (pic 36)

I grind down sharp edges and round the inside edges, test fit and then sand the grills before painting. (pics 37, 38)

I used a combo primer/paint black semi gloss spray can and coat each side of the grill. Once the case is dry just slide in the grill and you have a nice little case. (pic 39)

When putting the Marantz in (or out) the case, I always do it upside down - one, so that you can install/remove the feet again using M4-35mm screws, but also so that the screw heads on the Marantz don't gouge the inside of the wood trim when the feet are off.

Last pic is a previous case I did with the stereo inside it. This new case is waiting for the owner's Marantz to come back from servicing. (pic 40)

Hope you enjoyed the journey or that anything is helpful to the next person wanting to build one.
 

Attachments

  • 39-case_complete.jpg
    39-case_complete.jpg
    138.4 KB · Views: 48
  • 38_sand_grill.jpg
    38_sand_grill.jpg
    144.9 KB · Views: 42
  • 37-grind_grill.jpg
    37-grind_grill.jpg
    132.5 KB · Views: 39
  • 36_cut_grill.jpg
    36_cut_grill.jpg
    151.8 KB · Views: 40
  • 35-blo_finish.jpg
    35-blo_finish.jpg
    125.1 KB · Views: 45
  • 40_prev_case.jpg
    40_prev_case.jpg
    135.1 KB · Views: 48
Adding an update to my thread.
The last batch of grills I was able to get from offcuts (cheaper) allowed 9.5" depth, closer to orig wc22.
Also the 2238/2250s are a bit deeper and foot placement at back a bit different.
So, I've extended the cabinets to be overall 15.25" deep. The top is now 5.25" particle board with the two tails being 9.25" and a 1/8" veneer on the back edge and 5/8" wide hardwood front.
The foot holes at the back are done at 11 5/8" and 11 1/8" from the front holes to accommodate either.
I'll edit/update if there is an error in foot placement when I get the 2250 to install.PXL_20250402_142109627.jpgPXL_20250402_143240660.jpgPXL_20250402_142007506.jpg
PXL_20250402_142406672.jpg
 
Might as well update. I've been trying to squeeze to tighter tolerances and have eventually settled on making the sides just a hair under 6 5/8" wide, 6 19/32 to be specific to better provide even gaps around the faceplate.
The hardwood profile has a 9/16" height extending out.
 

Attachments

  • PXL_20250830_170311764.MP.jpg
    PXL_20250830_170311764.MP.jpg
    99.5 KB · Views: 18
  • PXL_20250830_171221689.jpg
    PXL_20250830_171221689.jpg
    127.4 KB · Views: 18
  • PXL_20250830_170613568.MP.jpg
    PXL_20250830_170613568.MP.jpg
    109.9 KB · Views: 18
Just finished the one pictured above for my restored 2235B
 

Attachments

  • PXL_20250902_194501897.MP.jpg
    PXL_20250902_194501897.MP.jpg
    141.4 KB · Views: 20
  • PXL_20250902_194517935.MP.jpg
    PXL_20250902_194517935.MP.jpg
    135.1 KB · Views: 20
Back
Top Bottom