• The move to the new server is done. There are some software and database maintenance updates in process. This has us passing the hat around to help out. We appreciate any donations. Seriously, even a dollar helps. The payment page may be found here - https://www.audiokarma.org/support.html

Glass bezel specs for 3D printer?

Yamahacr1020

New Member
Has anyone ever 3D printed the bezel on many of the face glass surrounding/framing some portion. Like the ones on the MR78, MC 2205, or specifically the MPI-4? I have a MPI-4 that is missing it and I don’t think I’ll ever get a replacement, so I want to 3D print one. I’m assuming they are all the same except the rectangle framing dimensions. Any help is appreciated.
 
Register to hide this ad
Has anyone ever 3D printed the bezel on many of the face glass surrounding/framing some portion. Like the ones on the MR78, MC 2205, or specifically the MPI-4? I have a MPI-4 that is missing it and I don’t think I’ll ever get a replacement, so I want to 3D print one. I’m assuming they are all the same except the rectangle framing dimensions. Any help is appreciated.
Thanks, I did reach out to Larry, and he stated this is not something that he has. He was very helpful by informing me a little about the design, but did not have any specs. So, I'm still hoping for some help with this.
 
I still have my 2255 bezel which isn't attached at this time. I'm not sure if that could help you for a MPI-4 though. Maybe it could be 3D scanned and dimensions could be modified to fit various models?
 
I still have my 2255 bezel which isn't attached at this time. I'm not sure if that could help you for a MPI-4 though. Maybe it could be 3D scanned and dimensions could be modified to fit various models?
Thanks Captouch! I would assume that these are all the same shape except for the overall width and length. If you have a digital micrometer, I would appreciate the measurements of the height, width of the bottom, and width of the top. Also, it is my understanding that there is a square valley on the bottom where the 2-sided tape rests. I can convert what measurements you provide to match the MPI-4 window.
 
I know nothing, but wouldn't assume any dimensions match anything else. I normally do this sort of thing by sitting there with my vernier calipers plus an angle gauge and draw it up in FreeCAD. If you don't have an original part to measure, just do the best you can from whatever parts you can get, then fine tune it. That's the beauty of 3d printing- you're always just one print away from perfection! Looking online it seems to be black with a narrow silver front. I'd print black PLA then use a silver metal Sharpie on the front edge. You could use a silver filament, but that seems more trouble than it's worth.
 
Some good suggestions above.

It is my memory from my MC2255, several years gone now, that the bezel does have a channel for the adhesive tape. Also, I recall the tapered area of the bezel having a stepped (much like a 3-D printed or SLA part often has on an angled surface) surface, not smooth, likely to reduce reflection. Not sure how that would be measured for accurate reproduction though.

And yes, the forward-most surface only has the silver paint or plating, much like automotive gauges of the era.
 
Thanks Captouch! I would assume that these are all the same shape except for the overall width and length. If you have a digital micrometer, I would appreciate the measurements of the height, width of the bottom, and width of the top. Also, it is my understanding that there is a square valley on the bottom where the 2-sided tape rests. I can convert what measurements you provide to match the MPI-4 window.
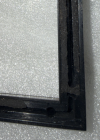
Here are some pictures and measurements.
Top View:

Screenshot 2026-06-20 at 9.44.08 PM.png

Close up of bottom side with channel:
Screenshot 2026-06-20 at 9.46.12 PM.png

Taper profile:

Screenshot 2026-06-20 at 9.46.39 PM.png

Silver paint on top surface:
Screenshot 2026-06-20 at 9.47.46 PM.png

The width at the bottom is 7.82mm, the width at the top is as you can imagine harder to measure with the slope, but I measure 2.85mm. The height is 10.15mm.

Hope that helps, let me know if you need more info!
 
Thanks for taking the photos and measurements. This helps a lot and clarifies the channel on the bottom that houses the two sided tape. Now I need to learn how to create a drawing that can be used for 3D printing. I thought it would be easy but CAD software is a little more complex than I assumed.
Thanks again
 
Back
Top Bottom