• The move to the new server is done. There are some software and database maintenance updates in process. This has us passing the hat around to help out. We appreciate any donations. Seriously, even a dollar helps. The payment page may be found here - https://www.audiokarma.org/support.html

Removing rubber surrounds

Frank_Black

Active Member
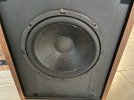
Hey all. Long story short, I have a pair of Genesis 2+'s from ca. 1979/80. Back in the '90s the surrounds were going bad and this was before the Internet and before I knew anything about replacing surrounds myself. I took them to a speaker place and they reconed all or some (2 8" woofers and 2 10" radiators). They didn't sound as good afterwards.

Now I'm refoaming the radiators and apparently when they did one of them they used rubber instead of foam. I noticed because after I did the other one (that was foam for some reason) the one with the rubber sounded almost like only the tweeter was working. The rubber one is noticeably stiffer.

Problem is, this rubber is adhering much more strongly than foam does. Is there a standard product that I can use to remove it rather than trying to scrape it all off?

Thanks.
 
Register to hide this ad
Those cones are paper DO NOT use any solvents or anything that can be absorbed by the cone.

You will probably have to scrape for hours or cut around and leave it on.

Yeah, I checked those are paper. No solvents!

Had a pair that were like that it took me two days of scraping after work to complete, My wrist still hurts.

What I do is find a thin flat piece of wood or metal about 3 inches wide by 12 inches long that I can slip behind the cone to support the force of scraping.

Really helps a lot.

Good luck.
 
Last edited:
Acetone or lacquer thinner are the only solvents that Might help remove that glue.

Otherwise... Guess what, More scraping! I find a real carpenters chisel is good for the frame.

Sharp Handy or matt knife, I always buy Japanese replacement blades SO much better.

Careful flocking sharp! But those speakers are worth the effort!

It's too bad someone took away your joy for so long.
 
What about on the metal parts?
3M 08984 Adhesive Cleaner. Used in the automotive industry for removing really tough adhesives from painted surfaces without damaging the paint. It works way faster than acetone or lacquer thinner and dries quickly. I have also had some success in using it with paper cones but be very careful and lightly wipe a very small bit on the edge of the cone as a test first. Definitely do not use it on paper cones that have been doped.
 
How about Goo Gone on the metal frame ? Very gentle, let it sit for a while then try scraping. I've had good luck using an old guitar pick.
 
The issue with solvents is needing more solvents to remove the solvents you used. Goo gone and such will often make it hard to get the new adhesive to stick.

In the end you'll clean that frame with isopropyl so start there. If they used epoxy then just use a chisel or razor.

Iso on the paper cone is OK if used sparingly. Let it dry. The iso will soften the adhesive ideally.
 
(Thought I'd posted something yesterday but never hit Post. . . .)

Anyway. Got most of it all scraped off with Xacto knife and chisel.

But: It's also missing the gasket/seal (which I didn't notice at first because I was too busy noticing the rubber surround....). *heavy sigh*
 
3M 08984 Adhesive Cleaner. Used in the automotive industry for removing really tough adhesives from painted surfaces without damaging the paint. It works way faster than acetone or lacquer thinner and dries quickly. I have also had some success in using it with paper cones but be very careful and lightly wipe a very small bit on the edge of the cone as a test first. Definitely do not use it on paper cones that have been doped.

Naptha + Xylene + Ethylbenzene. Wear proper PPE and work ONLY in well ventilated spaces with NO spark or flame sources.
 
Genesis 2's do Not require the gasket since they are top mounted.

If you search on their pictures any re-foamed pairs have no gasket.
 
Hmmmmmm. . . . .. . .

By golly, you are correct. JAYsus, what the heck did those guys do. Note: It was Speaker Lab in Seattle. Both cones in one speaker have these (not really a 'gasket' per se) but not in the other one. I admit I like the look of it with those things in place.
Gasket.jpeg
 
Last edited:
They can be applied anytime. Although unmounted it's one place where my 35 small clamps Shine~~~

Expensive speaker builders countersink the drivers so they are level with the front then make a custom Beauty Ring instead of a gasket.

On a speaker like this we line the front with a thin Foam 1/4- 3/8" to absorb reflected waves traveling across the baffle front.

You will see many speakers with a 6" square piece of Felt with a hole for the tweeter.

Some of my favorite speakers, Spica TC-50~~!

5800650-spica-tc-50-time-aligned-speakers-stunning-walnut-burl-finish.jpg
 
Update: Success! At least as far as I can go (for now). Refoamed both passive radiators, sealed both with putty. The one with the rubber that was noticeably thinner on bass is now back to mostly 'normal'. As I mentioned, Speaker Lab did something to them, and didn't do the same thing on both speakers. The woofers are both different as are the PRs. A-B'ing using the Balance control on a heavy bass track, I can tell a difference, though not enough to really affect the sound with them both on. One is definitely closer to what I remember them sounding like. Not sure it's worth it at this point to get new stock drivers from Hui over at Human Speakers, but it's something I'll contemplate.

One of the reasons I noticed this in the first place was because I snagged a pair of 1990ish Cerwin Vegas (DX-3's) a few months ago and after refoaming those and hooking them up to the device I'd been using the Genesis' on it was apparent that something was amiss. (Side note: These CV's are much better than I thought they'd be. I will also admit that the first thing I played on them was Foghat Live and spent an excellent time regressing to my teenaged self).

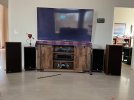
Thanks again for all the assistance! Speakers.jpg
 
Back
Top Bottom