

You are using an out of date browser. It may not display this or other websites correctly.
You should upgrade or use an alternative browser.
You should upgrade or use an alternative browser.
DIY Sound Group Fusion 12 Tempest
- Thread starter StevenZ
- Start date


StevenZ
Texas or nothin'
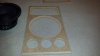
Well the kits have arrived today. Holy smokes. These parts are nice. the baffles are perfectly milled, though the waveguide opening is a little big for my tastes. There's about 1/16" on all sides of the waveguide so it's a bit loose. No biggie, I can deal with that. The woofer fits nicely but I'm a little irked that they didn't just cut the hole completely out. The rebate for the woofer needs to be a whole 3/4" and they only milled out about 1/2" so the woofer's frame/lip sticks above the front baffle about 1/4" or slightly less. I can see why this was left this way but I know it's not optimal.
The waveguides are really nice, very stiff molded plastic with no flashing left on. One thing that I'm curious about is the compression driver. While it's pretty decent build quality and packs some weight to it, it has a 5 bolt pattern but only 2 bolts are used per CD/waveguide??? Not sure if this is optimal but I think 3 of them could have been used if the waveguide were designed a bit different. Not a big deal as long as the seal stays tight. There is a slim gasket covering the face of the compression driver where it meets the waveguide body. One thing about the compression drivers are the spring loaded terminals, they feel a bit cheap, but it's to be expected at this price point and considering it's a "copy" of the B&C DE250.
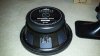
Onto the woofer. Well, it's your typical Eminence type of woofer. While it does boast a cast frame it feels a bit cheap since the rubber boot covering the motor moves freely and is quite loose. The pleated surround and paper cone are nice but it seems the spider is somewhat small for the size of the woofer/frame. Ovreall, decent quality. Nothing like a few of the boutique drivers I've used but I don't think I'll judge too hard until I get some listening in.
The crossovers are standard fare. Dayton capacitors, Dayton resistors, and Jantzen air core inductors. Nothing too special here. They are of average quality and as long as they spec within tolerance and perform well I'm fine with them as-is. I may upgrade at a later date, or I might not. Listening will be the determining factor.
Packaging. Boy oh boy, Erich knocked this one out of the park. The way he packaged the entire box was phenomenal. Truly professional grade packing job. While I won't claim it can survive a train wreck, it was very well laid out and everything fit perfect. There wasn't any excess space in the box filled mindlessly with fluff. Everything stayed put and could take any abuse I can imagine while in transit. Well done Erich. Two gold stars on this front.
That's about it. I've snapped a few photos while unboxing all the parts. Unfortunately I won't have my hookup wire until mid next week so the crossover assembly will take a little longer than I had hoped. In the meantime I will begin to assemble the enclosures and prep them for the bonded dacron and crossover boards. More photos to come as the rest of the goodies come in.
Cheers,
Steven
Attachments



donprice
Wound up workin' at a gas station....
That 1/4" extra on the woofer gives you some room to play with if you decide to veneer the baffle. Or back it up with another layer of MDF or plywood and route it a little deeper to make the drivers flush. You have options....
2-bolt or 3-bolt pattern depending on on horn...you could use all all 5 if if you want.
Perfect? Perhaps not. But how does it perform for price range?
2-bolt or 3-bolt pattern depending on on horn...you could use all all 5 if if you want.
Perfect? Perhaps not. But how does it perform for price range?
StevenZ
Texas or nothin'
Actually, I think I'm limited to the 2 bolts. I tried fitting the waveguide on with using 3 bolts and there was no way it was going on, and even if it did, there was no room to fit a nut in there to tighten the together.
I don't think veneer will help in this situation, especially with the baffle already routed on all 4 sides. Building it up with a scab is out of the question as well. I'll just roll with it and see how it sounds before I do anything drastic.
I don't think veneer will help in this situation, especially with the baffle already routed on all 4 sides. Building it up with a scab is out of the question as well. I'll just roll with it and see how it sounds before I do anything drastic.
He meant the additional mounting holes are for other horns/waveguides. It's a standard 2-bolt pattern, and a standard 3-bolt pattern (= 5 holes).
Don't forget that pro components are expensive (or any high power high efficiency stuff, but that's mostly pro stuff). A comparable design using high end pro parts in kit form would have cost you $3-4k+. Lucky for us, when you don't need 130dB, well-chosen cheaper pro stuff has some good things to offer.
Don't forget that pro components are expensive (or any high power high efficiency stuff, but that's mostly pro stuff). A comparable design using high end pro parts in kit form would have cost you $3-4k+. Lucky for us, when you don't need 130dB, well-chosen cheaper pro stuff has some good things to offer.
P.S. FWIW, after painting the baffles I have where I flush-mounted the QSC waveguide with a lightly-textured thick enamel, I couldn't get the waveguide in. I eventually resorted to a rubber mallet, which of course resulted in some paint damage when it popped in, and even more when I hammered it back out to fix the paint. This process has repeated several times. Since you're planning to use duratex, you may be glad you have that extra room.
StevenZ
Texas or nothin'
P.S. FWIW, after painting the baffles I have where I flush-mounted the QSC waveguide with a lightly-textured thick enamel, I couldn't get the waveguide in. I eventually resorted to a rubber mallet, which of course resulted in some paint damage when it popped in, and even more when I hammered it back out to fix the paint. This process has repeated several times. Since you're planning to use duratex, you may be glad you have that extra room.
Good point. I will keep an eye out for it and will tape off all necessary holes. Since it's water based and it's cure time is almost 7 days I have a little fudge time to clean up any overflow.

audiozaz
rtfm!? - tl;dr
Don't worry about "only" 2-bolts, it's plenty good assuming a better-than-completely-wimpy waveguide mounting base. 
Wow, this kit is really inexpensive, I was not aware of the price before, just checked it out. Good deal considering a lot of the work has been done, no need to slave over a spaghetti of gator clip leads and countless Xover parts for a few days. I'll be looking forward to your impressions. Good luck with the build/assembly process.
az
Wow, this kit is really inexpensive, I was not aware of the price before, just checked it out. Good deal considering a lot of the work has been done, no need to slave over a spaghetti of gator clip leads and countless Xover parts for a few days.
I'll be looking forward to your impressions. Good luck with the build/assembly process.az
StevenZ
Texas or nothin'
Quick teaser. I just bought this and a matching preamp. Amp is due in on Wednesday, preamp in about 2 weeks (being built). I think the duo will shake hands real well with the new speakers. :yes: 

Almond Mocha with Burl Walnut Sweet 807
Almond Mocha with Burl Walnut LP-2 (preamp)
-Steven
Almond Mocha with Burl Walnut Sweet 807
Almond Mocha with Burl Walnut LP-2 (preamp)
-Steven
Attachments


 . Looks cool.

You're lucky to have good connections. That particular Komo of yours is a big ticket item, and even medium sized businesses would be hardpressed to afford one. A buddy of mine has a 4' x 8' ShopBot that, while not quite as fast, also gets he job done. Here it is cutting out a speaker front panel....

http://i443.photobucket.com/albums/...3E265E-29300-00001C4C5CBDFD3D_zps117c2315.mp4
http://i443.photobucket.com/albums/...3E265E-29300-00001C4C5CBDFD3D_zps117c2315.mp4
You've got 30 minutes or less before you will have to scrape or sand any errant Duratex. It may be 7 days for complete cure, but it will be rock hard after 4 to 8 hours of Texas summer.
Good point. I will keep an eye out for it and will tape off all necessary holes. Since it's water based and it's cure time is almost 7 days I have a little fudge time to clean up any overflow.
StevenZ
Texas or nothin'
You've got 30 minutes or less before you will have to scrape or sand any errant Duratex. It may be 7 days for complete cure, but it will be rock hard after 4 to 8 hours of Texas summer.
Thanks for the tip. I just put on a relatively thin first coat and I'm pretty impressed. I will do another coat before I leave work and then finish it up tomorrow. I'm hoping to assemble the crossovers tonight and think that I may be able to have them at home and playing tunes by Thursday. This all depends on how 'cured' I think they are by the time I'm ready to take them home. It's been pretty damn warm here in Texas so I'm thinking it will be a quick process.
I will keep you folks posted and I apologize for the lack of build photos. I get carried away and bull doze through the project once I'm on a roll.
-Steven


dnewma04
The Healer
Steven,
When I built my crossovers for the recent horn project, I tried some copper terminals I found at home depot knowing that I was going to be swapping parts until complete. However, I'm not sure I'll be tweaking anything and it seems to sound good. Perhaps, not as good of a connection as soldered wires, but it makes assembly so easy.

When I built my crossovers for the recent horn project, I tried some copper terminals I found at home depot knowing that I was going to be swapping parts until complete. However, I'm not sure I'll be tweaking anything and it seems to sound good. Perhaps, not as good of a connection as soldered wires, but it makes assembly so easy.
StevenZ
Texas or nothin'
I specialize in breaking the leads off those Dayton resistors. I've got a whole collection of them, just in case I decide to get into repairing cheap resistors someday, somehow.
I've broken a few before and now I'm extremely gentle with them. It's also why I like to super glue my leads down so there isn't any sort of stress on them from the speaker wire.
Dnewma04, thanks for the heads up. I've actually used those a long time ago for a different project though I didn't even think about it for this one *D'oh*. Would have simplified things a bit. Perhaps later on down the line I'll re-do the crossovers a bit better, or have them professionally built
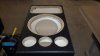
As for now, I left the cabinets over night (16hrs) and the material is hard as a rock. So I flipped them over onto their backs, put some cloth underneath and then proceeded to spread the material on the rest of the cabinets (top/bott/sides/face) and put a pretty heavy first coat. I will go back in during lunch time and put on the 2nd and last coat and then wait a day or two until they're ready to rock. Here are a couple photos from this morning.
Attachments


StevenZ
Texas or nothin'
Well, I'm pretty tired and my back is killing me, but I finally got 1 speaker buttoned up. Unfortunately I forgot to attach the damping material directly behind the woofer so I will have to open it back up tomorrow, but at least it's physically completed. I will also have to pull the waveguide out and use a permanent marker to darken the MDF that's revealed from an oversized cutout.
Other than those few hiccups I think I'm doing alright and I really like how the speaker as a whole looks. I've attached a few photos and will post more once the other speaker is completed.
I'm already thinking about rebuilding the crossovers since I'm 100% unhappy with how they turned out. Anyone know a service or person that would be able to build a professional grade crossover for me? Surely there is a much more efficient layout scheme as well as better parts that can be used. If so, please let me know via PM.
Enjoy the pics.
-Steven
Attachments


StevenZ
Texas or nothin'
Well, I'm done. I got the 2nd speaker completed this morning and gave it a quick 30 minute listen. So far, so good. I'll let them break in a while more before I give my final verdict. Here's a photo of them in the room without stands (next project).
-Steven
-Steven
