• The move to the new server is done. There are some software and database maintenance updates in process. This has us passing the hat around to help out. We appreciate any donations. Seriously, even a dollar helps. The payment page may be found here - https://www.audiokarma.org/support.html

Cool mine didn't blow up either, My MC-30 Refurb

perchdog

AudioDouchebag
I would like to start out with a big thanks to AK in general. In particlar members Sloober, Redboy, Dewickt and Kegger, for either advice given or the very helpful threads posted.

Background, I received these as part of a console pick up a couple years back.

http://www.audiokarma.org/forums/showthread.php?t=217360

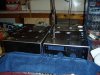
Never attempted to power up until they were gone through, that time has come. The amps were in pretty bad cosmetic condition on the outside, not so bad on the inside. One of the amps did have a blown fuse, I think the culprut was a bad rectifier tube. Below pictured as received.
 

Attachments

  • 3E528 - P1010177.jpg
    3E528 - P1010177.jpg
    76.3 KB · Views: 503
  • 3E751 - P1010002.jpg
    3E751 - P1010002.jpg
    72.8 KB · Views: 407
  • 3E528 - P1010011.jpg
    3E528 - P1010011.jpg
    99.4 KB · Views: 377
  • 3E751 - P1010011.jpg
    3E751 - P1010011.jpg
    103.6 KB · Views: 379
Register to hide this ad
Chassis

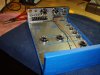
I decided it was time... I knew after market chassis were available through Ebay but I had not decided wether or not to change them out. Back in December this issue came up in a thread, next thing I knew I received a pm with a pair offered up for a price I could not refuse. The decission was made...
 

Attachments

  • 20070101_01.jpg
    20070101_01.jpg
    82.7 KB · Views: 335
Schematic

Chassis were recevied and it was time to place parts order. I started with the Sams service manual from the AK database, put together list and decided I had better crack the amps open just to make sure. As luck would have it my amps did not match the schematic, after what seemed to be hours I happened upon Sloober's thread which led me to Redboy's thread.

The schematic Redboy used and posted to the database (serial #15329 and above) was the closest I could find. As a matter of fact it matched my amp exactly except mine were missing C7 (470 pF) capacitor. I know Terry says no way but it was not there on either amp.
 

Attachments

  • 3E751 - P1010019.jpg
    3E751 - P1010019.jpg
    111.7 KB · Views: 331
  • 3E751 - P1010017x.jpg
    3E751 - P1010017x.jpg
    91.6 KB · Views: 283
  • 3E528 - P1010001b.jpg
    3E528 - P1010001b.jpg
    64.5 KB · Views: 307
  • 3E528 - P1010003X.jpg
    3E528 - P1010003X.jpg
    96.5 KB · Views: 325
Last edited:
The boards

Ok,
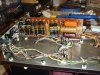
The boards needed to be removed and basically tore down completely to get to capacitor solder joints. I decided to take it one step further and not deal with the melted wire jackets. All wires taken out and replaced with 22 gauge solid core teflon coated wire.

All caps repaced, the .22uF's and .25uF's replaced with .25uF Russian PIO's, .047 uF's replaced with Russian teflons, .1uF and .47uF went to orange drops, 470pF CDE silver mica and electrolytics CDE WBR'S were my choice. The resistors all replaced with mixture of Takman's, Rikens, Kiwame's with the voids filled in with KOA Sphere and PRP's.

Below is a board layout. This was origanally posted by Redboy in his MC-30 refurb thread. I had first asked Nate to forward a better copy so I could work with it a little better. Later I asked Nate if he could forward the origanal file, he did no problem, I added a few things... I have included jpg and pdf file for prosterity
 

Attachments

Last edited:
The chassis

Ok,
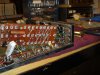
I could not go this far without going for it completely. I had decided if the chassis were going to get replaced I was going to rivet these pups together. It took a bit of time to tool up for this task. I thought that was going to be the biggest challenge but as it turns out wiring the front panel and bias circuits were quite a bit rougher then anticipated.

22 gauge wire size was retained for the bare wire connecting filiments V1 thru V4, the difference being the new wire is wrapped around on all lugs opposed to passed through and soldered. The rest of the wire on chassis, 20 gauge solid core teflon coated was used.
 

Attachments

  • 751 - P1010001 assm.jpg
    751 - P1010001 assm.jpg
    80.8 KB · Views: 240
  • 751 - P1010004 assm.jpg
    751 - P1010004 assm.jpg
    80.2 KB · Views: 213
Last edited:
The Trannies

I was seriously hoping that I would not have to paint the trannies but was expecting to replace the stickers. Well neither had to happen, I thought I would take this opportunity to throw a plug out there for a product called Flitz. This stuff is really cool.
 

Attachments

  • P1010008.jpg
    P1010008.jpg
    70.5 KB · Views: 287
  • P1010017.jpg
    P1010017.jpg
    73.3 KB · Views: 268
  • P1010004.jpg
    P1010004.jpg
    63.7 KB · Views: 317
Last edited:
Assembly and Start up

Overall the assembly went very well. This is my 3rd attempt at a tube amp recap / refurb. I take which seems like hunderds of pictures just to make sure, but also I am getting pretty good at reading the schematics.

There were a few mis-haps during initial fire up, the main one being that damn bad rectifier tube. On the 2nd amp when I got the variarc up to 50% smoke started pouring off of / out of the 150 ohm resistor and thermistors. I promptly shut it down, removed retifier tube, checked the power trannie and swapped rectifier from other amp. The resistor is cracked so I will replace it if it fails or after next parts order, those Mills are not cheap :dammit:

The other minor issue... I upgraded the C13 (10uF) capacitor to 20uF, at the same time I also changed out the R30 (3.3K) resistor to 9.1K. This is a very well known change to get bias voltage where it needs to be. When I started the amps the first thing checked was the bias. As it turns out I was checking approx -28v. On the first amp I kept dropping resistor value, first with 8.8K, then 5.6K, and then finally to the schematic speced 3.3K. I used CL80 thermistors on both legs of incoming power wire, geeze those things make life easy. I have been bouncing between -45V to -49V while playing since.

Tonight is my first night with these amps. I have them hooked up to a Sansui tuner with an adjustable output level, no preamp. They sounded a little tight to begin with but man are they starting to settle in. I am beginning to see what all the fuss is about :D

Tomorrow I will clean bottom chassis and emblem. Other than needing to replace corroded trannie screws I think its time to move on
 

Attachments

  • P1010002.jpg
    P1010002.jpg
    93.8 KB · Views: 312
  • P1010003q.jpg
    P1010003q.jpg
    64.7 KB · Views: 236
  • P1010004.jpg
    P1010004.jpg
    93.1 KB · Views: 271
  • P1010006.jpg
    P1010006.jpg
    97.2 KB · Views: 422
Last edited:
Outstanding. :thmbsp: I hope everything settles in well, you deserve to have them work well, after all that. :yes:
 
Nice work.How many hours do you have into the project?I bet that they look stunning.It's nice that you retained the original surface on the transformers.Enjoy.
Dave
 
Great job perchdog. You are a couple days ahead of me..I am waiting on the CE can and a couple caps from EAS which should arrive by the week end. By the way what is that CL80 Thermistors thingy you mention. Where do they go?
 
And there they are!

Man, you've done a nice job! This thread is going to be a real resource to those who follow. :yes:

Flitz, eh? Going to have get me some. :thmbsp:
 
**** I painted my transformers and got new decals. Unfortunaely I did it myself and ended up with a slightly textured finish. Looked great, but now holds onto dust pretty well. I may have to pull em now!
 
Well done, David. Outstanding work and a great thread to add to all the others for rebuilding those MC-30s.

I've got to get some Flitz.
 
And there they are!

Man, you've done a nice job! This thread is going to be a real resource to those who follow. :yes:

Flitz, eh? Going to have get me some. :thmbsp:

Redboy,

There is no way I would have gotten to this point without your thread and or advice. I owe you a big thanks here sir..

Yeh Flitz..
It acts like a super fin rubbing compound except maybe polymer based. The manufacturer claims it to be non-abrasive, I am not so sure. I have many uses coming up to try it on, I think it will work wonders on dirty chassis and rough face plates. Good for metals, plastics and painted surfaces, not recommened on electro-plated surfaces. The best part is I got mine from the local ACE Hardware, it was in with the Never Dull and metal polishes.
 
Back
Top Bottom