• The move to the new server is done. There are some software and database maintenance updates in process. This has us passing the hat around to help out. We appreciate any donations. Seriously, even a dollar helps. The payment page may be found here - https://www.audiokarma.org/support.html

Fast Eddie's Thorens TD 124 rebuild - lots of pics!

Fast_Eddie

Upper-middle fi
Hey Gang,

Yesterday I had T Day dinner with a friend who picked up a Thorens TD 124 MkI and offered to sell it to me for a very fair price. You can see the "before" pics here.

http://www.audiokarma.org/forums/showthread.php?t=406416

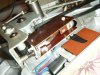
Well, after reading through a couple of threads, I decided to tear it down today. I was actually surprised how straightforward it is. It's not a difficult turntable to work on. I went very slowly so I didn't break anything. The lubricant had turned to glue (glubricant?) and some of the parts were very difficult to work lose. Going to take a good bit of cleaning to get them working well again. But working slowly and carefully I was able to get everything apart and bagged up. I took about 30 pictures along the way so I can get it back together.

For now, sub parts like the motor and the main bearing carrier are still together. I'll leave them in one piece until I rebuild them.

Getting started...
 

Attachments

  • DSCF9286.jpg
    DSCF9286.jpg
    67.2 KB · Views: 206
  • DSCF9287.jpg
    DSCF9287.jpg
    57 KB · Views: 122
  • DSCF9288.jpg
    DSCF9288.jpg
    52.5 KB · Views: 99
  • DSCF9289.jpg
    DSCF9289.jpg
    72.1 KB · Views: 122
  • DSCF9290.jpg
    DSCF9290.jpg
    61.4 KB · Views: 107
Register to hide this ad
So far so good.
 

Attachments

  • DSCF9295.jpg
    DSCF9295.jpg
    86.8 KB · Views: 98
  • DSCF9294.jpg
    DSCF9294.jpg
    84.5 KB · Views: 83
  • DSCF9293.jpg
    DSCF9293.jpg
    78.6 KB · Views: 95
  • DSCF9292.jpg
    DSCF9292.jpg
    71.9 KB · Views: 97
  • DSCF9291.jpg
    DSCF9291.jpg
    60.8 KB · Views: 84
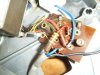
Getting all the electronics out. Have to unsolder two wires to get it all lose.
 

Attachments

  • DSCF9296.jpg
    DSCF9296.jpg
    88 KB · Views: 129
  • DSCF9297.jpg
    DSCF9297.jpg
    96.9 KB · Views: 69
  • DSCF9298.jpg
    DSCF9298.jpg
    91.1 KB · Views: 95
  • DSCF9299.jpg
    DSCF9299.jpg
    90.5 KB · Views: 62
  • DSCF9300.jpg
    DSCF9300.jpg
    85.4 KB · Views: 76
I chose to unsolder from the "main" board rather than the switch board. I left the strobe attached and removed it all as one unit. That arm in the last pic here- it was the WORST. Did NOT want to come off. Had to go very slowly, working it back and forth and pulling. It did finally come, but it fought all the way.
 

Attachments

  • DSCF9305.jpg
    DSCF9305.jpg
    90.5 KB · Views: 116
  • DSCF9304.jpg
    DSCF9304.jpg
    76.3 KB · Views: 74
  • DSCF9303.jpg
    DSCF9303.jpg
    78.5 KB · Views: 75
  • DSCF9302.jpg
    DSCF9302.jpg
    75.8 KB · Views: 74
  • DSCF9301.jpg
    DSCF9301.jpg
    62.2 KB · Views: 86
Last edited:
...
 

Attachments

  • DSCF9306.jpg
    DSCF9306.jpg
    67.5 KB · Views: 74
  • DSCF9307.jpg
    DSCF9307.jpg
    65.2 KB · Views: 54
  • DSCF9308.jpg
    DSCF9308.jpg
    73.5 KB · Views: 64
  • DSCF9309.jpg
    DSCF9309.jpg
    91.7 KB · Views: 61
  • DSCF9310.jpg
    DSCF9310.jpg
    61.5 KB · Views: 53
Getting gooey parts worked off of shafts was by far the hardest part. They did *not* want to budge. That's what causes the speed selector knob to be frozen in place. Once it's all clean and lubed it should work just fine.

So what do people use for lube for these parts? I'm tempted to use wheel bearing grease, but I'm guessing that's frowned upon.
 

Attachments

  • DSCF9314.jpg
    DSCF9314.jpg
    71.9 KB · Views: 94
  • DSCF9313.jpg
    DSCF9313.jpg
    73 KB · Views: 76
  • DSCF9312.jpg
    DSCF9312.jpg
    62.4 KB · Views: 75
  • DSCF9311.jpg
    DSCF9311.jpg
    83.9 KB · Views: 82
Nice pics! I was gonna undertake that job myself a few years back, but the deal fell through.
 
Nice pics! I was gonna undertake that job myself a few years back, but the deal fell through.

Thanks. I took it pretty much all the way down. I was a little nervous about pulling the magnet for the Eddy brake thinking I'd never get it adjusted right again, but I found a site with proper clearances and instructions on how to do it with a feeler gauge. So I think I'll be okay. Otherwise, it was surprisingly straightforward. And I didn't shoot even one E clip across the room! I did drop one of the bearings in the selector knob, but fortunately it was quickly spotted and bagged.

http://www.theanalogdept.com/eddybrake.htm

I figured I'd get the base as bare as I could get it so I can clean it well. It's dirty and the paint is dull. I'm thinking some automotive polishing compound might work. I'll do a test spot under the platter area to see how it goes.
 
Last edited:
Nice job. My TD135 Mk 1 needs a teardown and rebuild, so that I can remove all the rust from the chassis and levers, strip it and give it a respray.

I've been reluctant to do this for fear that I'll either break something or won't get it readjusted again, but these aren't that complicated mechanically. So, thanks for your example which is giving me the push I need.

The value of your approach is you know you have got it all clean and you'll understand how it works. I'm sure you won't forget servicing the motor itself.
 
The motor barely turns, so that's the first order of business. Once I get it done I'll look at main bearing upgrade options.
 
Yes, an Ortofon - I thought it was an SMG 212. And a Shure M44-7 cart. AKer Mech986 said it's an Ortofon RMG 212. Not sure. When I google it, the RMG looks longer, but has the fully enclosed bearing. The SMG is open on top. So I think he's right. Maybe there was a longer and shorter variant.

SMG
http://soundslikefunaudio.com/?attachment_id=452

RMG
http://www.vinylengine.com/library/ortofon/rmg-212.shtml

(edit) Ah, I just looked on ebay and there is an RMG 212 listed that looks exactly like mine.
 

Attachments

  • DSCF9315.jpg
    DSCF9315.jpg
    87.1 KB · Views: 146
Last edited:
Sure does look like the RMG 212T
 

Attachments

  • ortofon_rmg_212_3091.jpg
    ortofon_rmg_212_3091.jpg
    27.1 KB · Views: 90
Last edited:
Heya Sandy, good to see you. Yeah, I'm pretty happy and can't wait to hear it. May have to drag out my 1200 so I can give the cart a go.
 
That Ortofon tonearm looks tasty too. Is it 12"? (I know that the number implies this, but I get confused by these arms, because some numbered 12 are 9", e.g. AS-212S and RS-212D. And the RMG-309 is 12", or is it 16"?!)

I'm really not sure either. I *think* it is a 9" arm. From the pivot to the stylus is 9", but I'm not sure if that's how you measure it or not.

What I do know is some time with some automotive polishing compound made an enormous difference in the finish. It's almost flawless. I think I need to wax it, and I have left the clutch in place, but may need to pull it to polish under that area. It's hard to tell because there is so much discoloration under the platter, but it really shined up nicely in the areas you will see when it's together. There were several marks I thought were defects in the paint, but they polished off and the finish seems to be 100% in tact. Amazing. Pictures don't really capture this well. When I get some good "after" pics you'll see that the finish is really good. And the speed indicator plate is perfect as well. Unbelievable. It looked a little junky when I got it.

I've attached before and after pics. If you look at areas like the strobe cover you can see how much it cleaned up. Right near the clutch lever are a couple of black spots in the before that I thought were scratches or something, but they are completely gone now. In the before picture, you can see one small area near the speed indicator where I did a test patch. It probably shows the difference better than anything else. It really looks almost new now and once I get some wax on it I think it will be outstanding.

Oh, and I got the Thorens sticker that goes under the platter area off in one piece, so it can go back on when I'm finished.

I ordered parts to rebuild the motor last night. So I think I'll store everything away for now and get back at it when the parts get here.
 

Attachments

  • DSCF9316.jpg
    DSCF9316.jpg
    81 KB · Views: 121
  • DSCF9317.jpg
    DSCF9317.jpg
    69.3 KB · Views: 116
Last edited:
Back
Top Bottom