• The move to the new server is done. There are some software and database maintenance updates in process. This has us passing the hat around to help out. We appreciate any donations. Seriously, even a dollar helps. The payment page may be found here - https://www.audiokarma.org/support.html

KEF 105/3 refoam, really could use help...

Copa1934

My ears are bleeding
I was so looking forward to posting detailed instructions on a refoam of these speakers but I've become stumped. Any of you who have any familiarity with these speakers know about the "doughnut" woofer. What is that you ask? See the attached images.

Anyway, viewing the images you'll see the problem. Typically you can attach a surround and use either shims or a 40hz signal. But this doughnut changes all that since you can't shim due to the lip of the center post hanging over the VC gap.

Do you mount the doughnut first, or the outer surround first? This is really not cool at all.

Any help/advice appreciated. I will post images regarding dis-assembly and re-assembly as there are some things people might want to know before just diving in.
 

Attachments

  • KEF1.jpg
    KEF1.jpg
    75.2 KB · Views: 64
  • KEF3.jpg
    KEF3.jpg
    78.3 KB · Views: 76
  • KEF4.jpg
    KEF4.jpg
    77.1 KB · Views: 71
  • KEF5.JPG
    KEF5.JPG
    98.1 KB · Views: 58
  • KEF2.jpg
    KEF2.jpg
    33.7 KB · Views: 64
Last edited:
Register to hide this ad
More images...

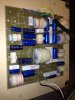
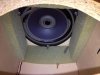
The first image should be the woofer. You can see the foam used to line the insides pretty clearly. The next image, using a mirror, shows one of the bolts holding the steel rod that I believe stabilizes the system structurally. The connections are soldered so it would be a good idea to note the polarity or take an image for reference. Note the pretty massive 2 networks. The one with the fewer parts and larger cabs is mounted to the back side and the other is mounted at the bottom access panel.
 

Attachments

  • KEF10.jpg
    KEF10.jpg
    90.1 KB · Views: 38
  • KEF9.JPG
    KEF9.JPG
    102.1 KB · Views: 50
  • KEF8.jpg
    KEF8.jpg
    101.7 KB · Views: 46
  • KEF7.jpg
    KEF7.jpg
    61.9 KB · Views: 50
  • KEF6.jpg
    KEF6.jpg
    83.3 KB · Views: 62
Descriptions...

The first image I show 2x4 blocks used to go under the back of the speaker to protect the binding posts. This allowed me to work with the speaker on it's back.

In the next image you can see the steel rod running top to bottom, which is secured to both woofers, top facing down and bottom facing up. Third image is more of same.

The last two images show the front baffle "assembly" which houses the mids and the coax. The coax is the center driver. All, as you can see, are sealed in the back. A 5mm hex is used to remove the bolts holding the front assembly.

There are 6mm nuts holding the drivers in place along with several washers. Make note of these washers and how they go back. Also take note of a metal sleeve inside the rubber grommet where the nuts go. These sleeves must be kept in place so that the grommets aren't collapsed inadvertently.
 
Last set of images...

As you can see by the images a normal surround must be mounted along with a donut like surround in the center. That is the bear. One issue, of course, is keeping debris out of the VC when removing the old donut, and while performing the final clean up of the surfaces.

The most miserable part, which I'm awaiting advice on, is which surround to mount first and how to go about it.

This is really tricky as there is so much slop in this configuration that it's far easier to screw up than typical drivers.

Right at the moment I almost wish I hadn't taken this on. If you've ever done a JBL LE series woofer, think of that as a ride in the park compared to this bugger.
 

Attachments

  • KEF11.JPG
    KEF11.JPG
    93.7 KB · Views: 51
  • KEF12.JPG
    KEF12.JPG
    84 KB · Views: 51
Shim it, or use a test tone, and do the outer surround first, then glue on the donut. The donut is mainly just a dust cap, it doesn't do much after the main surround is attached.
 
take some long but narrow strips of your shim material and place into gap with the top part hanging out over the cone, there shouldn't be any problem with interference with the center fixation piece. 5 or 6 small shims distributed around the voice coil should work fine.

Then I'd glue the surround to the cone, then to the basket frame. Once done, remove shims, test to be sure, then align and glue donut to the center post and cone, then lightly play the 40 or 60 Hz tone to be sure its still aligned without rub. Adjust donut if needed, then glue down with a little pressure to set, then let dry.

If in doubt, call OC Speaker repair for their recommendation.

You may have to lift the cone symmetrically to get the donut to touch all glue edges.
 
Took everyone's advice and shimmed the VC and installed the main surround first. Tested it later and sounded fine and no rub. Will be installing the donut today and working on the other drivers later as well. Hope to install them by tomorrow and give a listen.

Thanks guys for the advice.

I just hope anyone who digs into these will find this post helpful.

Now if I can find some curbside due to the bad woofers, that would be aces!
 
Word of CAUTION....

When removing the front baffle assembly pull away gently and only sufficiently to unplug the harness. Also, there are seals, seen in the images, that can separate from the assembly and could be damaged. I'm betting weather strip sold at most hardware stores will work, and is in fact very close to the dimensions of stuff I've purchased before. However, this stuff is pretty supple so don't go with anything to firm or too thick as you may not get a nice flush mounting when re-installing.

Another note, the lower woofer you may not have to de-solder, but you will need to make sure to take note of the connections.

I noticed with the first one that one of the connectors from the terminals was not snug, in fact it was loose, at the circuit board. Had it been against the back or upside down I think the one wire would have come off and the speaker of course would have stopped working. So, while you have it apart check all the connections for tight fit. No point going to this much effort to have a speaker suddenly and unexpectedly quite, eh?
 
Back
Top Bottom