• The move to the new server is done. There are some software and database maintenance updates in process. This has us passing the hat around to help out. We appreciate any donations. Seriously, even a dollar helps. The payment page may be found here - https://www.audiokarma.org/support.html

My TD 160 Restore and Upgrade

bobins08

Celebrating Life
I recently completed my Thorens TD 160B restoration and upgrade project. I picked up this table two years ago (April 2012) and have been enjoying it and learning a lot about vinyl playback along the way. I have done all of the basic maintenance and a few minor upgrades. This table and the SME 3009 series II improved (fixed head shell) tone arm, a Shure V15-III cartridge, and a Jico SAS.

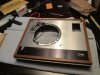
Picture 1 shows the before picture. Note the old grey ac chord and the old worn SME RCA leads. At this point I had abandoned the Thorens mat, first for a DIY cork, then for a thick rubber mat that I like to use on it (placed upside down). I got this tip and many others from AK member “Ilikevinyl”. The only other significant mods are the birch plywood bottom board and Joel’s MDF platter ring.

Pictures 2 and 3 are the top and bottom views before the transformation. In picture 2 note that I have a Q-Up device for the arm lift. The black plastic stock SME arm board will soon be replaced. In picture 3 see the rubber bands around the motor case and the cork/o-rings on the bearing well … a quick and dirty shot at damping.

Picture 4 and 5 show the SME tone arm with it’s old clunky 4 prong connector and plug which will be replaced with an RCA conversion kit and new cables. I chose Emotiva X-series cables because the RCA connector plugs are smaller, and the cables less stiff, than the Bluejeans cables that I had in house. The Emotiva cable is still much stiffer than the SME stock cable and provided some challenges that I will cover further.
 

Attachments

  • 1.JPG
    1.JPG
    78.5 KB · Views: 248
  • 2.JPG
    2.JPG
    104.6 KB · Views: 232
  • 3.JPG
    3.JPG
    127.8 KB · Views: 224
  • 4.JPG
    4.JPG
    95.5 KB · Views: 224
  • 5.JPG
    5.JPG
    85.2 KB · Views: 227
Register to hide this ad
Damping mods

In picture 1 you can see that I have the top plate (or motor plate) off of the table and I made cardboard templates. I used these template to size the Dynamat that would go onto the top plate. See picture 2 for the completed top plate. I put Dynamat everywhere except directly under the sub chassis.

Picture 3 shows the inner platter (or hub) and you can see I added dampening to it. You can see in the top right the MDF ring that I got from Joel. The ring lasted about 8 months and then would no longer wedge into the platter. It was useful as a template to cut the Dynamat . It is important to put this on evenly.

Picture 4 shows the top chassis which I damped with 2 mm thick cork. I precut the cork “gaskets” to size and bonded them with blue RTV gasket sealer. I used that small brush to apply an even coat of RTV.
 

Attachments

  • 10.JPG
    10.JPG
    116 KB · Views: 183
  • 8.JPG
    8.JPG
    120.9 KB · Views: 193
  • 7.JPG
    7.JPG
    119.8 KB · Views: 173
  • 6.JPG
    6.JPG
    102 KB · Views: 180
Pictures 1 and 2 show the finished bottom and top views of the sub chassis. Make sure your cork is thinner than the rubber bumpers on the top of the sub chassis. I had to clamp the cork in place and let it dry overnight. It came out nice save for the blue smudges from getting RTV on my fingers.
Picture 3 shows the plinth after 2 coats of Howards Restore-a-Finsh and 4 coats of Howards Feed N’ Wax. The plinth never looked better.

Picture 4 shows the outer platter rim after countless attacks with Brasso, and the Scotch Brite scrubber, and my elbow grease. It is not up to par with some of ones I have seen but it is no longer grey and dull.

Picture 5 - I replaced both capacitors that you see here. The smaller disc cap is across the power up switch and was bad. I would hear a “snap” if I turned the TT off with the volume up. The other cap is for the motor start up. It was not the correct value as per the Service Manual drawings and so it was replaced. The “snap” is gone. Motor start up is faster.
 

Attachments

  • 11.JPG
    11.JPG
    94.3 KB · Views: 156
  • 12.JPG
    12.JPG
    98.8 KB · Views: 143
  • 14.JPG
    14.JPG
    100.7 KB · Views: 169
  • 15.JPG
    15.JPG
    89.4 KB · Views: 179
  • 16.JPG
    16.JPG
    104.9 KB · Views: 188
In picture 1 you can see I have the top plate installe and that I installed some Dynamat on the top of the plate too. At this point I removed and replaced the old power cord. I then removed the pulley and cleaned it. I oiled the motor from top to bottom. I forgot to take pictures of these steps but this is where I did the work because it was convenient to tip the motor upside down, add oil, and then run it in. Sorry about the missing pictures – removal of the pulley is documented at “the analog department” website. I used Joel’s motor oil BTW.

Picture 2 - I cleaned and powered the suspension springs and grubber grommets before installing them.

Picture 3 is the bottom view showing the top plate mounted to the plinth and the sub chassis connected. I have the springs on loosely for now. You can see I added O-rings to the motor case and O-rings to the bearing well. Notice the new caps and that the ground is connected from top plate to sub chassis. You can also see that I filled the seams and crevices were the top plate meets the plinth with Blue Tack. The clamps that I used for the AC cord and for the phono leads did not get the job done and were later replaced.

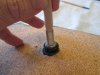
I used Joel’s Spindle cleaner and polish to put a mirror like finish on the spindle. Picture 4 shows the before with material used, picture 5 shows the after and the dirty rag. I thought the spindle was clean when I started but I pulled a bunch of gunk off of it.
 

Attachments

  • 20.JPG
    20.JPG
    101.1 KB · Views: 169
  • 19.JPG
    19.JPG
    108.4 KB · Views: 155
  • 18.JPG
    18.JPG
    146.5 KB · Views: 181
  • 17a.JPG
    17a.JPG
    98.7 KB · Views: 131
  • 17.JPG
    17.JPG
    97.4 KB · Views: 150
Next it’s time to polish the bearing. I used Joel’s bearing polish kit in picture 1 to clean and polish the bearing. In picture 2 you can see that you spin the dowel while polishing up and down. I did this a whole bunch of times, all by hand. I then cleaned the polish out of the bearing well. Use a lot of Q tips and pure Isopropyl. Note the progression of Q-tips going from dirty to clean in picture 3.

Picture 4 - I picked up some better cable clamps to provide strain relief for the phono cables, the AC chord ,and the ground wire. A lot of trial and error went into this step. The Emotiva cables are much stiffer than the SME stock phono cables and created some challenges for setting up the spring suspension. I put soft blue padding inside the clamps to make them hold really tight – once I had the cables in the right spot they are not moving. This picture shows how it ended up. You can see the TT ground chord for the first time.

I added oil to the bearing well. In picture 5 you can see the tool I used to install the new thrust plate. This was a kit from Joel. Next you coat the spindle with oil and slowly install it straight down into the well. I let it slowly sink into the oil on its own. I added the outer platter and did some spin testing. I was getting around 3 mins and 40 seconds. I am feeling good at this point.
 

Attachments

  • 21.JPG
    21.JPG
    97.8 KB · Views: 144
  • 22.JPG
    22.JPG
    100.8 KB · Views: 163
  • 23.JPG
    23.JPG
    112.1 KB · Views: 140
  • 25.jpg
    25.jpg
    74.1 KB · Views: 168
  • 26a.JPG
    26a.JPG
    118.1 KB · Views: 156
Last edited:
Picture 1 was the beginning of a long process of setting up the suspension. I think you first need to find the best position for the springs when the nuts are still loose and then tighten the nuts. I tighten by using ¼ to ½ turns at a time and move from spring to spring while keeping the platter balanced (level). This picture shows the beginning of the process with just the platter on. Once I got the to the point of the platter not bottoming out into the safety pin I then connected the belt, the platter mat, a record, and my record clamp. In this configuration I set the suspension to provide ~ 10 vertical bounces after I nudged the record near the label at the 2:00 position. Once I achieved this I connected the tone arm phono cables to the arm only to see the energy in the suspension die out quickly. I had to play with the cable tension and position and continue to adjust the suspension and the cables in unison. Eventually it got there. Once it did I had to tighten the cable clamps without moving the cables. Good clamps and good strain relief is critical. It worked. I did not take pictures of every step because I was on an intense mission. My description of the process should get the point across. Next time, I would use more flexible phono cables but I did finally triumph on this step.

Picture 2 shows me checking the platter speed. Joel’s belt runs slow. I already knew that and bought a Q-Audio belt to replace it. Yes, it runs at the proper speed!

Picture 3 shows the tone arm set up. I use Conrad Hoffman’s protractor program and the data from the Vinyl engine library. For my serial number arm, a Stevenson alignment is the factory spec, so I set it to Stevenson. Conrad’s tool is awesome. For the SME all you do is set the pivot position to the arc and you will get the correct overhang. The cartridge position is fixed in the headshell and it’s already designed to the correct null points once you get the correct O/H. Easy !

Picture 4 is my high tech grid line method for setting VTA. I called this “good enough” but after listening to it for one day I raised the pivot by the thickness of two business cards and it sounds better. Upon further review of this picture the pivot does look low. I use the grid lines to get close, then I listen to it and adjust from there.

I primed the birch plywood bottom board and painted it black. After the suspension and tone arm adjustments I installed the spikes onto the board and then the board to the plinth. Once I did this I was so excited and want to get some pictures … unfortunately I noticed the spring suspension died, as in no bounces. It turned out that the tone arm bottomed out on the plywood board. The new RCA conversion kit was the problem. Picture 5 shows the board. I had to cut the hole in the top right to prevent the arm from bottoming out. I decided to cut holes big enough to allow easy access and suspension adjustment for all three springs. Once I made this fix and re-installed all was good again.
 

Attachments

  • 31.JPG
    31.JPG
    69.2 KB · Views: 141
  • 30.JPG
    30.JPG
    79.1 KB · Views: 159
  • 29.JPG
    29.JPG
    92.4 KB · Views: 160
  • 28.JPG
    28.JPG
    55.2 KB · Views: 130
  • 27.JPG
    27.JPG
    103 KB · Views: 148
Last edited:
Picture 1 shows it all together. I plugged it in and made sure it spins ... what else can go wrong?

You can see the new arm board from SoundSupports. It is the one without grommets. You can also see that I have the fluid damper trough installed. In the next few weeks I will be adding the damper paddle and fluid but I want to hear the table without it first.

Picture 2 shows it looking clean and with a nice shine. New phono cables and ground wire, I decided to show it with its original mat too (even though I do not use the Thorens mat).

I am polishing up the dustcover and will add that picture and some with the fluid damper at a later date.

It sounds really great. It is quieter than ever before. The sound quality is far better, more details, just more good. I think the Emotiva cables and the upgraded sound board bring out details that I was missing. The Q-audio belt makes a difference. It really is like I have a new turntable.

Thanks for hanging with me and reading my long post.

Thanks for all the great ideas and information that you guys post here. I learned a ton in the past two years and really enjoy AK.


Cheers, Bob :music:
 

Attachments

  • 32.JPG
    32.JPG
    84.6 KB · Views: 193
  • 33.JPG
    33.JPG
    95.9 KB · Views: 210
Fantastic job! They are a fun table to work on. I'm sure you found it rewarding.


Rewarding indeed. I played around with this table for awhile and finally decided to put all the upgrades in.

It was about one week of work that I spread over about six weeks since I have other turntables to play.
 
Looks great Bob. :thmbsp:

Thanks. That last photo does look nice. :yes:

Maybe a custom plinth and a high quality tone arm rewire will be in its future some day?

I am very pleased with it's sound, still learning it by playing all my favorite records and hearing them better. Getting pulled into the music even more.

Cheers, Bob
 
Last edited:
Thanks. Now that I have it so clean and shiny on the outside it should be easier to keep it that way. It's the mods on the inside are what really count.

So far I am thrilled with the sonic improvements. The table, tone arm, and cartidge really work well together. I still have the dampening kit to add in the near future! :music:

I will probabaly never sell this table since it is so personalized now.

cheers, Bob
 
Bob, I love it. It really looks SWEET!!!! Maybe we can hook up next Tue. for a session. You have made a lot of upgrades to the system since I heard it last. I also have to hear the new pot in action. Maybe we can convince Devil Dog to hang out with us one day.
Sturg

PS I may have the DQ-10's in a week or two.
 
Back
Top Bottom