• The move to the new server is done. There are some software and database maintenance updates in process. This has us passing the hat around to help out. We appreciate any donations. Seriously, even a dollar helps. The payment page may be found here - https://www.audiokarma.org/support.html

My Garrard 401. A proper introduction.

the_nines

Lunatic Member
A little over a year ago, I came across a Garrard 401 on the auction site. The unit looked like it was well taken care of. Negotiated a fair price, I bought it.

I built a plinth for it, which I created a thread for. In the thread, I mentioned that I would show the turntable itself in some future thread.

The link for the plinth can be found here:
http://audiokarma.org/forums/showthread.php?t=634197


This is my Garrard 401.

Seeing that it came from the UK, I was a little scared in what condition I would receive it in, however the seller assured me not to worry. Needless to say, always in the back of my mind was the number of horror stories I read, about the destruction of TTs during transport, and how little was actually known by sellers about proper ways of packing items like this, or how people didn’t really care to find out about the proper way of doing it. I realize nothing is guaranteed, but at the very least if some common sense was used, turntables in general may stand a good chance of surviving the shipping.

Finally, it arrived, very well packed (chassis and platter packed separately, motor braced for transport, spindle guarded against hits or knocks). This seller actually knew his stuff and cared. Thanks bud!

IMG_2862_zpsb8f56139.jpg


IMG_2868_zps3e855071.jpg


Besides doing a top notch job with bracing the motor, he also secured the idler wheel and changed the voltage to 110-125. Even though he had told me he would do this on emails we exchanged, he never-the-less left a pink post-it to remind me that this had already been done. Nice touch!:
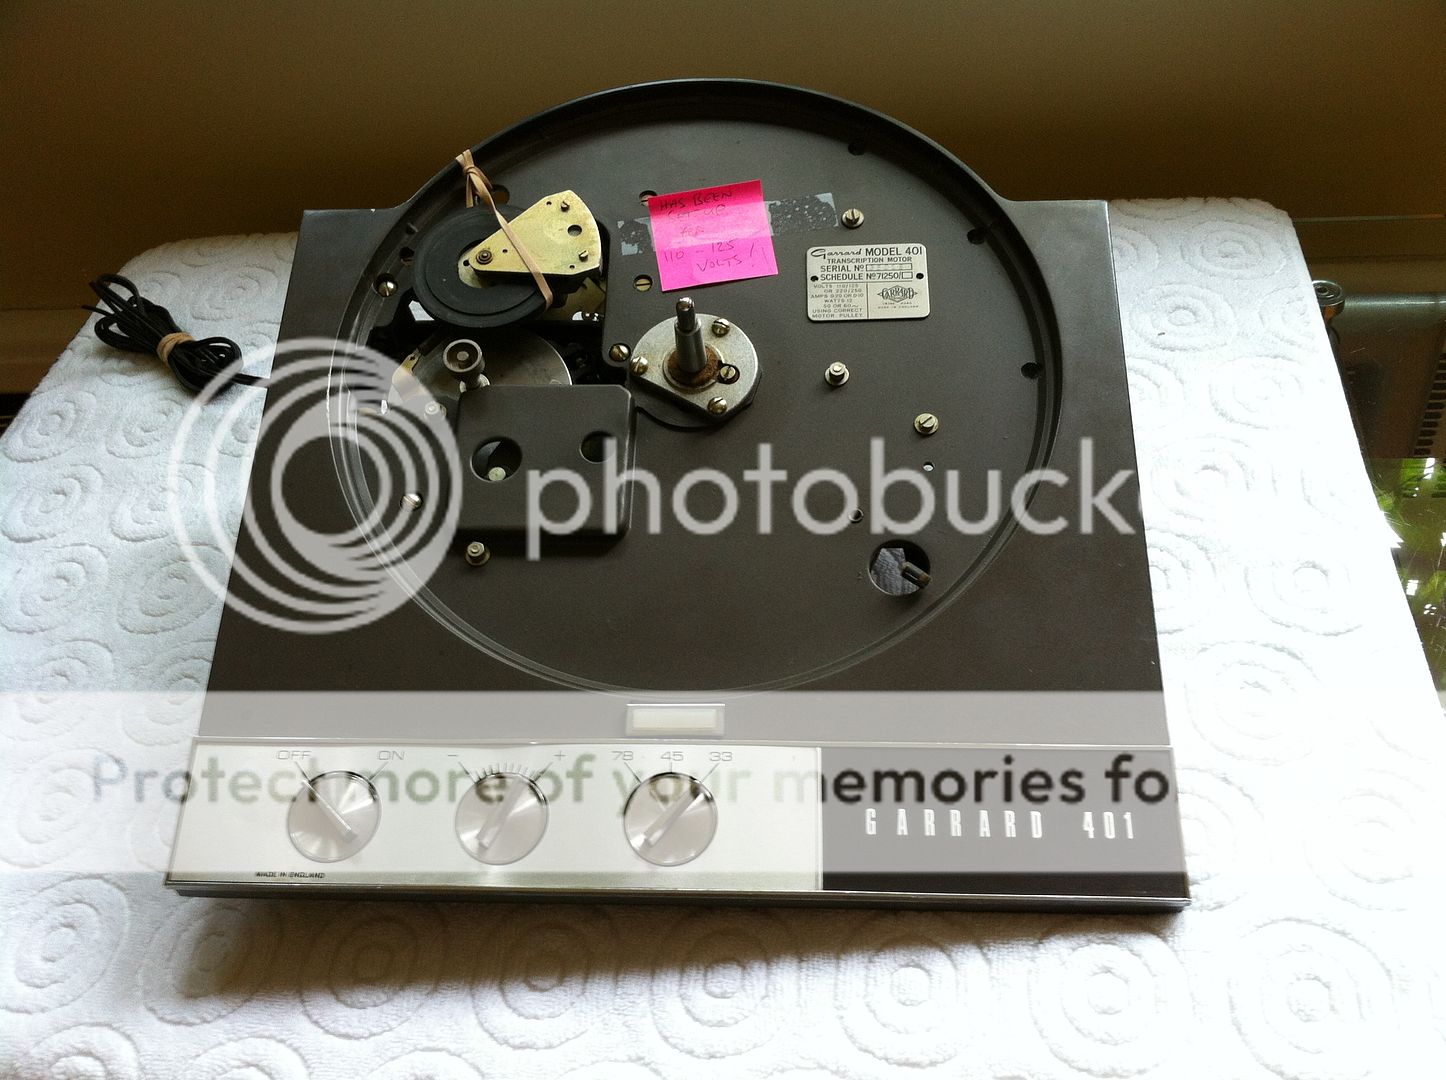
IMG_2872_zps85fbb1df.jpg


Very clean under-belly:

IMG_2877_zpsf15c1aa1.jpg


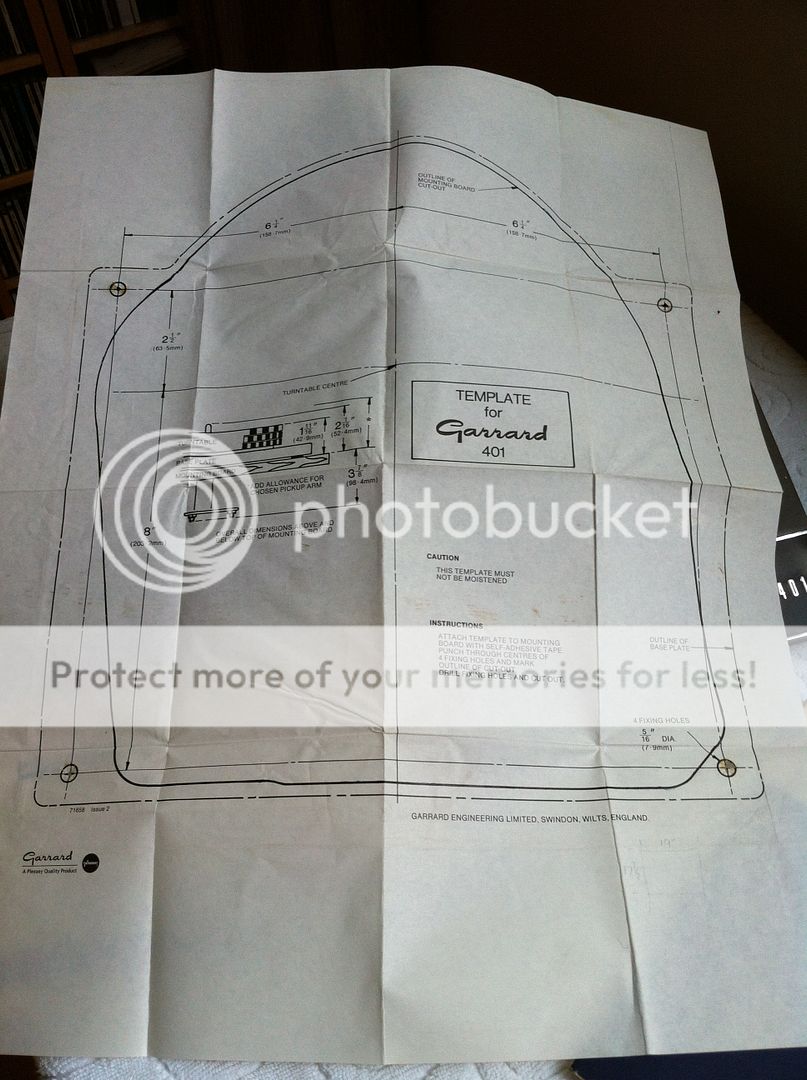
Original instruction manual and template:

IMG_2880_zps05d83ab5.jpg


IMG_2883_zpscd32a2c1.jpg


Platter and mat in excellent condition. I used a damp cloth to wipe the rubber mat, nothing more was needed. Cleaned up quite nicely:

IMG_2886_zps62cd5973.jpg


Now for the face-plate. Although there were no physical marks in terms of dents, dings or scratches, I wanted to straighten out the warpage:

IMG_2891_zpsedc3c99c.jpg


IMG_2894_zps628d2db7.jpg


Simply using a flat screwdriver, I gently wedged the tip of the screwdriver between faceplate and plastic backing, and pushed inward a little at a time, lifting the faceplate off bit by bit. The original tape adhesive had dried completely after so many years, so removal of the entire faceplate was less of a headache than I anticipated:

IMG_2895_zpsd48e67a7.jpg


IMG_2897_zpsykfokaij.jpg


Removed the old adhesive (it had completely dried-up, became powder when scraped):

IMG_2898_zps6b3e00d5.jpg


Cleaned the backing and faceplate with some lighter fluid and clean cotton rag:

IMG_2900_zpseeaf1d95.jpg


IMG_2902_zps7b633309.jpg


Applied strips of double-sided adhesive tape every few inches throughout the entire back-side of plate. This would help in an even and level sitting:

IMG_2907_zpsbba53a46.jpg
 
Register to hide this ad
Finished it off with some wax and light rubbing:

IMG_2904_zps654662a9.jpg


During this cleaning and buffing process, I had noticed that the face-plate had started to straighten out, became flatter, the major warps went away (reason which I am not sure, I could only presume the original adhesive may have caused the warpage due to it drying up and losing its elasticity). However, I still thought it would be a good idea to lay it on a flat surface with some weight on top for a few hours. I used the kitchen granite counter-top and placed some books on top.


Now the pulley had to be changed from the original 50Hz used in the UK to a 60Hz needed for North America. I found a 60Hz pulley on the net. Removing the old 50Hz one and installing the new one was fairly easy. I just made sure the idler wheel made proper contact on all three speed levels along the shaft, not too high or too low on each level.

IMG_2910_zps7f372e9c.jpg


IMG_2912_zps2a0504d8.jpg


And now, for the strobe. Being a UK model, the turntable came with not only a 50Hz pulley but a 50Hz platter as well, meaning the strobe markings on the platter are spaced differently than a 60Hz one. So, the bulb is working at 60Hz on 50Hz strobe markings. Useless!

One solution is to replace the platter to a 60Hz one. Garrard did make them but they were limited in production as most of the 401's were meant for the UK market and their 50Hz electrical power mains. From what I understand, finding a 60Hz platter is extremely hard, and if lucky enough to find one, chances are it would be an expensive purchase. Just out of curiosity, I checked and checked on the net, ...... nothing doing.

Another option would be to leave the table as is and just check the speed with a strobe disk. However, I really wanted the strobe to work, not only for functionality but for looks as well. I researched some more.

I found something called Key-Strobe Pulser2 ** from the UK, which is a kit to replace the original strobe harness, complete with LED light and wiring, which plugs directly into the original neon bulb socket and uses this as its power source. This kit accommodates both 50Hz and 60Hz power mains with a flip of a built-in switch. I guess one can build one, but I can't. So, given the rarity (and cost $$$) of a 60Hz platter, this seems like the best option for me, both in functionality and in cost:

IMG_3423_zps307b708e.jpg

** I have no affiliation with this company or product.


Removal of the original neon bulb and housing was pretty straight forward, nothing complicated there. The kit came with instructions which were easy to follow, as well as video clips on their web-site:

IMG_3104_zpsb494cb61.jpg


I would need to keep the original strobe plastic lens and metal frame for the installation of the new strobe. This way, we install the new LED light below the frame and put back the old plastic cover. It should look like nothing was changed. Just being careful when prying open the tiny metal tabs, they are quite snug, but a small sharp screwdriver will do the trick:

IMG_3110_zps46143c4e.jpg


IMG_3112_zpsd81ca4fd.jpg


This little thing called the "KeyStrobe Optibloc" will replace the neon bulb. Installation was a breeze:

IMG_3113_zpsb9e353d0.jpg


IMG_3117_zps0c781f3c.jpg


Just when things are going real smooth, as is sometimes the case, we hit a "snag". The KeyStrobe unit takes its power from the voltage supplied to the original neon bulb. It is so easy to install a child can do it, provided the child is working with the correct sized parts. In this case here, the male connector from the KeyStobe was too big to fit into the female connector of the Garrard. Crap!!

IMG_3119_zpsb146fc31.jpg


I did send an email to the company mentioning this oversight. They were thankful I brought it to their attention and told me they would look into correcting this.


Well....as they say, necessity is the mother of invention. Let's forget the male/female thing and let's hard-wire the connection:

IMG_3145_zpsd2443e5a.jpg


Excellent!
IMG_3121_zpscec33081.jpg


Finally, wiped the base with a soft damp cloth, using warm water and a few drops of dish soap, then waxed and polished by hand:

IMG_3547_zps5010dd10.jpg


And here it is, ready for its plinth:

IMG_2983_zpsd7b9087f.jpg
 
For the tonearm, I am using an SME M2-12R. This is truly one remarkable tonearm, extremely user-friendly, easy to set up and a pleasure to work with:

IMG_3742_zps5byaplqp.jpg


IMG_3737_zpsz57bl4gq.jpg


IMG_3734_zpslwntwwmd.jpg


It sounds awesome mated with a Clearaudio Aurum Classics cartridge. I have tried a couple of cartridges but so far the Clearaudio Aurum Classics seems to be a really good match. The search is still on, I'm hoping to find a MC that will be compatible and sound sweet. But for now, this combo is ace!

IMG_3728_zpsmoxnlqow.jpg


Project complete. Not too shabby.

IMG_3584_zpsc7fba2d1.jpg


I experimented with sorbothane hemispheres for feet, but found the sound became lighter, more ghostly, more airy. It had lost its authority, the bass became somewhat thinner. Didn't like it. I removed the sorbothane pads and everything just fell into place. Yes!

I had read an article written by Art Dudley in stereophile.com “Listening #99” whereby he built a plinth for a Garrard 301 and discovered that sometimes “flat is good”. I can totally relate and agree with this. I experienced it for myself:

“I'm especially proud that, even without taking special pains to keep my plywood sheets from warping—I did, after all, clamp them in free air, and not against a known level surface—my completed 301 plinth is perfectly flat. And that's a good thing, because literally none of the accessory feet and isolation products I've tried so far sounds quite as good as when my plinth simply rests directly on the very solid Box Furniture stand beneath it.” - Art Dudley

I do quite a bit of listening on my 401 because I spend more time in my basement, and, because it sounds so good!

Cheers.
 
Thanks for such a great writeup. You inspire me to put my rebuilt 401 back into rotation. But, I'll need to build a new plinth for a 12" arm.
 
I love the design of the 401. For my money, it's among the top couple of turntables ever made for visual design.
 
FumBle FuMble, Damn. Jealous fingers just can't type.

I've got one and really like it, but it doesn't look like that - yet - I hope. I did manage to get a 50Hz strobe under it.
 
Great lesson in patience here and a fabulous outcome. The time frame on this project is simply astronomical and would have made me insane.

I do have one question, how's the motor handling being enclosed heat wise?
 
Great lesson in patience here and a fabulous outcome. The time frame on this project is simply astronomical and would have made me insane.

I do have one question, how's the motor handling being enclosed heat wise?

Thanks.

I've been running the table for nine months now. It's used quite a bit on the weekends (7am-7pm), no issues with heat to speak of.
 
For the tonearm, I am using an SME M2-12R. This is truly one remarkable tonearm, extremely user-friendly, easy to set up and a pleasure to work with:

IMG_3742_zps5byaplqp.jpg


IMG_3737_zpsz57bl4gq.jpg


IMG_3734_zpslwntwwmd.jpg


It sounds awesome mated with a Clearaudio Aurum Classics cartridge. I have tried a couple of cartridges but so far the Clearaudio Aurum Classics seems to be a really good match. The search is still on, I'm hoping to find a MC that will be compatible and sound sweet. But for now, this combo is ace!

IMG_3728_zpsmoxnlqow.jpg


Project complete. Not too shabby.

IMG_3584_zpsc7fba2d1.jpg


I experimented with sorbothane hemispheres for feet, but found the sound became lighter, more ghostly, more airy. It had lost its authority, the bass became somewhat thinner. Didn't like it. I removed the sorbothane pads and everything just fell into place. Yes!

I had read an article written by Art Dudley in stereophile.com “Listening #99” whereby he built a plinth for a Garrard 301 and discovered that sometimes “flat is good”. I can totally relate and agree with this. I experienced it for myself:

“I'm especially proud that, even without taking special pains to keep my plywood sheets from warping—I did, after all, clamp them in free air, and not against a known level surface—my completed 301 plinth is perfectly flat. And that's a good thing, because literally none of the accessory feet and isolation products I've tried so far sounds quite as good as when my plinth simply rests directly on the very solid Box Furniture stand beneath it.” - Art Dudley

I do quite a bit of listening on my 401 because I spend more time in my basement, and, because it sounds so good!

Cheers.

Really Nice!! and thank you for the info, cant wait to try this
 
Back
Top Bottom