• The move to the new server is done. There are some software and database maintenance updates in process. This has us passing the hat around to help out. We appreciate any donations. Seriously, even a dollar helps. The payment page may be found here - https://www.audiokarma.org/support.html

NIKKO NR-819 right channel massive noise

cartagena99

New Member
NIKKO NR-819 right channel massive noise

I bought my Nikko NR 819 at Crazy Eddie's in New Jersey in 1978(it worked up until last year). I joined the US Navy in 1980 and learned electronics, but now it's 2025.

I saw the fantastic thread about this issue: https://audiokarma.org/forums/index...jor-static-and-pops-need-help-to-fix.1040467/

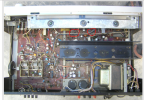
I also saw the very kind user here who sells the replacement transistors. I have the service manual, but I can't locate where on the board are the legacy 2sa798 transistors to be replaced.

"amp uses 2SA798 dual PNP on the front end" This refers to the FM tuner, I assume... Don't wanna get into an analog lecture/lesson, I used to know this stuff cold, back in the day. Computers kinda came along and took up the last 40 years of my career. LOL

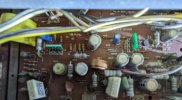
new-0.jpg


Can somebody help and show me where the transistors are(the ones to be replaced)?

TIA
 
Register to hide this ad
which makes perfect sense being that the right output is complete noise regardless of input and left channel works perfectly on all sources.

(everything is simple once figured out....:))
 
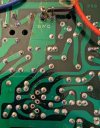
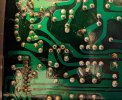
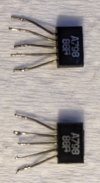
I finally got around to replacing the old transistors with the modern IC solution, suggested here and purchased from eBay. After taking the unit apart, I was unable to remove the amp board, due to the output power transistors mounted to a large folded metal heat shield and everything seems connected to each other so, I only had access to the land on the bottom, but getting at the transistors from the top of the unit was difficult, especially when it came time to install the replacements and match up all 5 wires/legs. After removing the old pair(I replaced both Q701 and Q702). I used a hemostat I had lying around. It made all the difference trying to get the new mini IC board with it's 5 legs into the 5 holes on the circuit board for each amp. It was not clear which of the solder pits to unsolder, but the bottom of the board did have very light labels, saying "B1 and B2" which were most helpful!

I carefully unsoldered the old(bad) transistors, I reamed out the holes just a little bit with a large paper clip and installed the replacement IC boards from eBay. I did not need to drill out any holes to make them bigger, just a little reaming with the paperclip and solder iron to make penetration easier.

I bent the 5 wires on each IC to conform with the pattern of holes on the amp board and used my hemostats to gentle inset the IC board from the top. It was hardly fun, but with patience, it did not take long. I soldered them back in and clipped the excess wires with cutting pliers. I tested the unit and it worked perfectly! I had already cleaned all the pots with DeOxIT F5, so the controls were silent, no static nor pops.

My Nikko NR-819 works just like the day I bought it back in 1978. Major thanks for the wonderful people here who helped me. I'm posting this update to help anybody who needs to do the same. Here are some helpful pictures:
 
4.jpg


View from the top. After replacement IC mini-boards have been installed. Note the bright green color and note which direction the chip faces.

Anybody with a solder sucker and iron and some patience and TLC can do this.
 
Back
Top Bottom