• The move to the new server is done. There are some software and database maintenance updates in process. This has us passing the hat around to help out. We appreciate any donations. Seriously, even a dollar helps. The payment page may be found here - https://www.audiokarma.org/support.html

Starting To Dive Into an SX-1250

69sixpackbee

Well-Known Member
Okay,
so I am starting to troubleshoot my newest acquisition to my hoard. This SX-1250 is a bit rough but has potential.

I plugged it in and I get lamps on at the faceplate and I hear the auxiliary outlet relay click in but that's it. I popped off the bottom and I notice that fuse FU1 and FU2 are blown. The 60V from the Xformer is there. I put two new 1A fuses in and they pop right away. I saw a bit of smoke from somewhere in or around R3 or R4 but not sure. So, I have nothing to lose at this point. Put a couple more in to try to see the source of the smoke and same-same but I cannot locate the trouble. Put a third set of 1A fuses and they are okay now but still nothing so something else let loose.

What are the trouble-prone areas in these monsters?

I am going to pull the PS board out and start ringing it out.

Are these unit notorious for blowing output transistors?

Thanx,
Bud
 
Register to hide this ad
looks like max damage is done now after all them fuses ..
mtf will be along soon with lists of replacement components to get it singing again ..
 
I knew this was going to be a project but at least the boards are accessible. Unlike my Marantz 4400
I figured it would need some help anyway that is why I got it fairly cheap.
I love projects anyway and this one is a perfect candidate.


Sent from my iPhone using Tapatalk
 
start researching 1250 threads, pay attention to the AWR106 power supply regulator (stabilizer) rebuilds, that's what you need. Replace all the transistors, all diodes (except d7 and d8 hi current rectifiers), the two trim pots and all the electrolytic capacitors. Check each and every resistor by lifting one lead and then reading it's resistance.

popping those fuses on the 107 board is a strong indicator of AWR106 problems, BUT be sure the AWR107 (fuse) board has +85v on pin 9 and -87v on pin 10.

I believe I list the AWR107 board's parts too, it would be a good idea to put new electrolytic caps, diodes and 10 ohm 2 watt resistors on it as well.

BUT first step - do you have the hi res service manual? If not, download it... it's 64 meg...
read it, study it, at least LOOK at every page. you need it to identify boards (AWR106 etc) and components (q1, c17 and so forth)
 
I'm ahead of you....at least with the hi-res manual :) I already got it in a 3-ring binder. I've spent the better part of yesterday and today reading alot of the resurrection, redo, etc. posts. Thishttp://www.audiokarma.org/forums/showthread.php?t=225933 is a good one too. I've been reading a lot of stuff!!
This place is the best, I'll tell ya. I back-burnered the re-do of my Marantz 4400 until I get this one up and running. This 1250 is exponentially more tech-friendly than the latter mentioned..that is for sure!

Thanx!
 
Well,
I've finished tearing it apart and now the fun begins. For now I've left the flat amp , equalizer amp, etc boards in place. I'm concentrating on the power stuff first. Got a list ready to order, Thanx to all of you that have thoroughly documented this receiver!
I found resistor R3 was fried on the AWR-107 power supply board. That was the source of the smoke.
Visually, things look pretty good but I am just going to start swapping components anyway.
I have a good grasp on what I need to do and how to proceed so I will keep you all apprised of my progress.
Now I am debating whether to make a DBT or use my variac when I go to fire this bad boy up.

Gonna test the outputs when I pull them from the heat sink. I am going to bead blast it and repaint it and then it will look like it should
Overall after cleaning this up a bit it is pretty damn nice. I think I will put a small abrasive pad on my Dremel to clean up all of the RCA connectors on the back as they are pretty tarnished.
I just love the ease of accessibility of this thing!

Bud


Sent from my iPhone using Tapatalk
 
1. I use a shield when polishing rca shells
2. do various boards in one fell swoop, otherwise bad transistors or parts could set you back further, safest, quickest and inexpensive: use new Q's, D's, C(lytics) and a few R's of low values that could be heat/current stressed.
3. r3 is a result, not a cause
4. DBT saves output transistors, variacs cannot - I HAVE BOTH... a HUGE variac. USE DBT unless outputs are REMOVED:
5. be aware the power transistor collectors are always connected to the big caps, even if the amp board transistor connectors are pulled from the board, also the board will be partially depowered when those transistor connectors are pulled, SO with the drivers providing the dc feedback, you can pull the power transistors from their sockets, insulate the sockets and connect the transistor to board connectors to operate/troubleshoot the amp WITHOUT ANY LOAD and without a DBT. It is still possible to pop the driver transistors if the idle current circuit opens up, SO - USE NEW TRIMPOTS on the amp boards and be super careful about the stv-xh thermal diode connections to the heat sinks.

I am interested in your stripping/painting of the heat sinks, I have an ugly duckling 1250 that needs similar attention.

also I am an old MOPAR B and RB big blocker from wayy back, although I am currently driving an A block (and keeping the lean burn system purring along). A former gearhead. so I know what a 69 6 pack super bee is. I had a 73 400 thermoquad and later a 69 383 10.5:1 driving an 8 3/4 rear end with 3.23:1 gearing (car started life as a 2.71:1 iiac) that would RUN.... Suspension was super stock springs in rear to keep axle under control and stiffer torsion bars in front for the ride. Did it all myself.
 
Last edited:
A restoration whiz AND a Mopar man!
Now we're really getting somewhere.
I could go on for hours on THAT subject but I will limit it to a few words and keep this post in track. Suffice to say my 69-1/2 A12 Bee has been with me since '84. I did ALL work on mine--inclusive of paint and body. ALL mechanical aspects. Not one hand other than my own has worked on it. It is EXTENSIVELY modified yet dependable as hell. Kinda like this 1250 is going to be.
Thank you for taking the time to walk me through it.
From one resto-er to another. This means a lot. I will share my progress as I go and hopefully be able to she'd some light on others' endeavors as well

Bud
urunapag.jpg
2amu3uga.jpg
vuqu8ugy.jpg


Sent from my iPhone using Tapatalk
 
I shot it in 1985 with four coats of DuPont Imron. Back when you could get REAL paint.
The other one I picked up in '98 and stuck a rock on her finger. She only had two coats...one leather and the other denim. :)


Sent from my iPhone using Tapatalk
 
Sorry to say, former mopar wrench turner, sold my breakdown engine hoist and motor rotor engine stand about 15 years ago :tears:

449378879580BPF___Selected.jpg


789920779_640.jpg
 
Last edited:
That oughtta hold this 1250 just about right. Hey, maybe I can fabricate rotisserie to spin these monsters!
Easy to work on em' like that :)
 
I did,

I stand them up on end, on a lazy susan turntable. Use a couple of "feet" that bolt on where the bonnet mounts (4mm), that are wide enough to prevent any reasonably possible tipping.
 
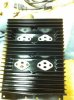
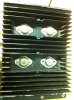
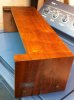
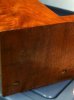
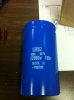
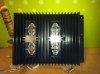
Well, been a little slow getting going on this beast. I finally got around to blasting and repainting the heat sinks. I got my BIG load of parts in from Mouser and the filter caps from Online Components. I got the OEM United Chemi-Con caps. I took some Elmer's Carpenters wood filler and went to town on the nicks in the veneer. I decided it wasn't bad enough for a re-do so I restained it and shot a few coats of urethane on them and rubbed them back out with 0000 wool. Pics to follow. Got my Hakko 808 and tips from Dave at B&D. Great guy! Nice friggin tool to say the least.!! Now I am going to start the parts swapping.

Hopefully in a few weeks Ill be done. I am trying to jostle my work load because I have a few more projects on the bench as well as a VMAX engine to finish putting back together so I can start riding to work again

I'll keep y'all posted
ImageUploadedByTapatalk1352161512.779217.jpgImageUploadedByTapatalk1352161532.328262.jpg


Sent from my iPhone using Tapatalk
 
ooooooohhhhhhh, THAT's pretty.....

What type of paint did you use, and did you strip it completely bare both sides?
 
I used Valspar Satin Black. I really just blasted the sides that are visible. I took all of the paint off and hit it again with a mist of Isopropanol. Kinda hard to get between the fins with a rattle can but it has a decent enough tip.
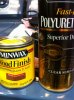
I used Minwax products for the cabinet. ImageUploadedByTapatalk1352180392.936588.jpgImageUploadedByTapatalk1352180407.571146.jpgImageUploadedByTapatalk1352180420.303695.jpg

Not looking for a total "Mint" resto on the thing but I am going for a total rebuild where it matters......inside!


Sent from my iPhone using Tapatalk
 
They're used to it... since they can bite rather nastily, it's a good thing. Their cases have a DIRECT connection to the BIG caps!!

I've had the WEIRDEST hankering to have the covers on the ugly duckling chrome plated!!!! :stupid:
 
Last edited:
Back
Top Bottom