

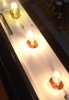
I recently accquired a near-mint TU-517 that had 3 of the 4 original 8V, 300mA Stanley bulbs blown. It's common knowledge that original spec replacements are no longer available, so I decided to see if different style, but similar spec lamps could be used.
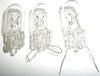
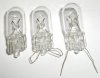
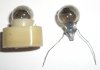
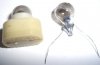
Luckily, I had some help from dgwojo who kindly sent me some 8V 250mA wedge-base lamps to see if they could be used. These replacement lamps are much taller than the original Stanleys, but can be made to fit using the following reversible mod. Be warned, it involves a bit of soldering.... :yes:
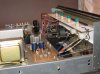
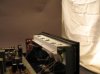
This mod can be applied to as many of the lamps as needed. I applied it to all 4 lamp positions. Although lamp clearance with the chassis lid is tight, the lid did not get particularly warm in my install, even after leaving the unit powered for some hours.
Please be careful following these instructions!!! If, after reading my notes below, and BEFORE you remove the chassis lid, you have any doubts as to what you are doing here, please get a qualified electrician to do this work. Don't risk damage to yourself or your tuner!!! :thmbsp:
1. Please unplug your tuner from the Mains/Line Supply and leave it for a few minutes before opening the lid. Nearby capacitors may still be charged, and may give you a shock if you are careless (but you'd have to be very careless doing this mod!!).
2. PLEASE UNPLUG YOUR TUNER FROM THE MAINS/LINE SUPPLY!
3. Open the lid by undoing the 4 crosshead screws on each side of the chassis, and carefully place out of harm's way.
4. Undo the 3 small crosshead screws that hold the white heatshield in place over the lamps.
5. Remove the blue lamp "shades", and the rubber Stanley lamp holders. This will leave 2 pcb lamp mounting-pins per lamp-position exposed.
6. This is a little tricky!! Get a short screwdriver and undo the 3 crosshead screws underneath the while lamp pcb mounting deck and release the lamp pcb. I needed a bit of manoeuvring here, and the screws were in pretty tight!! They will come loose, just make sure the screwdriver bit is the correct size, or you will risk stripping the screw heads..... :thumbsdn:
7. Make sure you're wearing your trousers/pants!!
8. Fire up the soldering iron.
9. Mark the position of and then desolder the black and white ac feed wires to the pcb.
10. Remove the pcb.
11. Desolder the lamp mounting-pins. Keep them in a safe place, should you wish to reverse this mod.
12. Take each of the new wedge lamps and straighten out the wire loops on the base.
13. Using fine cutters, cut the inboard wire where it is returned into the glass base. Don't cut the other wire, as you will ruin the lamp!! :scratch2: Straighten out the wires and trim off any stub left in the base where you used the cutters.
14. Mark and drill a 2mm mounting hole between each of the holes vacated by the lamp mounting-pins. The wedge lamp has a small glass "pip" on the base, and we are going to use the "pip" to hold the lamp in position and also reduce the overall height of the lamp installation. The small amount of height saved is pretty important here, IMHO.
15. Solder the new lamps in position.
16. Resolder the black and white ac feed wires to the pcb.
17. Refit the pcb and gently tighten all 3 screws from underneath. Nip the screws up - you may want to reverse this mod.
18. Refit the heatshield.
19. Refit the blue lamp "shades" UPSIDE DOWN. The bulb lugs on the inside of the shade, originally at the bottom, are designed to hold the shade in position on the Stanley bulb. Used inverted, the lugs will hold the new wedge bulb nicely in position vertically.
20. Replace the chassis lid. If you look carefully at the bulb clearance when you do this, you can see that there is about 5mm or so clearance from the bulb top to the chassis lid.
21. Power up and enjoy that vintage glow again!!!!
As I mentioned above, the chassis lid did not get particularly warm after performing this mod. I'm happy with the result, but I'm also looking into ac supplied LED solution as well (reverse paralleled LEDs to be precise, but need to do the reading!!).
Pics to follow......
Luckily, I had some help from dgwojo who kindly sent me some 8V 250mA wedge-base lamps to see if they could be used. These replacement lamps are much taller than the original Stanleys, but can be made to fit using the following reversible mod. Be warned, it involves a bit of soldering.... :yes:
This mod can be applied to as many of the lamps as needed. I applied it to all 4 lamp positions. Although lamp clearance with the chassis lid is tight, the lid did not get particularly warm in my install, even after leaving the unit powered for some hours.
Please be careful following these instructions!!! If, after reading my notes below, and BEFORE you remove the chassis lid, you have any doubts as to what you are doing here, please get a qualified electrician to do this work. Don't risk damage to yourself or your tuner!!! :thmbsp:
1. Please unplug your tuner from the Mains/Line Supply and leave it for a few minutes before opening the lid. Nearby capacitors may still be charged, and may give you a shock if you are careless (but you'd have to be very careless doing this mod!!).
2. PLEASE UNPLUG YOUR TUNER FROM THE MAINS/LINE SUPPLY!
3. Open the lid by undoing the 4 crosshead screws on each side of the chassis, and carefully place out of harm's way.
4. Undo the 3 small crosshead screws that hold the white heatshield in place over the lamps.
5. Remove the blue lamp "shades", and the rubber Stanley lamp holders. This will leave 2 pcb lamp mounting-pins per lamp-position exposed.
6. This is a little tricky!! Get a short screwdriver and undo the 3 crosshead screws underneath the while lamp pcb mounting deck and release the lamp pcb. I needed a bit of manoeuvring here, and the screws were in pretty tight!! They will come loose, just make sure the screwdriver bit is the correct size, or you will risk stripping the screw heads..... :thumbsdn:
7. Make sure you're wearing your trousers/pants!!
8. Fire up the soldering iron.
9. Mark the position of and then desolder the black and white ac feed wires to the pcb.
10. Remove the pcb.
11. Desolder the lamp mounting-pins. Keep them in a safe place, should you wish to reverse this mod.
12. Take each of the new wedge lamps and straighten out the wire loops on the base.
13. Using fine cutters, cut the inboard wire where it is returned into the glass base. Don't cut the other wire, as you will ruin the lamp!! :scratch2: Straighten out the wires and trim off any stub left in the base where you used the cutters.
14. Mark and drill a 2mm mounting hole between each of the holes vacated by the lamp mounting-pins. The wedge lamp has a small glass "pip" on the base, and we are going to use the "pip" to hold the lamp in position and also reduce the overall height of the lamp installation. The small amount of height saved is pretty important here, IMHO.
15. Solder the new lamps in position.
16. Resolder the black and white ac feed wires to the pcb.
17. Refit the pcb and gently tighten all 3 screws from underneath. Nip the screws up - you may want to reverse this mod.
18. Refit the heatshield.
19. Refit the blue lamp "shades" UPSIDE DOWN. The bulb lugs on the inside of the shade, originally at the bottom, are designed to hold the shade in position on the Stanley bulb. Used inverted, the lugs will hold the new wedge bulb nicely in position vertically.
20. Replace the chassis lid. If you look carefully at the bulb clearance when you do this, you can see that there is about 5mm or so clearance from the bulb top to the chassis lid.
21. Power up and enjoy that vintage glow again!!!!
As I mentioned above, the chassis lid did not get particularly warm after performing this mod. I'm happy with the result, but I'm also looking into ac supplied LED solution as well (reverse paralleled LEDs to be precise, but need to do the reading!!).
Pics to follow......








 I will be doing the lamps on my TU-717 soon. I have the lamps from dgwojo and plan to get to work one of these weekends.