• The move to the new server is done. There are some software and database maintenance updates in process. This has us passing the hat around to help out. We appreciate any donations. Seriously, even a dollar helps. The payment page may be found here - https://www.audiokarma.org/support.html

Broken Shaft Repair

blhagstrom

Mad Scientist, fixer.
Subscriber
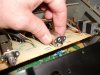
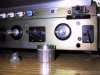
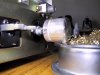
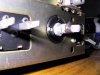
I thought I'd share my broken shaft repair with you. This is the volume pot on an Akai aa-1150. Basically, I needed to extend the shaft. There was enough shaft remaining to get some grip. Since the shafts are about 1/4 inch, a drill type grinding wheel mount was a great starting point. After actually measuring the remaining shaft, I drilled out the threads on the mount with a 15/64 bit. 1/4 is a little too big. I wanted a tight fit. It took some custom sanding with emery cloth to get things fitted. I cut the broken shaft off clean to get enough room so the new part could be placed back far enough to hide behind the face place. I cut the mount off on both ends to get the right length. I drilled and tapped a hole to use for a set screw. It took a little fitting to get the knob onto the shaft. Some filing and emery to get it tight. Once I had the part built enough to get it mounted, I had to do a lot of "shrinking" to get the new part to clear the face plate. There is a lot less room than it first appeared. I finally had to go with a real set screw and flatten the shaft and round the whole thing a lot to get clearance on the face plate. Even then, the face had to be "set" right to clear (The face screws are in slots so that was handy). Turned out OK. The knob I had to work with is less than best so it may get an update later but the mount is solid. Oh, the grinding wheel cost me $3 at the hardware store. Took me about 2-3 hours to get this done. I do have a lot of handy tools. Drill press, files, drill bits, taps, screws, etc...

picture.php

picture.php

picture.php

picture.php

picture.php

picture.php

picture.php
 
Register to hide this ad
That's a pretty slick fix. Usually if I have that much left of the original shaft to work with I find a sleeve that's the right ID and use that and JB Weld to attach a new shaft end. Especially if I have the original broken end to work with.
 
Very clever ideas from both of you. I currently have an Eico HF-85 with no volume pot, and that design uses a fairly long shaft. The closest part in my pile is about 1/2" too short. Now I have some ideas on extending it.
 
Nice job.
I usually drill a hole down the center of the old shaft and then screw in the new - using something like thread lock to hold it. Aluminum is pretty easy to work with.
DH
 
Plan B

Nice job.
I usually drill a hole down the center of the old shaft and then screw in the new - using something like thread lock to hold it. Aluminum is pretty easy to work with.
DH

Yup, I thought of that. Then I wondered if I could drill straight enough. I also think this shaft is steel.
 
Last edited:
Most control shafts that break are aluminum. That's why they break. It's really difficult to drill a straight hole down the center of the shaft. Kudos to the man who can do it! :thmbsp:
 
Slotted

I posted this in the Pioneer forum but wanted to put it here for a wider audience.
I just picked up a Pioneer SX-5580 (a euro model blackfaced SX-1050) which had a busted main bass control shaft. To repair it I filed down the existing nub and slotted it with some small files. Then I took a shaft from a parts unit and filed it to fit the slot. It is a tight fit. Then I used JB Weld to hold it in place.
YMMV
JimB


attachment.php


attachment.php
 
I did what Dr Audio did. At first was skeptical it would work -- the JB Weld part -- but that stuff's wicked strong. What I wanted to do is disassemble an old spare control and scavange the shaft, disassemble the unit-in-repair's control and maybe attach the new shaft at a different point....too much work. Nice job on yours!
 
the JB Weld part -- but that stuff's wicked strong
JB Weld is still holding the oil dipstick tube in my Pontiac 400 block 12 years now No leaking nor loosening, subjected to oil and heat..:thmbsp: Can use it to seal cracked heads and is easily machineable.
 
Last edited:
what do you do when...

the shaft is broken off so far in that there is no mean in it like this: DSCF0714 (Medium).jpg

This is akai am-95 reference master amp. I would love to have it up and running any ideas please?

Marko
 
drilling

Drilling and tapping like the only option on that one, IF there is enough "meat" left to do that.

Controls are the hardest things to locate. Sometimes they show up on ebay but the price can be "stupid".
 
Plenty of great ideas submitted here to fix the shaft on my broken volume pot of an SX-950. Thanks.
 
Yes but this shaft was broken off flush, so it is kind of different to your situation bagsy, but thanks anyway.
 
My shaft was broken right at the back end of the shaft split.
I dug out a nut with the right ID and about 1/8" thick.
I had to grind off the corners of the nut to clear the hole in the face plate.
I used JB Weld Kwik. Only 4 hrs. to cure.
All I got left to do is smooth out the high spots in the JB Weld with a dremel tool and I'm back in audio bizzzzz!
 

Attachments

  • SX-950-1.jpg
    SX-950-1.jpg
    84.4 KB · Views: 169
  • SX-950-2.jpg
    SX-950-2.jpg
    84 KB · Views: 161
  • SX-950-3.jpg
    SX-950-3.jpg
    72.5 KB · Views: 168
  • SX-950-4.jpg
    SX-950-4.jpg
    76.8 KB · Views: 172
Back
Top Bottom