• The move to the new server is done. There are some software and database maintenance updates in process. This has us passing the hat around to help out. We appreciate any donations. Seriously, even a dollar helps. The payment page may be found here - https://www.audiokarma.org/support.html

Holy Guacamole - an SX-5580 for (cough) $20!

w1jim

I can fix it but good...
Subscriber
Holy Guacamole - an SX-5580

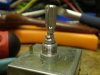
Only significant problem is that the main bass pot has a snapped shaft. Someone tried to epoxy it back on but we all know how futile that can be.

Wired it up to my disposable test speakers and - viola - everything works, not even a bad bulb.

Next is figure out how to fix (ha!) or replace the busted pot, do a recapping and general cleaning then adjust the amp settings.

The black anodized face has some scratches - time to break out the black sharpie.

I'm psyched!

JimB


attachment.php
 

Attachments

  • 5580c.JPG
    5580c.JPG
    115.2 KB · Views: 464
  • 5580b.JPG
    5580b.JPG
    116.2 KB · Views: 124
  • 5580a.JPG
    5580a.JPG
    116.6 KB · Views: 122
Last edited:
Register to hide this ad
Zackly!
Except after a night of serious drinking (and missing a finger).
 
Thats a great score there on that SX-5580!

Hope you get it running good and everything!
 
The black anodized face has some scratches - time to break out the black sharpie.

I'm psyched!

JimB

Nice score! I'd be psyched too.

I've never been pleased with the results I've achieved with a Sharpie. It ends up looking sort of purple. I've had better luck with Testors model enamel. I get gloss black and semi-gloss black and mix it to the correct luster. Then I apply it very carefully with a really small brush, sometimes removing all but a few bristles to get an even smaller size.

John
 
Only significant problem is that the main bass pot has a snapped shaft. Someone tried to epoxy it back on but we all know how futile that can be.

Take the pot apart to remove the shaft. Figure out exactly where the two pieces line up and mark them. Center punch the shaft ends and drill a hole in each about the size of a brad or fine finish nail while in a vice. Cut said pin to length, Test for fit, remove all traces of oil and epoxy in place. Let cure for 24 hrs and reassemble.

This is a major pain in the ass but can be done .. don't ask how I know.:smoke:

Regards, Steve
 
Well that's a good concept except that the end of the shaft is "split"; it has two half circles with a gap in between them. I'd have to pin each of the separate pieces but they're to damn small!
I'll see if I can remove the entire shaft and replace it with one from another pot or I'll just replace the entire pot with one from a parts unit. It's reated at 102K ohms; a 100K should do just fine.
Stay tooned!
 
If there is any of the old pot shaft left, buy another pot (any value) with a long shaft. cut the shaft off of the new pot, and join it to the old pot shaft, using a lap joint, using JB-Weld. cut the resulting shaft to the right length, bevel and slot it, and you're good to go.

Enjoy,
Rich P
 
Only significant problem is that the main bass pot has a snapped shaft. Someone tried to epoxy it back on but we all know how futile that can be.

Wired it up to my disposable test speakers and - viola - everything works, not even a bad bulb.

Next is figure out how to fix (ha!) or replace the busted pot, do a recapping and general cleaning then adjust the amp settings.

The black anodized face has some scratches - time to break out the black sharpie.

I'm psyched!

JimB

That is a great looking receiver. Should clean up really well. Best bet would be to get another pot from another donor unit as you mentioned, and be done with it. As far as the black touchup, I use a product from a company Birchwood/Casey. Ordered a gloss black, and it works really well.


http://birchwoodcasey.scaleslive.co...tegoryID=735f46a9-9bec-4146-bb28-3ad829ba4b04

Product on the 2nd page. The touchup pens. "Super Black"
 
Most gun shops sell small bottles of Aluma-Black, which is designed to touch up damaged black anodizing.
 
that is really cool, w1jim! You got a helluva deal! I've got a 5590 and they are sure purty machines. :yes:

I was wondering if the toriodal trannies are any different from the single volt models since they have to accomodate the dual voltage line in?
 
Last edited:
If there is any of the old pot shaft left, buy another pot (any value) with a long shaft. cut the shaft off of the new pot, and join it to the old pot shaft, using a lap joint, using JB-Weld. cut the resulting shaft to the right length, bevel and slot it, and you're good to go.

Kind of like this? We'll see how it is once it hardens in the AM.
(Thanks!)

EW- thanks for the advice on the Aluma-Black. Now I'll just have to find a gun shop. Massachusetts isn't what you would call a gun friendly state.

JimB

attachment.php


attachment.php
 

Attachments

  • Shaft2.jpg
    Shaft2.jpg
    84.7 KB · Views: 816
  • Shaft1.jpg
    Shaft1.jpg
    82.4 KB · Views: 818
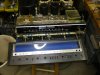
Oh, I've been doing a little recapping today too. I suspect this receiver had an easy life (electrically) as there were no cracks or signs of heat. The sleeves over the power resistors all looked new.
JimB
 

Attachments

  • P6221822.JPG
    P6221822.JPG
    97.3 KB · Views: 133
  • P6221819.JPG
    P6221819.JPG
    115 KB · Views: 68
  • P6221818.JPG
    P6221818.JPG
    114.4 KB · Views: 69
  • P6221820.JPG
    P6221820.JPG
    113.2 KB · Views: 77
Cover those two wood looking tops of the side panels with black and that will finish the look. Pioneer Black/Silver® is the best looking Pioneer gear.
 
EW- thanks for the advice on the Aluma-Black. Now I'll just have to find a gun shop. Massachusetts isn't what you would call a gun friendly state.

Just do a search for Birchwood Casey black anodizing.
You should be able to find it online no with trouble.

Regards, Steve
 
The restoration is proceeding nicely. Recapped all of the "front" boards today. Replaced all of the tantalum caps with electrolytics except for 4 - 1.0 mfd parts which I replaced with film caps. I have the knobs, push buttons and face plate soaking in soapy water and tomorrow I'll address the tuner PCB.
I've been using primarily Nichicon FG and Muse series parts.

attachment.php


attachment.php
 

Attachments

  • TC1.JPG
    TC1.JPG
    113.7 KB · Views: 189
  • TC2.jpg
    TC2.jpg
    130.5 KB · Views: 187
A bit more colorful than those drab brown UPW's, black UKL's, UVP's and UEP's...
 
Oh, but what about those lovely orange OEM "LR" series caps? And the blue tants? ...Delicious!

This unit was so clean and had no evidence of wear from heat that it's likely that the caps were in fact all in good shape. Except for those nasty tantalums.

Probably just my OCRD (Obsessive Capacitor Replacement Disorder) at play here.

Do you think there would be any audible improvement to be gained by replacing the phono section transistors?

JimB
 
re:phono transistors - probably not.

no known troublemakers there....

i don't want to fuel your ocd, but for discussion's sake, the transistors are:

512-KSA992FBU (ln)to-92 ecb 120v .05a .5w 100mhz 150-800hfe $0.05 ea
512-KSC1845UBU (ln)to-92 ecb 120v .05a .5w 100mhz 150-800hfe $0.05 ea

but it's a tossup as to whether or not the 2SA841S's or the KSA992's are quieter.
 
Last edited:
Back
Top Bottom