• The move to the new server is done. There are some software and database maintenance updates in process. This has us passing the hat around to help out. We appreciate any donations. Seriously, even a dollar helps. The payment page may be found here - https://www.audiokarma.org/support.html

Tricky solder job really could use tips please

Kahoona

Super Member
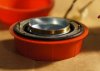
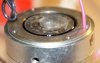
The tweeter comes from a B&W Matrix speaker. I tried this once before and destroyed a diaphragm so I want to do this one by the book and I need help! The red and black wires need to be soldered to the short tinned pieces connected to the coil wire. The resulting solder joint needs to fit back into the hole that the wires extend out of. There will need to be some tubing slid over the solder joints before the diaphragm is installed to keep them from shorting out against the tweeter body. I thought shrink tube but only using heat on the other end from the coil to keep from softening it. It sounds easier than it is for me. The only solder joint I can conceive of would be a but joint with no mechanical connection at all. Wrong as that is that is how the originals were done. I found that if I was careful with the heat the joint would come apart when trying to assemble the tweeter. I tried several times and eventually got enough heat on to it to unsolder the coil wires. After that it was all downhill and I could not even get the coil wires to solder to the feeder wires. Did you ever have a day when solder ceased to flow. period? Eventually the coil got too shopworn to use. Should I solder hot and fast or turn the heat down and let it take time. Should I tin the wore and try to do it with the solder that is on it? I had no flux last time. I bought some this time. Please check the pics. I am nervous here! I cannot send it in to them. I did try. The wire harness is not original and they do not have replacement harnesses and so will only replace the tweeter for $360.00. Nothing special about the harness. It is automotive.
 

Attachments

  • DSC04717.jpg
    DSC04717.jpg
    58.7 KB · Views: 215
  • DSC04718.jpg
    DSC04718.jpg
    40.4 KB · Views: 177
  • DSC04719.jpg
    DSC04719.jpg
    40.5 KB · Views: 151
  • DSC04720.jpg
    DSC04720.jpg
    50.5 KB · Views: 183
Register to hide this ad
Wow...what a nightmare.

Your first approach was the right one, but you need a dab of paste flux to help the solder flow properly (and quickly). You can also use shrink wrap an a heat gun, but apply heat from the heat gun for only a second or two at a time and them allow it all to cool off to prevent damaging the diaphragm and coil, then hit it again with the heat.

Patience should pay off here.

Q: Is that the smallest wire you can use?
 
Wow...what a nightmare.

Your first approach was the right one, but you need a dab of paste flux to help the solder flow properly (and quickly). You can also use shrink wrap an a heat gun, but apply heat from the heat gun for only a second or two at a time and them allow it all to cool off to prevent damaging the diaphragm and coil, then hit it again with the heat.

Patience should pay off here.

Q: Is that the smallest wire you can use?

It is the size that B&W used but I had thought about going smaller. The wires snake through an inner chamber and do not follow a straight line so I would need to solder on a thinner gauge and shrink tube it to insulate it. Would that help much? How small?
Interesting side note. When this was at the B&W shop I was told that (aside from not being able to supply a new wire harness) that it was impossible to fish the new wires through the tweeter body without taking it apart and that they could not put it back together if they did. This is the official B&W main US office's shop! When they returned it to me I fished the wires through in ten minutes flat. I did send them an offer to do it for them for a nominal fee if they wanted. No reply.:D
 
You might try a crimp-on (butt splice) connection. It would be rigid, insulated, and slip right into the holes the red and black wires come out. I don't know what size your wires are but the red crimp-on connectors will handle 22-18 gauge wire. No chance of heat damage!
 
You might try a crimp-on (butt splice) connection. It would be rigid, insulated, and slip right into the holes the red and black wires come out. I don't know what size your wires are but the red crimp-on connectors will handle 22-18 gauge wire. No chance of heat damage!

The resulting solder joint needs to fit back into the hole that the wires extend out of.
I believe the butt-splice will be much too large to fit through the hole.

As far as the wire size, it isn't too important (tweeter here). I'd use a small gauge solid core wire to make things easy (I have some stripped from Cat5 cable that I'd probably try).
 
I believe the butt-splice will be much too large to fit through the hole.

As far as the wire size, it isn't too important (tweeter here). I'd use a small gauge solid core wire to make things easy (I have some stripped from Cat5 cable that I'd probably try).

solid core:thmbsp:
 
Don't forget the flux. It'll allow the solder to flow evenly and quickly. Carefully wipe up the excess flux after soldering with a Q-Tip and acetone.
 
Small crimps

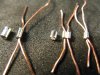
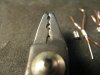
This is an example of jewelry/bead making #2 crimps with 26ga. copper wire. The small crimping tool (about $8) makes it possible to make the first crimp and a second rounding crimp. Finished crimp is less than 2mm diameter.

The first picture is (L to R): Larger type crimp with example; smaller crimp #2 , first crimp and second rounding crimp. Alternate way is rounding (oval), followed by crimp on each side. Second picture is Crimp tool.

Got tool & crimps at large craft store "Michaels.com" in NJ. WalMart sells the crimps ($2.00), but the tool is the key to get maximum pressure without destroying the crimp.
See: http://www.michaels.com/Crimper-Too...oducts-beads-tools-cuttersandcrimpers&start=3

I saw this type of connection in my 10" cabinet lights, that are no longer sold by Home Depot. They have five 120VAC wire lead miniature bulbs crimped in series.
 

Attachments

  • CrimpWire26 002.jpg
    CrimpWire26 002.jpg
    101.6 KB · Views: 100
  • CrimpWire26 003.jpg
    CrimpWire26 003.jpg
    63.2 KB · Views: 53
Last edited:
Just had an idea - instead of heat shrink you might also try Nomex, aka housewrap. It is thin, stong, and can be rolled into a tube around the joint.
 
Another vote for the crimp sleeves (Tyco has some very small brass crimps). Consider PTFE tubing as insulation.
 
Hmmm
Thanks guys. I am going to check out the crimp tool. I suspect that it might still be too big once the 1mm piece on the coil is crimped to the 22 ga solid wire and some kind of insulation wrapped. It has to be substantial since the sharp edged crimp must be pushed into the 2mm hole in the conductive stainless body and will tend to abrade the wrap. I will check the kapton. B&W used some tubing that was not shrink and was slightly thinner. It was just sliped over the joint as it was pushed in. I am surprised that it did not slide back and cause a short. I'll send for samples. Now that you mention it a carefull application of liquid electrical tape might serve also. Lots of options! I will experiment with the old one first and see what works. Mostly I am concerned with getting the but solder right and holding well enough to get back into the small hole. I think the smaller solid wire may do the trick! I am waiting for the flux to show up and I got a 3rd hand. I'll report back
Thanks
 
Two quick thoughts on the matter.

When I am unable to use shrink tube, I use liquid electrical tape. The jar comes with a brush, but it's huge. I buy cheap fine artist brushes at a craft store and use that to apply thin coats.

Could the holes the wires fit through be enlarged (reamed out) without any negative consequence? Big enough to make it a tad easier to work on?

Best of luck!
 
Oh jeez. I somehow missed your mention of the liquid electrical tape.

Sounds like you guys are already ahead of me!
 
Gotcha. Echowars. How about the legs from some small capacitor?

Thedelihaus- I love your signature quote. It is one of the best lines in an unbelievably great movie.
 
Back
Top Bottom