• The move to the new server is done. There are some software and database maintenance updates in process. This has us passing the hat around to help out. We appreciate any donations. Seriously, even a dollar helps. The payment page may be found here - https://www.audiokarma.org/support.html

Auto Return Mechanism on PL-55X

jazzzman

Active Member
Auto Return Mechanism on PL-55X refurb log

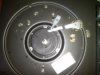
My purchase of a PL-55X came through. :bigok: If I have done this correctly, a picture of the table should be attached (maybe in duplicate, I seem to be having a problem with the attachment function). Unfortunately no dust cover.

I tried it last night with the dl-110 I use on my PL-610 and it sounds great! I plan to change the electrolytic capacitors (there appear to be only 3, which are in the power supply circuit) clean the return mechanism and get a decent cartridge.

The table seems to have the same problem I have seen other PL-55 owners have noticed: On albums that have a narrower run out, for the last 5 to 10 rotations on the last track the tonearm bumps a little and a clicking sound can be heard. From reviewing the SM, it appears there is a lever attached to the tonearm that, at the end of an album, strikes an aluminum plate that pushes a plastic arm in a position to be struck by a pin on the underside of the platter. The pin causes the plastic arm to "kick out" which releases a plate that ultimately causes the tonearm to rise and return to the arm rest. My guess is that the pin bumps the plastic arm, but that the arm is not moving enough to release the plate for the several rotations. If the arm bounces back, I would expect it to cause the aluminum plate to rebound and strike the lever attached to the tonearm, causing the tonearm to bump. I suspect the clicking sound is the pin striking the plastic arm.

I hope that cleaning the correct parts will permit the plastic arm to move sufficiently on the first "bump" by the pin to activate the mechanism. One poster has suggested using isopropyl alcohol to clean the return mechanism. Does anyone disagree? Should I use a q-tip to apply it? Any other thoughts?
Thanks in advance.
****I have expanded this thread to include a log of my refurb efforts****
 

Attachments

  • IMG00212-20120421-1216.jpg
    IMG00212-20120421-1216.jpg
    43.5 KB · Views: 96
Last edited:
Register to hide this ad
alcohol is usually pretty good for cleaning that stuff. It doesn't harm the plastic, but it removes dirt and grease and whatever else has gotten in there. Also, something I've experienced with other auto-return mechanisms is that the table needs to be fairly close to level. If its off too much one way or the other, it will either auto-return on its own when it should not, or it won't always trip the return.
 
Thanks gadget73.

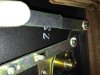
One other thought. There is a screw on the tonearm lever that can be adjusted to alter when the lever will strike the aluminum plate. (See attached page from SM) Although I plan on cleaning the mechanism in any event, I am wondering if I adjust the screw so the initial collision with the pin does not occur until a bit later will it just delay the tonearm bounce (til after the music has ended) but still bounce or, given the speed with which the tonearm moves in the runout groove, might it solve the problem altogether? I have to think that it is not good for the plastic arm to be subjected to multiple collisions with the pin each time the album is ending. Does anyone have any thoughts on this?
 

Attachments

First roadblocks

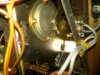
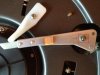
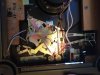
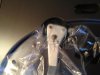
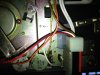
I opened up the bottom to take a look at the mechanism. Unfortunately, it is not clear how to get access to the parts that I assume are sticking. In the third picture (it may or may not come out as the third picture, but it is the third picture I attached to this message) the bright object is the aluminum plate. You can see the adjusting screw at the end of the lever. The first picture shows the plastic lever. As you can see from the second picture, a large plate blocks view of the mechanism. Does anyone have any suggestions?

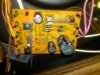
I also do not see how to loosen the circuit board to change the capacitors. The last picture shows the board attached. Is there some trick to this?

Thanks again.
 

Attachments

  • IMG00215-20120421-1644.jpg
    IMG00215-20120421-1644.jpg
    46.8 KB · Views: 131
  • IMG00216-20120421-1644.jpg
    IMG00216-20120421-1644.jpg
    56.9 KB · Views: 149
  • IMG00217-20120421-1645.jpg
    IMG00217-20120421-1645.jpg
    64 KB · Views: 135
  • IMG00218-20120421-1645.jpg
    IMG00218-20120421-1645.jpg
    65.8 KB · Views: 122
Jazzzman, you`v got a full acess! Look, you just need a pliers or tweezers. There is 2 or 3 plastic "mushroom" that holds a board, sorry for my english, don`t know how to say:) You need to push on the plastic hat and pull the edge of the board up . Then you`ll push on second hat and do the same. Just look at this black plastic things and youl`ll understand how they works! I wish, you`ll understand my poor explanation:)
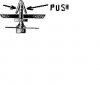
this pic will help you:
tmpC3-1.jpg
 
I`ll try to help you with autoreturn...I`v got the same problem, but was lazy to fix it:) Try to open my PL soon and look what it could be
 
Thanks again Paul. Your explanation was quite clear. :thmbsp: At least that part of my refurbishment looks like it should be pretty easy.
:)
Any help you can give me on the auto return would also be much appreciated.
Thanks again.
 
Step 1 - removing the auto return mechanism

I have been studying the service manual and visually inspecting the mechanism to try and figure out how to remove it. To get the mechanism out, it looks like I have to remove 3 e-clips, 3 anchoring screws, the tonearm wire lug terminal, and two switches (one for power, the other for muting). One of the e-clips is on the top side, connecting the plastic arm to a post and the other two are part of the control lever assembly. See photos below.

I am thinking of removing the e-clips first, then the lug terminal (I am concerned about the fragile tonearm wires, so I thought I could try and get that out of the way), and the mute switch. Next the three anchoring screws. It appears that I will have to flip the assembly over to get the power switch off.

If anyone thinks I am going about this the wrong way, please let me know.
Thanks, I'll keep posting as I progress.
 

Attachments

  • PL-55X control levers.jpg
    PL-55X control levers.jpg
    92.2 KB · Views: 132
  • PL-55X - plastic arm.jpg
    PL-55X - plastic arm.jpg
    75.3 KB · Views: 125
  • corrected auto return.jpg
    corrected auto return.jpg
    73.7 KB · Views: 139
Last edited:
step 1 continued

I removed the e-clips first. As shown in the picture, I put a baggie around the part with the e-clip to catch it in the event it slipped through my fingers.

You can see in the second picture the gook on the post that the plastic arm was attached to. At first I thought maybe this was my problem, then I realized that the plastic arm rotates with this post, not around it.

Next, I removed the single screw holding the mute switch on, then the three anchor screws, followed by the lug with the tonearm wires. No problems, so far.

To get the power switch off, I needed to slide the mechanism out from under the pick up lever (which is the lever attached to the tonearm that moves with the tonearm and eventually trips the return mechanism when its screw strikes the aluminimum plate show in the earlier post).

I slid the mechanism out, turned it over and removed the two screws holding the power swith to the plate, only to realize that the wire to the power switch is fastened to the mechanism with a clip that looks difficult to remove. I could just cut the clip with a razor blade, but I prefer not to. So it looks like I will have to clean the mechanism while it is still tethered to the turntable.***(edit - I ended up removing the clip, it was very easy to remove using a miniature wrench on the small nut
visible in photo 5 below)***
My originial plan was to place the mechanism in a container with alcohol or some degreaser, swirl it around a bit and then take it out and dry it off. I might still be able to do that, but I will have to be careful with the attached wires and power switch. ***(I elected not to submerge the mechanism after learning that some grease is sealed into the mechanism on the other side of the plate with the red washers visible in photo 5. I did not want the alcohol to get inside the sealed part of the mechanism)***

Another thought would be to try and clean it with alcohol without submerging it. The problem with that is that the rotational points of the moving parts are not easy to reach without disassembling the mechanism, which I do not want to do.

Otherwise, I could spray the mechanism with an electrical contact cleaner. Any thoughts on the efficacy of that approach?

Also, I am tempted to clean the grease from the tonearm lift plunger, but I do not know what type of grease (or where to get it) to put back on it. (See last photo.) The lifter was working very well before and I do not want to goof it up. Any thoughts on what grease to use or how much of it?

Finally, assuming I can clean the mechanism, I am also tempted to put some kind of lubricant on the pivots of the rotating parts. Maybe something light like sewing machine oil. Any thoughts out there?

Thanks
 

Attachments

  • removing e-clip from plastic arm.jpg
    removing e-clip from plastic arm.jpg
    51 KB · Views: 112
  • post under plastic arm.jpg
    post under plastic arm.jpg
    56.6 KB · Views: 102
  • control levers after e-clips removed.jpg
    control levers after e-clips removed.jpg
    69.5 KB · Views: 101
  • power switch screws.jpg
    power switch screws.jpg
    102.6 KB · Views: 99
  • power switch wire fastener.jpg
    power switch wire fastener.jpg
    57.7 KB · Views: 98
  • arm lift plunger.jpg
    arm lift plunger.jpg
    58.8 KB · Views: 113
Last edited:
Step 1 still continued - Grease and Lube question

From what I have been able to dig up from the forum, it appears that silicone grease is frequently used in the lifting mechanism of vintage turntables. The required grease is pretty thick to help damp the arm as it descends. From what I can tell, the grease should be about 500,000 centipoise.

I have been unable to find any grease of that viscosity. It seems that silicone grease grade 2 is readily available, but apparently grade 2 is the viscosity of peanut butter and apparently peanut butter has centipoise of about 250,000. Since my lifter was ascending and descending without problems, I think I may not open it up and therefore will not need the thick grease to replace that that may be in the cylinder.

However, there also is grease outside the cylinder on the plunger that goes up and down based on the position of the cam plate. As shown in the picture, the cam plate had some grease on it. I now have cleaned the plate off and am considering cleaning the grease off the top (or bottom, depending on your point of view) of the plunger.

My question is, if I do that would silicone grade 2 grease placed on the cam plate and the top of the plunger be good enough? Has anyone regreased that kind of part in a turntable?

Thanks again for any thoughts.
 

Attachments

  • tonearm lifter cam.jpg
    tonearm lifter cam.jpg
    55.3 KB · Views: 89
Hello! Wow, nice job and explanation how to remove it. I can`t fix the same problem yet, but I think the problem is in an old grease. This answer is in the manual. I`ll try to find 500,000 silicone oil for that. Thanks for nice tutorial!
 
Thank you, Balifly. I had been looking like crazy for that kind of grease, to no avail. That link is excellent. :D:D.

Do you know if the same grease goes on the outside of the plunger and the cam or does one use a thinner grease for that?

Thanks again.

Studio7, I am glad you are enjoying my odyssey. I will continue to report until I have this table in tip top shape.
 
Do you know if the same grease goes on the outside of the plunger and the cam or does one use a thinner grease for that?

Use the same silicone oil through out, (inside and outside).

Hope you will have your machine up and spinning soon!:music:
 
Jazzzman,
Here's how to clean the old grease off your auto return mechanism without disassembling it. First, dribble isopropyl alcohol onto the pivot points to flush out old grease. Then, cut a file card into narrow strips (say, 1/4" to 1/2" wide--depending upon the space available) then soak the end of a strip in isopropyl alcohol and slide it under the appropriate part of the mechanism. Slide it in and out and back and forth. Repeat with new strips until they collect no more grease. In a turntable or changer, usually, the auto return trip lever or levers are dry--no lubricants on them at all. If they get grease or oil on them, it causes them to stick.
Rick
 
Thanks Rick, that sounds like a great way to get into the pivot points. Do you put some kind of light lubricant (I was thinking sewing machine oil) on the pivot points after cleaning the grease off?
 
The end of record trip lever is never lubricated. It must be dry. Everything else gets lubed. In general, oil for parts that pivot and grease for parts that slide against other parts. I like SuperLube Synthetic grease with PTFE (Teflon). Unlike the original grease, it will never dry out or get stiff and gummy. For oil, fully synthetic motor oil works great. It is available in various viscosities from thin to thick. BUT, you must remove all the old dried up grease and oil first.
And yes, sewing machine oil will work but is certainly not the preferred oil. It will eventually gum up.
Rick
 
Thanks Rick. It looks like I should avoid the sewing machine oil. With respect to the synthetic motor oil, am I right that I should get the thinnest available?
 
Step 2 - Cleaning, Greasing, and Oiling

I have isolated the part that seems to be causing the problem. The first photo shows two white plastic L-shaped arms that pivot on the same post. The black arrow is pointing at a little notch in the lower arm. When you move the control lever to the "down (on)" position the metal plates are pushed to rotate anti-clockwise. The rotation of the plates stretches the spring, which tries to return the plates to their earlier position. A flange on the metal plate catches in the notch (see the yellow arrow in the second photo) which prevents the plate from rotating clockwise. In essence, the mechanism is cocked.

When the pin on the underside of the platter stikes the plastic arm shown in the first photo in post # 4 the arm is pushed further anti-clockwise. A pin on the bottom of the plastic arm pushes both of the white plastic L-shaped arms which rotate about their pivot in a clockwise direction. That rotation pulls the notch away from the flange thereby releasing the metal plate. The spring turns the metal plate in a clockwise direction which causes the return of the tonearm and shutoff of the motor.

The problem is that it takes a bit of a push to get the white plastic L-shaped lever to release the flange. I have cleaned the pivot point and the lever moves freely, but still it does not release the flange as easily as it probably should. Should I try putting any grease on the point where the flange and lever intersect? The only other thing I can think of is perhaps lessening the tension in the spring a little, so the flange will not be pushing against the lever quite as hard (there is a screw for tightening or loosening the spring, ostensibly to change the speed of the return). Of course, that will slow down the entire return process, but I do not think that would be a problem.

Any thoughts on whether it is a good or bad idea to put grease on the spot described above?

As always, thanks a lot for your thoughts.
 

Attachments

  • PL-55X notch.jpg
    PL-55X notch.jpg
    69.5 KB · Views: 147
  • PL-55X flange in notch.jpg
    PL-55X flange in notch.jpg
    72.7 KB · Views: 136
Last edited:
Back
Top Bottom