jazzzman
Active Member
Slight Detour: Step 3 replacing speed switch
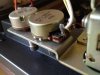
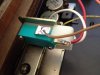
Now is a good time to work on the speed switch and pots. It only takes two screws to remove the speed board that holds both the pots and the switch. (See first photo, which shows the board after I removed it.) After pulling the speed board out, I used de-oxit on the pots. My first plan was to replace the pots, but I was having a difficult time finding a pot that could still use the same knobs as the original one. The pots have a pretty good sized opening, so it is easy to get the de-oxit inside. See photo 2.
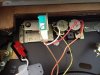
Next, I replaced the switch using a standard microswitch from partsexpress. As you can see in photo three, the connections are a bit different (the original has common in the middle, the new switch has common on the bottom (or top, depending on your POV)). Also the plastic cover does not cover the common prong. I soldered the wires without worrying about the fit with the cover and ended up having to cut part of the plastic cover, as you can see in photo 3. If you are careful and plan ahead, you might be able to avoid that.
The switch is wired so that the 33 rpm wire goes to the NO (normally open) terminal and the 45 rpm wire goes to the NC (normally closed) terminal. When you depress the 33 rpm button, the switch closes which connects the 33 rpm wire and disconnects the 45 rpm wire; when you depress the 45 rpm button, the switch opens which connects the 45 rpm wire and disconnects the 33 rpm wire.
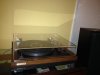
Photo 4 shows the assembly after I reinserted it.
Easily done, now back to the oiling and greasing!
Now is a good time to work on the speed switch and pots. It only takes two screws to remove the speed board that holds both the pots and the switch. (See first photo, which shows the board after I removed it.) After pulling the speed board out, I used de-oxit on the pots. My first plan was to replace the pots, but I was having a difficult time finding a pot that could still use the same knobs as the original one. The pots have a pretty good sized opening, so it is easy to get the de-oxit inside. See photo 2.
Next, I replaced the switch using a standard microswitch from partsexpress. As you can see in photo three, the connections are a bit different (the original has common in the middle, the new switch has common on the bottom (or top, depending on your POV)). Also the plastic cover does not cover the common prong. I soldered the wires without worrying about the fit with the cover and ended up having to cut part of the plastic cover, as you can see in photo 3. If you are careful and plan ahead, you might be able to avoid that.
The switch is wired so that the 33 rpm wire goes to the NO (normally open) terminal and the 45 rpm wire goes to the NC (normally closed) terminal. When you depress the 33 rpm button, the switch closes which connects the 33 rpm wire and disconnects the 45 rpm wire; when you depress the 45 rpm button, the switch opens which connects the 45 rpm wire and disconnects the 33 rpm wire.
Photo 4 shows the assembly after I reinserted it.
Easily done, now back to the oiling and greasing!