• The move to the new server is done. There are some software and database maintenance updates in process. This has us passing the hat around to help out. We appreciate any donations. Seriously, even a dollar helps. The payment page may be found here - https://www.audiokarma.org/support.html

2275 filter cap replacement

Jamie Starr

Active Member
Hello: I am restoring a 2275 and am getting ready to change filter caps. After doing some research here, it seems the preferred method is to attach a round terminal to the snap-in capacitor.

My question is how do you attach the terminal to the capacitor? Crimp it? Solder? Or both. Any help appreciated. Thanks.
 
Register to hide this ad
Thanks guys for all the insight. This was the last thing I did as part of restoration, and it turns out it was the hardest part of the job for me. The reason was that I did not have the proper tip on my solder iron. The fine pencil tip that I used to solder the caps on the boards, was not big enough for the job to get rid of all the solder on the big filter cap lugs. I guess you live and learn. I went back with a nice heavy solder tip and job much easier. Thanks again for your help.

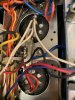
Oh. I decided to use a “spade”” male connector for the two terminals that went into buss bar. Just thought it would be easier to make a solder connection with a flat terminal.
 
Last edited:
I rarely 'unsolder' wires, I just cut them close and re-strip.
Good idea on the spade connectors, what did you use for these? A part number and source would be appreciated.

Tom
 
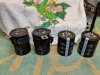
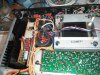
one thing to watch out for is that the original caps are 50 mm, but the holes are punched for 40 mm caps! the clamps hold the caps off the chassis a bit so the hot can does not short out to ground. so if you upgrade to 80 volt 15,000 like i did, horror of horrors, the caps are too long and can not pass thru the chassis to take up distance! so i had to nibble the chassis and install some sleeving around the hole made from coax insulation that gets slit and glued on. the solder lugs are nice, you can modify the buss bar to fit over the lugs,

1.jpg
2.jpg
 
Last edited:
one thing to watch out for is that the original caps are 50 mm, but the holes are punched for 40 mm caps! the clamps hold the caps off the chassis a bit so the hot can does not short out to ground. so if you upgrade to 80 volt 15,000 like i did, horror of horrors, the caps are too long and can not pass thru the chassis to take up distance! so i had to nibble the chassis and install some sleeving around the hole made from coax insulation that gets slit and glued on. the solder lugs are nice, you can modify the buss bar to fit over the lugs,

View attachment 1601073
View attachment 1601077

Hmmm. On my 2275, I did not notice that issue. I used the upgraded caps (15,000 80V), and they seemed to go in fine with no issues. Thanks for info.
 
They were nothing special Tom. Just plain old male solderless/crimp type connectors. The ones common at most home improvement stores. I took off the insulation prior to install.

https://www.parts-express.com/1-4-(22-18)-male-disconnect-crimp-terminal-red-50-pcs--095-262

Thanks!
The 2.2µF film caps are to allow high frequencies to 'bypass' the impedance of the large capacitors's caused by inductance. Hence the name 'bypass capacitors'.
They are said to improve 'transient response' such as cymbal crashes in the music.

Tom
 
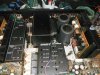
here is a shot of another 2275 with the undersized cap holes, they probably wanted to use up some 2270 inventory or something.
caps.jpg
 
Back
Top Bottom