• The move to the new server is done. There are some software and database maintenance updates in process. This has us passing the hat around to help out. We appreciate any donations. Seriously, even a dollar helps. The payment page may be found here - https://www.audiokarma.org/support.html

2285B just about done 95%

So today I put on the 400 watt 8 ohm loads and let it rip. Full volume, well, 3/4 ish.. right where it started to clip. 15 mins the loads were a bit over 200 degrees.. the final amp transistors were 140 degrees measuring on the case. According to my calcs based on the since wave, I was pushing right about 90 watts a channel. The new replacement transistors seem to work very well. I wouldn't want to bake it like that for a long time but the smoke test went well :D All the replacement caps and diodes etc held up nicely.

Nice, everything working as (or better) than expected. Nice work there.
 
To test an amp at the point where the maximum power is dissipated in the output transistors, I believe that the peak to peak output voltage (across a dummy load resistor) should be about 63% of the power supply voltage.
So, for a 2285B with rails at plus and minus 53V, that's 106V times 0.63 = 66.8V peak to peak, or about 23VRMS (sine wave test signal).

Tom
 
To test an amp at the point where the maximum power is dissipated in the output transistors, I believe that the peak to peak output voltage (across a dummy load resistor) should be about 63% of the power supply voltage.
So, for a 2285B with rails at plus and minus 53V, that's 106V times 0.63 = 66.8V peak to peak, or about 23VRMS (sine wave test signal).

Tom
Simple math. Now let me pick up my brain from off the floor.
Great explanation. I now know I've been doing it incorrectly... doh!
 
Since it's still on the bench ( I need to take the tone board out AGAIN to apply the DeOxit shield this week), I fired it up and had it hooked to a pair of bookend speakers 8ohm and set to a loud but not ear bleeding volume for the room. Like what you would do for a favorite album. Temps on the transistors were 95 degrees. Ambient was 81 when I started. The diode arrays were 105 degrees. The filter caps were 84 degrees. This is measured with a a laser spot temp reader. Like what you would use for AC or working around a metal shop. It's fairly accurate if you get close enough :)

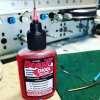
@catrafter Your suggestion with the DeOxit red was spot on. I got some of the liquid and used it on the volume control and the switch bank. The cool thing about it on the switches, it that can be applied right at the opening of the shaft and the cutter shell and then it wicks into the switch. The real test will be the balance control :)
IMG_3583.jpg
 
@catrafter Your suggestion with the DeOxit red was spot on. I got some of the liquid and used it on the volume control and the switch bank. The cool thing about it on the switches, it that can be applied right at the opening of the shaft and the cutter shell and then it wicks into the switch. The real test will be the balance control :)
View attachment 1170394

I always follow up with FaderLube on pots . Before spraying anything into a rotary pot, be sure to turn the pot 'shaft up' so you don't wash the damping grease out of the bushing.

Tom
 
^
Shaft up when applying deoxit...

First time I’ve heard this advice. Seems to be a fairly critical step that should be added to the idiot’s guide.

You don’t have to worry about washing out the damping grease with the OP’s D100 though right?
 
Last edited:
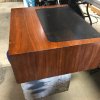
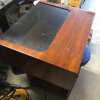
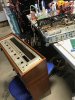
So my 2285B came with a wooden cabinet. In fact, it's an OEM job. The screw holes for the top metal shield were never threaded. But the cabinet is pretty battered up and I was going to redo the veneer. But I got a nice deal on a different cabinet that looked pretty good. I got it today and the pictures made it look better than what it was but it's not bad. Someone had tried to stain it at some point. And it has a ding on the lower right corner in the front where someone used plastic wood to fill it.
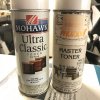
I took the same approach I use with my vintage pre 40s radios. A wash with mineral spirits and 0000 steel wood lifted the dirt and a fair bit of the "stain" off. Then I went over it with lacquer thinner and 0000 steel wool again.. but in even strokes. The thinner will soften and let the steel wood work as a strainer/leveler of whatever is left of the OEM finish. Let it dry and give a quick buff with 0000 steel again. Then it's a light coat of walnut toner to even out the wood. Then a blast of satin clear lacquer and let it dry a bit. 0000 steel wool again and one coat of wax and buff. I'll do a second tomorrow. I think I will leave the ding with the plastic wood. Its not too ugly and it works with the patina I've saved on the case. It's 40 years old.. it's allowed some dings :D God willing, I will finish everything off this weekend and get the chassis into the case.
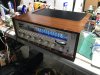
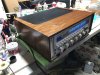
IMG_3586.jpg IMG_3590.jpg IMG_3591.jpg IMG_3592.jpg IMG_3593.jpg IMG_3596.jpg
 
We are done. Mostly :). I found out the case is specific to the 2285b. The replacement case only had four holes but the 2285b had 6.

I will finish cleaning the connections and call it done. I may redrill the holes or I may swap it the correct case after I veneer the OEM case and repair it.

But it sounds really good :)
 

Attachments

  • D9BDBE26-78E9-4A11-B3A6-33A0705F74D3.jpeg
    D9BDBE26-78E9-4A11-B3A6-33A0705F74D3.jpeg
    104.8 KB · Views: 25
  • EC38598D-5262-40E5-BB57-994CC02A4AA2.jpeg
    EC38598D-5262-40E5-BB57-994CC02A4AA2.jpeg
    107 KB · Views: 24
Back
Top Bottom