• The move to the new server is done. There are some software and database maintenance updates in process. This has us passing the hat around to help out. We appreciate any donations. Seriously, even a dollar helps. The payment page may be found here - https://www.audiokarma.org/support.html

9090 Amp Section Fiasco

wparker1934

New Member
Hey all, I'm about at wits end with my 9090.
The set is coming out of protection mode, but the sound is incredibly distorted on each channel and not reaching higher volume levels-- on both the speakers and headphones.

All of the power transistors are new equivalents. The driver board, to my knowledge, is in good shape. All fuse resistors have been removed, and I even went as far as to replace all transistors on the board (except for the T07-08 cans). Messing with the bias and DC offsets has no effect on cleaning up the sound.

Just now I turned up the volume a good bit, and then R45 and R46 on the driver board started to smoke. At this point, I have no idea where the problem is. Would the driver board be the culprit for the distortion? Could something on the protector circuit board be messing with the sound before it finally hits the speakers?

Any help would be MUCH appreciated.
 
Register to hide this ad
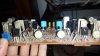
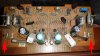
Since you changed out all the transistors I would make sure they were installed correctly, the amp board is removable from the unit and easy to work on, can you post a few good pictures of your work front and back. Also what did you use for replacements.
 
Check fuses F07- F10 with a multimeter. Make sure the fuse clips have a nice snug grip on the fuses and the solder connections for the clips are not cracked.
 
Make sure your replacement transistors have the same pin out as the originals. Also, don't trust the silkscreen on the board to identify the correct polarity of the caps or the pin locations for transistors.

- Pete
 
The fuse clips check out, and all the replacement transistors/caps seem to be in the right place.

Here's the replacement lineup if that helps:
T13-14: TIP32CG
T11-12: MJE15030
T09-10: C3503
T05-06: A1381
T01-04: KSC1845

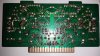
I've attached some pics of the board, too. The back is a bit messy--lots of lifted tracings and whatnot.
 

Attachments

  • 20160611_113831.jpg
    20160611_113831.jpg
    103 KB · Views: 37
  • 20160611_114021.jpg
    20160611_114021.jpg
    67.8 KB · Views: 37
  • 20160611_114101.jpg
    20160611_114101.jpg
    73.5 KB · Views: 36
  • 20160611_152257.jpg
    20160611_152257.jpg
    107.5 KB · Views: 40
Get you some 99.8% tech alcohol and a tooth brush and clean off the burnt rosin on those solder joints. I can't see anything. :eek:
 
This thread is a good example of why you don't want to replace parts randomly. It exponentially increases the odds of introducing new problems and makes it much harder to figure out what is going on.

Get some 97 to 99% isopropyl alcohol from a drugstore and a small bristle paint brush to clean the board. Very carefully look at all your solder joints. Use a magnifying glass and a bright light. Look to see if there are any solder bridges between traces. Look to see if any of the traces are broken. Verify that the transistors are installed correctly and that the pin out of the new transistors are the same as the old ones. Don't rely on the markings on the board to correctly identify the transistor connections.

Also verify that the correct value resistors were used to replace the fuse resistors. Don't rely on the service manual for the resistor values. There were several variations to this board used during the production of the 9090 and these variations are not in the service manual.

The fuses on that board need to be covered. Sansui used vinyl tubing as an insulator over the fuses.

This would be a good time to make a dim bulb tester. Don't power the receiver up again without one.

- Pete
 
The switch is optional. Get a 60 and 100 watt bulbs. Start with the 60. The point of this tool is to limit current flow through the amp. It also gives a visual indication of the amount of current flow. With a healthy amp the bulb will flair bright as the capacitors charge and then dim to almost nothing. If it stays bright, somethings wrong.

- Pete
 
Back
Top Bottom