• The move to the new server is done. There are some software and database maintenance updates in process. This has us passing the hat around to help out. We appreciate any donations. Seriously, even a dollar helps. The payment page may be found here - https://www.audiokarma.org/support.html

A Step By Step Dust Cover Renewal Easy *PICS*

zenarrrow

Well-Known Member
I will make this as simple as I can. First off had 2 very marred covers, I had been waiting for a while and did research here on the forum of how to do it. I work night shifts and had a few slow shifts so I had time to bring them with me. I decided on using Novus plastic Products.


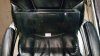
Here is a picture of the Marantz dust cover, as you can see multiple scratches from years of storage in a garage I suspect. Also there are several very deep scratches.
20171022_182841.jpeg


First I got an All purpose Hand Pad
20171022_183008.jpeg


Aluminum Oxide Grain Very Fine, I suppose one could use very fine sand paper or substitute a pad. 20171022_233641.jpeg

Then I attached the pad to a small Pad Sander, the nice thing about this is in fact the sander has a soft pad on the bottom to begin with. Once on I was able to put some heavy pressure and work the entire top surface of the cover. Please take note to tape over the emblem as any pressure while sanding I am sure would destroy it.
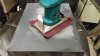
20171022_200718.jpeg
Here is a Pic of the top of the cover after nuetralizing or scouring off all scratches to make them all equal in depth. I would use glass cleaner to wipe away any debris and dust. 20171022_200746(1).jpeg
Again being a pad grinder it just vibrates does not spin so I was able to use force and not worry about "burning" the cover.
Next time to bust out the Novus.20171022_201342.jpeg
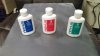
Started off with Novus 3 Deep Scratch remover20171022_202038.jpeg
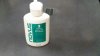
I applied the Novus just with a soft clean rag. No need to really rub it in to hard using elbow grease. Just apply the Polish evenly.20171022_202308(1).jpeg
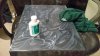
Then I removed the hand pad from the pad grinder and put on a clean fresh rag. And went to work using the pad grinder in circular motion, again applying plenty of pressure.20171022_201409.jpeg
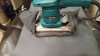
After a thorough buffing with #3 Then I used #2 finer scratch remover. Again applying the cleaner then using the pad grinder to buffer it out.
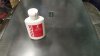
20171022_202650.jpeg

As you can see the cover after #3 is still very dull but not quite as hazy as it was before. I can only add 10 photo's so I will finish with photo's in a reply. Please note emblem is taped. Also, a very deep defect in the dust cover off to the right of the tape.

I repeated these steps a few times to finally get the cover to a fine gloss.
 
Register to hide this ad
Next Step, again apply #2 just with a clean rag, no need to really put too much elbow grease into it, I let the pad sander do the work. Until finally after a few repeated steps I use the #1 Novus Cleaner and Shine and again use the pad grinder in a circular motion to really buff out the top of the cover.20171022_203148.jpeg

At this point I flip the cover over and want to remove any scratches from the inside. I do not use the pad grinder in here but apply just #2 Novus and really rub it out. I do not want to use the grinder in here as through its vibrations it could get into the sides of the cover causing damage inadvertently. So plain old elbow grease.
20171022_205855.jpeg
After that I use #1 to buff out and polish the inside.

Now to the sides of the cover, for the most part the sides were fairly in good shape so I just used #1 to clean and polish. If a bad spot existed I used #2 and buffed it out by hand.
20171022_212053.jpeg


Next step, I removed the tape to expose the finished product.

20171022_213137.jpeg

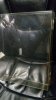
Here are some pics of the end product. Again, with the right tools I started this project at 8 pm and was finished by 9:30 pm.

Sorry for the grainy photo's did the best I could.
20171022_213216.jpeg
20171022_213201.jpeg
I had a lot of very deep scratches in this cover and after all this if they were too deep to begin with well all of them could not be fully removed. But it is 95% better than it was at the beginning of the process.
 
For real, I knew the covers were in pretty bad shape. So I figured I couldn't cause more damage, so I tried just some "industrial applications". The threads I read warned about buffers spinning too fast and burning an area.

I stopped down at the hardware to look for applications for my drill. That seemed worse, like I could do serious damage to one local spot.

I found that pad sander. At work all we had was 250 grit paper. So I grabbed that fine pad. I was able to sand the top down evenly.

Then polishing just applied pressure in a circular motion. I think they turned out better than pocket aces. I will post some pics of the first one I did. When I am at my PC
 
Is that the 2 ounce Novus kit? How much did you use out of the bottles and is there enough for a few more dust covers?
 
The little 2 oz kits did 2 covers with most of it ised. I will have to buy a larger size. I still have like 3 more to do, as I am a hoarder. If I find a vintage tt at a garage sale I cannot not buy it.
 
Crazy thing is I was reading in another post about how long it was taking others to buff out a cover and all the steps it took.The second night I did one, I had it done in an hour and a half. And that was doing a couple of applications, and I wasn't worn out by waxing with my arms.

Albeit, I gained no marshal art skills, as no wax on wax off repetition was used.
 
Crazy thing is I was reading in another post about how long it was taking others to buff out a cover and all the steps it took.
First, you've done an amazing job. Your dust cover looks fabulous! Second... I've done that job many times before using only metal polish paste (AutoSol) and for the few first times I've only used elbow grease for the buffing. There aren't many steps. It's just open the tube cap, squeeze some on the dust cover and buff like there's no tomorrow. Then I got older and smarter and started to use a small Bosch random pattern mouse type buffer with a cloth to ease it on my poor joints. I'll try to find a picture of one of those projects later. The result is not much different than yours. Not too many steps in my way (Oh... you got to cap that polish tube when you're done too, but that's hardly a 'step').
 
Nice work!
I use automotive rubbing compound after the sanding and finish it off with automotive polishing compound. I find that using a buffing wheel with an electric drill motor speeds up the process.
 
First, you've done an amazing job. Your dust cover looks fabulous! Second... I've done that job many times before using only metal polish paste (AutoSol) and for the few first times I've only used elbow grease for the buffing. There aren't many steps. It's just open the tube cap, squeeze some on the dust cover and buff like there's no tomorrow. Then I got older and smarter and started to use a small Bosch random pattern mouse type buffer with a cloth to ease it on my poor joints. I'll try to find a picture of one of those projects later. The result is not much different than yours. Not too many steps in my way (Oh... you got to cap that polish tube when you're done too, but that's hardly a 'step').

You are right, not many steps, just didn't know how to state that. I would have done a hand polishing job on my cover if it were my only one and I did not want to take a chance of marring it up. But with like four to do and none of them being my main TT I took a chance and tried just "giving 'er hell". I won't lie, when I used that abrasive pad and it was all hazy, I was pretty taken back. Even after a few applications with the polishes it still needed more. That was the first night though. Second night, my confidence was high and I didn't fear anything could go wrong.
 
First cover before,
20171021_182326.jpeg 20171021_182331.jpeg

...and after.

20171021_215630.jpeg 20171021_215604.jpeg

Again this had some very deep scratches in it and they were not completely removed. But still a very nice finished project. If I were to sell them, I think this may up the value for these TT's.
 
Back
Top Bottom