• The move to the new server is done. There are some software and database maintenance updates in process. This has us passing the hat around to help out. We appreciate any donations. Seriously, even a dollar helps. The payment page may be found here - https://www.audiokarma.org/support.html

Acoustic Research AR18s // Terminal Replacement Help

chasepj

New Member
Hey there! Novice here, so apologies in advance if I'm missing something simple.

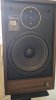
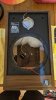
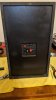
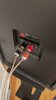
I recently picked up a pair of AR18s speakers in great shape, the only issue is that a red spring clip on one of the terminals is busted. It looks a replacement terminal would only cost me a few bucks, but I'm confused how I should even begin. How am I supposed to remove the terminal from the back of the cabinet if there aren't any screws to take out? Does it need to be pried off, do I need to remove the full back of the cabinet, or do I need to remove a driver and enter from the front? Pictures are attached, any and all help would be much appreciated. Thanks so much!

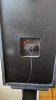
PXL_20200922_144008967.jpg PXL_20200922_144036983.jpg PXL_20200922_143921013.jpg
 
Register to hide this ad
Easiest solution is to drill out the rivets holding the clip assembly in, and replace with a bolt, washer and nut. I'd recommend going with 5-way binding posts rather than the spring clips you had before, and maybe do both speakers at the same time.
 
Thanks so much! This is exactly the info I was looking for, and I found some 5-way binding posts on Parts Express that look like they'll fit perfectly.

Is there anything I should be aware of when drilling out the rivets, other than using a small bit and going straight through? Also, I'm assuming I'll use the old rivet holes for my bolt/washer/nut assembly, but will I need to superglue the nuts to the inside of the cabinet? Once I've removed the spring clip assembly and wired in the new 5-way binding post, I will no longer have access to the inside of the cabinet, which means I won't have a way to hold the nut in place while screwing in the bolt. Alternatively, can I forgo the nut/bolt setup and superglue the whole assembly to the cabinet? Will that create a strong enough seal, if the old rivet holes get sealed up? Thanks in advance!
 
You need to remove the woofer to do this properly, and drill out the rivet from the inside. I'd recommend removing the tweeter at the same time to prevent any steel shavings from attaching to their magnets. The cabinet will be filled with either fiberfill or fiberglass, which will need to be removed as well (if you've never worked with fiberglass stuffing before, it will make your arms itchy unless you wear gloves and a long sleeved shirt, or you can just shower afterwards). None of this is difficult, and is part and parcel of working on loudspeakers. Place the fill in a plastic bag while you're working on the speaker. When you remove the drivers, before disconnecting the wires, note which wires connect to which terminals so you know how to reconnect everything. You may want to take a photo of the front of the cabinet with the drivers removed so you know how the fill is positioned when you put it back, but it's not that critical, as long as it doesn't press into the woofer cone.
 
Oh wow. Okay perfect, thank you for the step-by-step, I'll dive in this weekend after the new terminals arrive. I'll take lots of pictures and be sure to follow up if (when) things start to go haywire. And just to confirm, when I reinstall the drivers at the end of this, will I need to put in any new gaskets or seals? Or can I use the existing components, assuming everything is still in good shape?
 
You can reuse any gaskets. However...you didn't give any indication of your experience level. Chances are that these will need to be soldered. Will that be a problem? And if you're going to be opening up the speakers, you should give serious consideration to replacing the crossover capacitors at the same time (order everything from Parts Express at the same time to save on shipping); they're over 35 years old and probably way out of spec by this time.
 
Yeah, about that... my experience level could best be described as Extremely Beginner But Well-Read And Enthusiastic. I have a soldering kit that I'm just starting to get comfortable with, so I have a few other things to practice on before diving in headfirst. If I need to re-solder the connections at the terminal anyway, you're right that I might as well replace the capacitors.

I guess that brings me to my next question: it looks like the original caps are 50v 5μF bi-polar electrolytics, is it possible to replace them with 250v 5.1μF polypropylene caps? My understanding is that polypropylene caps are all non-/bi-polar anyways, and anything over 50v should work. But will putting in a 5.1μF vs. a 5μF be an issue, or are those close enough?
 
It will not make a significant difference. It will shift the crossover frequency downward by around 100hz.
 
Okay awesome, parts are ordered! Thank you again for all your help with this, I'm sure there will be more questions after I cross the point of no return this weekend. Either way, look forward to pictures when it's all complete!
 
Good news! I was able to drill out the rivets on both sets of speakers, bolted on new 5-way binding posts, and then soldered in new capacitors and rewired everything. Speakers sound amazing running through a Pioneer SX-636 receiver, and my confidence level is through the roof! Not bad for a first-time soldering project. Thanks again for all your advice here, I really appreciate your help and am excited to take on more stereo projects in the future!

PXL_20200926_045409735.jpg

PXL_20200926_042753876.jpg

PXL_20200926_062539681.jpg

PXL_20200926_064636828.jpg
 
Back
Top Bottom