• The move to the new server is done. There are some software and database maintenance updates in process. This has us passing the hat around to help out. We appreciate any donations. Seriously, even a dollar helps. The payment page may be found here - https://www.audiokarma.org/support.html

Acrylic Platforms

Ampslut

Member
About 6 months ago I put my equipment on bicycle tire tubes as a proof of concept for vibration control. It made a difference, though it was hard to quantify what it improved and what was worse. Overall was a slightly positive addition for about $40.

A couple months ago I started buying 2" thick offcuts of hardwood and attaching spikes to couple the platforms to the concrete under my carpet. I then use a smattering of Isoacoustic pucks (8 minis, 4 Indigo) and an ancient 3 piece ball bearing isolation product I got for cheap. I definitely noticed a difference. Put my amp, Step-down power transformer, Power Isolator, laptop, and DAC on various platforms, spiked or not spiked, with Isoacoustic pucks. Sound was tight and clear, though I did feel I noticed some bloat at certain frequencies, but the upside was the rest of the spectrum was very nice, a definite improvement.

Last week I decided to hunt down some acrylic as a proof of concept for a non-resonant material. Was looking to hear what the different wood platforms sounded like, and needed to hear the wood what the wood sounded like by eliminating it. (and still have the extra clarity that comes with vibration control) I found a local supplier that sells 4'x8' sheets, and can cut to size. I utilized the "offcut" strategy, where I purchased scraps cut to size at a discount for cash. Ended up with a 1/4" thick 18"x17" platform for under my amp, and a roughly 9"x8" piece that is a full inch thick. Total cost: $38USD. The first piece I inserted was the inch thick piece. I swapped out a slightly smaller piece of Macassar Ebony, and took 3 brass spikes off it and put them on the Acrylic. Then I put the step-down transformer on that platform. I wasn't expecting much of a difference, but it was immediately obvious that the Macassar was converting energy and outputting it somewhere in the high bass/low midrange region (sorry, my ear isn't experienced enough yet to put that frequency to a number). The result was more clarity throughout the frequency spectrum with at least one "boosted" frequency gone. I then put the 1/4" piece under my amp with less than obviously results, but good results. Finally there was enough room on the small platform to also put my DAC on. For clarity; My amp, step-down, and Dac are all resting on Isoacoutic isolation devices, which sit on Acrylic that is coupled to concrete under the carpet.

My assumption/fear was that even though Acrylic is a material known as non-resonant, it doesn't seem to be a popular material in the audiophile world, and there must be a reason. Well, I haven't figured out that reason. I thought it might make my system to sterile, but it isn't. It makes rhythms and subtle touches stand out, like a split second delay before striking a key is way more obvious because my brain is tracking the rhythm naturally without effort (or so I figure)

Next up is to purchase a full 4' x 8' piece of inch thick, or even 2' thick Acrylic and cut it into pieces for all my equipment. Cost for 32 square feet, 1 inch thick is about $560 USD, and I should have some left over to sell.

Anyone else have any experience in this area?
 
Register to hide this ad
Recording engineer Barry Diament is very much into the bicycle innertube isolation--basically, sandwiching a small (12 inch?) bicycle innertube, partially inflated, between two platforms. It does isolate components from seismic vibrations, yet I don't agree with his reasoning that speakers should be similarly isolated--I can picture an entire speaker moving back and forth (perhaps microscopically?) while it is operating, and that would only blur the sound. I've heard of Corian (or similar) being used for turntable platforms.

I don't fuss over it that much. My equipment rack is based on spikes, and uses wooden shelves supported on metal beams. My current turntable also has its own isolation. The speakers are similarly spiked to the concrete beneath the carpeting and padding. Works plenty good enough for me.
 
Barry Diament is where I was first introduced to the idea. Now I've taken it several steps further. I believe his blog post on the subjected was meant to inspire and provide a proof of concept for very little money. Now that I'm a believer, the statement "
Works plenty good enough for me." Is the exact opposite of how I feel. Barry certainly doesn't stop at bicycle tires. Nor am I. I also have speakers on soundanchor stands with spikes. Why not add some isolation to your coupling? If the coupling works for your platform, and isolation for TT, why not try some isolation for your Amp?
 
IMG_20200322_114216.jpg

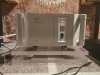
Here is the Acrylic platform I had made. Two pieces, 12" x 19.5" x 1". Bottom piece is coupled to the concrete under the carpet. Sandwiched this platform and the next are four Isoacoustic Orea Indigo isolation pucks, with a combined capacity of 28.8kg. I currently have the stock feet of the amplifier. I have some vintage ball bearing isolation devices that I tried using for lateral vibrations between the top platform and the amp, but wasn't entirely happy with the result. (They are currently under the Power Isolator where they work well). Also tried the Indigo pucks directly under the amp, with the ball bearing devices between the platforms, but again not to my liking. I feel that the ball bearing isolation devices gave my treble a bit of a shrill or just not quite natural sound. I will try with a better quality set, like Symposium Rollerblocks in the future.

IMG_20200322_114236.jpg

Chord Qutest DAC on 1" Cast Acrylic platform coupled to concrete. Not sure there is enough weight to really couple the spikes to the carpet, even if I stood on the platform before putting the DAC on the platform. Will upgrade to pointier, heavier brass spikes in the future to help with a better connection to the concrete. In between the platform and DAC are two Isoacoustic mini pucks.

IMG_20200322_114252.jpg

This older 1/4" piece of acrylic was the "proof of concept" piece I bought for $20 and originally put under my amp. When it sounded better than the 2" wooden platforms I own, I repurposed it under the power isolator. Coupled to concrete, with 3 ball bearing isolation devices between the acrylic and device.
IMG_20200322_115753.jpg

Lastly, same deal, 1" acrylic coupled to concrete, with laptop isolated with isoacoustic mini-pucks.


Total cost for these 1" platforms was $251 Canadian dollars. I purchased 4 SQ feet @ $52.50 a foot plus tax. The piece under the laptop was an offcut I purchased earlier for $30 as a 1" proof of concept. I then had the 4SQ feet cut into the two 12" x 19.5" pieces under the amp and three 4.5" x 8" pieces, one of which is under the DAC, one of which will also go under the DAC eventually, and the last is scrap.

So, How does it sound?

Pure, clean, even, balanced, focused. I instantly noticed the sound of the Wood disappeared. I had no idea what the wood sounded like, and I thought I liked the sound. Turns out the wood gave it a dull boomy hump that sounded like extra bass somewhere in the low region(my knowledge and experience isn't good enough to give you a frequency, sorry). After hearing the Acrylic, I realized I was listening to a coloration and didn't know what I was missing. If I were to give a single characteristic to the Acrylic, I would call it balanced. Balanced in that every frequency has equal and clean "weight" to it. No one piece of the spectrum is fighting for attention. Energy doesn't seem to be moved from one frequency to another. To my ear, there is a noticable lack of sonic coloration. Rhythms and soft touches flow unhindered into my brain. Im guessing this is because of a more natural attack and decay, but I am an amateur, so Im not really sure.

Next I will work on putting everything in my system on top of dual 1" acrylic platforms coupled to the floor. I will then add more coupling spikes and isolation devices to my hoarde and play around with them until Im happy.

The only thing not going on acrylic will be the speakers, which will get get some Isoacoustic GAIA III's on the carpet spike platform that is an add on.

TL;DR: Go buy some Acrylic. It's cheap, neutral, and nice sounding.
 
Last edited:
I would think Acrylic would be fine. Considering many Turntable manufacturers use it for bases, and armboards.

I modified my own "lowly" VPI HW-19jr, swapping the 1" thick MDF Plinth to 1" Solid Black Acrylic. With other mods done as well, the table took a large step forward. And weight went up as well considering I also added the VPI 10lb Stainless Steel Sub Chassis Plate underneath the Plinth. It all squeezed into the Wood Base perfectly using Herbies tall firm Tenderfeet, replacing the Junior's Sorbothane Puck Suspension

I have seen those who work with Acrylics do what is called "flame polishing" on the edges. This gives a beautiful finished crystal clear look.
 
I would think Acrylic would be fine. Considering many Turntable manufacturers use it for bases, and armboards.

I modified my own "lowly" VPI HW-19jr, swapping the 1" thick MDF Plinth to 1" Solid Black Acrylic. With other mods done as well, the table took a large step forward. And weight went up as well considering I also added the VPI 10lb Stainless Steel Sub Chassis Plate underneath the Plinth. It all squeezed into the Wood Base perfectly using Herbies tall firm Tenderfeet, replacing the Junior's Sorbothane Puck Suspension

I have seen those who work with Acrylics do what is called "flame polishing" on the edges. This gives a beautiful finished crystal clear look.

I'm looking for best, glad Ive hit "fine" at least :)

I'm posting this here hoping others can pitch in and save me a step or two on my journey.

Have you stopped at 1" acrylic or have you taken this to the next level yet?

The guy at the industrial plastic and paint supply shop mentioned the flame polish as well. Said I could get some sandpaper and sand the edges to preference and they would put a blowtorch to it for me. I do like the way it bends light and shows off the spikes and isolation. Will probably find some some sand paper and get the polish done..... Eventually.
 
I'm looking for best, glad Ive hit "fine" at least :)

I'm posting this here hoping others can pitch in and save me a step or two on my journey.

Have you stopped at 1" acrylic or have you taken this to the next level yet?

The guy at the industrial plastic and paint supply shop mentioned the flame polish as well. Said I could get some sandpaper and sand the edges to preference and they would put a blowtorch to it for me. I do like the way it bends light and shows off the spikes and isolation. Will probably find some some sand paper and get the polish done..... Eventually.


I had actually 2 VPI HW-19 Plinths Machined, another for a person who saw a post of mine some years back, and asked if I could help him and have such made for him.

While I didn't feel a need for the Flame Polishing because the edges are never seen once the acrylic sheet was dropped into the wood base, he chose it for himself.

The Acrylics Shop-Factory was in California, they did the outer Length-Width Dimensions precisely, and flame polished his piece, they were able to do this flame polishing and also left the protective peel off paper on both sides.

Once back to my machinist friend, who him and I were both living in New Mexico at the time, he was then able to route the underside of the Sheet for the Motor, drill the needed Holes for the Platter Bearing, and Arm and Tonearm Base.

It truly would've been interesting and gained knowledge had I been able to personally witness this flame polishing being done.
Maybe there's some vids or such on the web to observe how such is actually done?
 
Last edited:
View attachment 1802247

Here is the Acrylic platform I had made. Two pieces, 12" x 19.5" x 1". Bottom piece is coupled to the concrete under the carpet. Sandwiched this platform and the next are four Isoacoustic Orea Indigo isolation pucks, with a combined capacity of 28.8kg. I currently have the stock feet of the amplifier. I have some vintage ball bearing isolation devices that I tried using for lateral vibrations between the top platform and the amp, but wasn't entirely happy with the result. (They are currently under the Power Isolator where they work well). Also tried the Indigo pucks directly under the amp, with the ball bearing devices between the platforms, but again not to my liking. I feel that the ball bearing isolation devices gave my treble a bit of a shrill or just not quite natural sound. I will try with a better quality set, like Symposium Rollerblocks in the future.

View attachment 1802248

Chord Qutest DAC on 1" Cast Acrylic platform coupled to concrete. Not sure there is enough weight to really couple the spikes to the carpet, even if I stood on the platform before putting the DAC on the platform. Will upgrade to pointier, heavier brass spikes in the future to help with a better connection to the concrete. In between the platform and DAC are two Isoacoustic mini pucks.

View attachment 1802249

This older 1/4" piece of acrylic was the "proof of concept" piece I bought for $20 and originally put under my amp. When it sounded better than the 2" wooden platforms I own, I repurposed it under the power isolator. Coupled to concrete, with 3 ball bearing isolation devices between the acrylic and device.
View attachment 1802265

Lastly, same deal, 1" acrylic coupled to concrete, with laptop isolated with isoacoustic mini-pucks.


Total cost for these 1" platforms was $251 Canadian dollars. I purchased 4 SQ feet @ $52.50 a foot plus tax. The piece under the laptop was an offcut I purchased earlier for $30 as a 1" proof of concept. I then had the 4SQ feet cut into the two 12" x 19.5" pieces under the amp and three 4.5" x 8" pieces, one of which is under the DAC, one of which will also go under the DAC eventually, and the last is scrap.

So, How does it sound?

Pure, clean, even, balanced, focused. I instantly noticed the sound of the Wood disappeared. I had no idea what the wood sounded like, and I thought I liked the sound. Turns out the wood gave it a dull boomy hump that sounded like extra bass somewhere in the low region(my knowledge and experience isn't good enough to give you a frequency, sorry). After hearing the Acrylic, I realized I was listening to a coloration and didn't know what I was missing. If I were to give a single characteristic to the Acrylic, I would call it balanced. Balanced in that every frequency has equal and clean "weight" to it. No one piece of the spectrum is fighting for attention. Energy doesn't seem to be moved from one frequency to another. To my ear, there is a noticable lack of sonic coloration. Rhythms and soft touches flow unhindered into my brain. Im guessing this is because of a more natural attack and decay, but I am an amateur, so Im not really sure.

Next I will work on putting everything in my system on top of dual 1" acrylic platforms coupled to the floor. I will then add more coupling spikes and isolation devices to my hoarde and play around with them until Im happy.

The only thing not going on acrylic will be the speakers, which will get get some Isoacoustic GAIA III's on the carpet spike platform that is an add on.

TL;DR: Go buy some Acrylic. It's cheap, neutral, and nice sounding.

Years ago I was experimenting with similar concepts .. and building my own cabling .
With high resolution equipment it makes a notable difference, as does the distance of various electronic pieces one from another .. the type, topography, and physical arrangement of the cabling ..
There are also notable improvements to made with reducing micromovements of the speakers .. like fixing them as firmly as possible to the surface that they are
sitting on .. especially literally spiking a rigid speaker stand into a wood floor ..
What you are experimenting with pays dividends, and is the reason that most fine speakers and turntables these days come with spikes attached ..
If it sounds better it is better .. Play the music !!... and keep experimenting .. that's where the innovations come from.
All of that tuning, cumulatively, can make an already good system give ya goosebumps ..
 
And crazy as it sounds, I have a preamp that sounds better standing on it's side ..
Long ago there was a preamp that was infamous for sounding better standing on it's side but I've forgotten which one ..
This is just a xiang sheng copy of a marantz but ... FWIW..
( I'd suspect tube ringing, but who knows.. easier to just leave it on it's side )
 
Flame polishing isn't that hard but you need to learn to just "lick" the edges quickly or the results will turn bad very quickly. Get a bunch of scrap from your plastics supplier to learn on. In the back of my head I think I read somewhere that the preferred torch gas is hydrogen, burns cleaner than propane.

BillWojo
 
FWI Acrylic edges flame much better [results] if you start with a very smooth surface
by routing or sanding prior.

On the other hand Polycarbonate can react with much less favourable results
ie Lexan and other brands.
 
Back with an update! Did a bit of an "audio reset" by dismantling my system and setting it up for headphones utilizing the same principals for speaker setup. Used an Elekit tu-8200 tube amp and Hifiman Edition X V2 headphones. At first I was disappointed, but once I got used to it, and burned the headphones/my brain in there was something nice about the Tonality.

A couple weeks later I went back and started at the basics, looking to fix one issue: the High frequencies. Previously there was just something slightly off about them. I went back to basics, rearranged my best sets of Brass footer spikes onto the most important equipment, and doubled up the 1" acrylic under the Power amp (with double sided tape in between). I kept all energy transformation devices out (isolation/vibration reduction) and started with Symposium precision couplers between the Power Amp and acrylic. Sounded pretty good! A nice full sound, though lacking in some details. Next I took out the precision couplers and added a set of Loyalty Audio "springs". Not sure the exact name of them, a local genius makes them. Natural Crystals on the bottom to drain highs, a hard Chinese wood base for the mids, and a special spring to drain the bass? I don't fully understand all the workings, but I'm slowly wrapping my head around it. This sounded even better, separating sounds for better detail without screwing up the frequency response. Then I put the precision couplers under the power isolator. Even better.

So what was wrong? can't say for sure, but I believe my smorgasbord approach with different isolators was NOT reducing vibrations evenly across the spectrum. Each individual one was selected for a more transparent sound, and each individual one made the system sound a little better (or so I thought!), but one by one, like a frog boiling in water, I didn't realize I was drifting away from where I wanted to be. I also think composite metal/plastic combination cone feet are garbage.

Granted, I havent yet spent the big bucks. All the little components are cheap, old, second hand devices. 2 specifically were made sometime before the year 2000 when machining tolerances weren't up to the standard they are today. Now that I have learned a lot for a few hundred bucks, I think I'm ready to sell off a few, and start trying some more quality items, with a better understanding of what I wish to do.

Alternative theory of what was wrong: Overdamping?
https://derangedphysiology.com/main....3.4/resonance-damping-and-frequency-response
I found this explanation as it relates to the waveform of a heartbeat. Super interesting article from an entirely different field.

The bold highlight appears to be an exact description of the sound defect I have previously heard in my system:

"Underdamping leads to overshoot. A system with minimal damping will reverberate, the natural frequency of the system will amplify the measured waves and therefore the pressure registered by the tranducer will be higher than the actual pressure. Sharp jagged waveforms will be produced. Conversely, an over-damped system will produce underestimated values and slurred broad waveforms. With overdamping, some of the higher frequency harmonic waveforms will be lost (remember that these are the waveforms which already have a lower amplitude; with more damping their amplitude disappears to near zero)."
clamping%20the%20arterial%20line%2C%20by%20Geddes%20%281984%29.JPG


"Note how first, the dicrotic notch is lost (because it is produced by high frequency, low amplitude elements). Then, the waveform begins to flatten as the amplitude of even the low frequency waves is affected. At last, with the tubing clamped, the waveform flattens at the mean arterial pressure."

Also interesting is how a single heartbeat with 5th order harmonics created a pretty funky waveform, just like music.

arterial%20waveform%20and%20component%20harmonics%20from%20Hansen%2C%201949.JPG


I imagine the 2nd, 3rd, 4th, 5th order harmonics created by platforms and isolation products can turn into some pretty ugly frequency distortions that are fed back into the system. The chart above is created with a single pulse, a heartbeat, beating once per second. Yet the overall resonance and damping effects create a monster.

Working theory: Any non-uniform reduction in vibration frequencies will incur a 2nd, 3rd, 4th etc order vibrational harmonic distortion, probably not how envisioned. And the distortions will resonate further and further away in both directions from the non-uniform energy reduction. Sharp peaks and valleys of vibrational energy can come about from using mediocre isolation devices that don't reduce energy uniformly. (And thats probably most of them!)

Working solution: Broadband drainage of vibrations, very limited and targeted use of energy conversion techniques to control vibrations, and only on secondary pieces of equipment.

Taking this a step further:

"And then there's the issue of all that weight being concentrated on one point, which exploits the relationship between mechanical pressure and contact efficiency. Anyone who's ever boiled water on a stove with electric heater elements knows that if you push the pot down onto the metal heating elements, the water will come to a boil faster. This is because you are making a better mechanical connection between the pot and the heating element. Heat energy is also a form of vibration; in like manner, if you apply more pressure between a component and its support, there will be a better energy transfer. So, reducing all the weight of a component down to two or three tiny points makes the transfer at those points much more effective, since the effective pressure may be hundreds of pounds per square inch, or more. This is analogous to reducing the resistance in a circuit from many hundreds of ohms to a fraction of an ohm, and energy has a commensurately greater chance of passing through."

In order to properly harness drainage of vibrations, it appears that smaller contact points are necessary. Which presents a problem: the smaller the points, the more pressure per SQ inch. At a certain pressure, the point will deform, flatten, and cause a reduction in pressure, and a reduction in energy drainage.

Solution: stronger materials for the contact points,

Out of ideas for now....

Would love to know what you know about spikes/feet for drainage of vibrational energy. Coupling and drainage are my new focuses right now.
 
Back
Top Bottom