• The move to the new server is done. There are some software and database maintenance updates in process. This has us passing the hat around to help out. We appreciate any donations. Seriously, even a dollar helps. The payment page may be found here - https://www.audiokarma.org/support.html

ADS L-1530 restoration

JimEGR

AK Subscriber
Subscriber
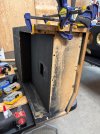
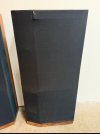
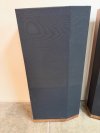
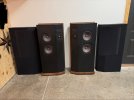
Picked these up locally recently. Fully functional, but needing some cosmetic attention. Scratched woofer cones, broken base, scratches, dents and stains. One mid with grill cloth prints and the other mid was deformed.

I sent the mids to Richard So for rehab. He treated the tweeters with a PO in 2024.

Working on some clean replacement woofers with a seller.

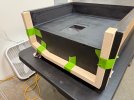
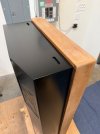
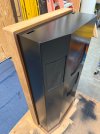
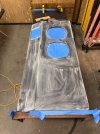
For the cabinets I stripped them down and built them back up. Wood hardener, Bondo, wood filler, Murphy’s Wood Soap, Bar Keepers Friend and sanding.

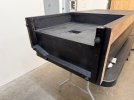
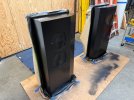
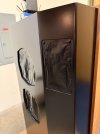
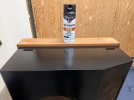
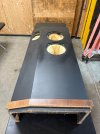
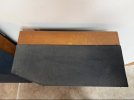
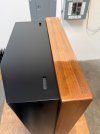
The bases required a lot of attention, but turned out nearly new again. I repaired the cabinet bottoms. Built new risers. Added some metal guards on the backside to protect them when tipping. Flat black paint underneath and for the backs.

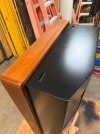
The walnut came out great. I was able to lift most of the staining. And between filler and sanding I was able to come up with a nice clean surface ready for oil.

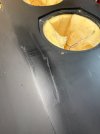
The faces went through progressions with Bondo, sanding and cleaning. A few light coats of satin black. These turned out great too. There is one run on the front that is hard to see. Trying to decide if I’ll sand and repaint this one or leave it. It’s only visible in certain light. Not sure what I’ll do there yet.

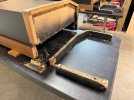
Next up is repairing the grills. One support rod is missing and they both need cloth. I’m pretty anxious about this phase. The cloths require cutting and stitching at the angled intersections. I’d love to hear any opinions on this step.

I’ll update the thread more once I move on to the next phase. Happy to hear any advice or feedback folks may have.
IMG_9932.jpegIMG_0036.jpegIMG_0058.jpegIMG_0216.jpegIMG_0370.jpegIMG_0421.jpegIMG_0425.jpegIMG_0423.jpegIMG_0426.jpeg
IMG_1418.jpeg
 
Last edited:
Register to hide this ad
Beautiful work. My L1530s have some base issues but haven't progressed as far as yours were. I haven't had to re-cloth the grills but I will at some point. I'm thinking an upholstery shop may have the skills to do the angled intersections.
 
Beautiful work. My L1530s have some base issues but haven't progressed as far as yours were. I haven't had to re-cloth the grills but I will at some point. I'm thinking an upholstery shop may have the skills to do the angled intersections.

Thanks! Good call on the upholstery shop. I may look into that too. Sure would be nice to have a pro handle that, depending on cost.
 
Very nice work Jim! I had similar damage to mine on the bottom. Although I've fixed mine from further damage, I still have work on the trim to finish. How'd you paint them? Rattle can or sprayer? Just curious. Also, what kind of paint? Always good to know for others when faced with the same problem.
 
Very nice work Jim! I had similar damage to mine on the bottom. Although I've fixed mine from further damage, I still have work on the trim to finish. How'd you paint them? Rattle can or sprayer? Just curious. Also, what kind of paint? Always good to know for others when faced with the same problem.

Thanks!

I considered different options for painting them. In the end I went with satin black Rustoleum in this 5 in 1 can that has a fan spray pattern. That fan spray pattern really helps with laying down the paint. Much more productive.

Overall, it turned out good, but not perfect. It’s definitely a 10 from 5 feet but up close there are some minor imperfections. For me to go further I would probably need to fine sand and go with another coat. Not sure if I’m up for that though. These look so much better than they did when I got them. And the reality is, they will be covered by grills for most of the rest of their lives.

IMG_1421.jpegIMG_1422.jpegIMG_1425.jpegIMG_1426.jpeg

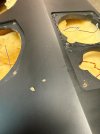
The faces were in pretty rough shape when I started.

IMG_0029.jpegIMG_0028.jpegIMG_0025.jpegIMG_0032.jpeg
 
Last edited:
Yep on the paint. Before the 5 hole, my favorite was the fan spray. Half of those who used it didn't like it, but personally was/IS my favorite. In any case, it looks like you've done a great job there fella. After I fixed the bottom/back, I did put a cross bracer back there for better support. Those corners will snap like a twig if one tips them back to move them. Especially on carpet!

When I got mine, the did not have the risers, so I had to work from scratch. I did make mine half inch taller then spec, but that was because I wanted to make a dolly system whereby I could just roll them when I needed to move'em. But that went bust as the speaker would rock more on carpet then I felt comfortable with. Hard floor was okay, but my floors were carpeted, so I removed the wheels.

To my suspicion, ADS (or more accurately, the company that build the cab's for ADS) used a custom blend of Black. It wasn't so much a Satin or quite as flat as a Matt, so it's hard to reproduce.

Say, when you get to the grills, let us know what fabric you use okay.

Garry~
 
Yep on the paint. Before the 5 hole, my favorite was the fan spray. Half of those who used it didn't like it, but personally was/IS my favorite. In any case, it looks like you've done a great job there fella. After I fixed the bottom/back, I did put a cross bracer back there for better support. Those corners will snap like a twig if one tips them back to move them. Especially on carpet!

When I got mine, the did not have the risers, so I had to work from scratch. I did make mine half inch taller then spec, but that was because I wanted to make a dolly system whereby I could just roll them when I needed to move'em. But that went bust as the speaker would rock more on carpet then I felt comfortable with. Hard floor was okay, but my floors were carpeted, so I removed the wheels.

To my suspicion, ADS (or more accurately, the company that build the cab's for ADS) used a custom blend of Black. It wasn't so much a Satin or quite as flat as a Matt, so it's hard to reproduce.

Say, when you get to the grills, let us know what fabric you use okay.

Garry~

The guy I bought these from suggested flat black with a clear coat for the fronts. And I think he was right. What came off of the front when I sanded was not black, but clear and maybe a clear coat satin. I wasn't up for a 2-step process so I just went satin black.

Edit: My one complaint about the 5in1 on fan setting was the pressure and then the fan pattern would change during spraying. This could be that I did not shake the cans enough (I am sure I did) or something about that tip design. Either way it was unsettling to be mid spray and have the pattern suddenly change. I think next time I would look for an aftermarket fan tip to try on a standard can. I'll never go back to the round pattern on a standard spray can after this though. The fan is so much more productive and easier to control when working properly.

Here is what the initial sanding looked like. It's all clear coming off.

IMG_0209.JPG
 
Last edited:
The guy I bought these from suggested flat black with a clear coat for the fronts. And I think he was right. What came off of the front when I sanded was not black, but clear and maybe a clear coat satin. I wasn't up for a 2-step process so I just went satin black.

Here is what the initial sanding looked like -

View attachment 3717262
The final coat of varnish helped protect the black layer. It came out well without it.
 
A piano company did the manufacturing and painting. Having used Satin myself, I pretty much knew that wasn't the formula, was just too shiny. I recall a thread where some guy used flat and was happy with the results, but I knew flat was not the answer either. IF ... ADS used flat that finished with a clear coat (Likely matt?), then polished to sheen, or .. used a Satin,and sanded then polished to a somewhere between shine and sheen.

At the end of my painting project, I did get a Piece of wood, Kill's as a primer (and sanded smooth), then sprayed with Matt, then polished using a felt buffer pad to sheen (not shine). I winked at the result, and made a tick sound from my mouth and told myself, yes sir ... pretty darn close. I think I could have used a clear coat matt, and buffed to sheen, but winter was setting in, and I never got back to the project.

@JimEGR What's going on with the grills? Picture wise, they look pretty good. You'll likely not find a matching fabric. (I examined Dozens of samples so ... I've been there)
 
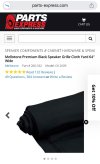
The grills are actually in pretty rough shape. Cloth is toast and one of the frames is missing a front support rod. I haven’t looked into a replacement rod yet - hopefully I can find a match from a metal supplier. I was planning on using the premium black cloth from Parts Express unless there is a better option.

IMG_1485.jpegIMG_1489.jpegIMG_1488.jpegIMG_1487.jpeg
 
Ouch! Yeah, you can get the quarter rod from Home Depot. I bought cloth from this guy, but ... it's been a while since I ordered it and at that time it was half the price. Still, it's as close as I could get. One thing I learned in the process, was that Black is not always Black. There are various shades of black. Stuff I got was as close as you can get to the original black. When you remove the fabric, try to dismantle it instead of just ripping it off (I've read the horror storys) Remove the fabric and unstitch it to create a template. Lemmy say this, these speakers are well worth the effort.

Amazon

Hope that helps.

Garry~
 
Last edited:
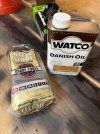
Starting on the walnut. 2 coats WATCO Danish Oil , 0000 steel wool polish then beeswax. Most satisfying part of the process so far! The color turned out identical to the existing finish that I didn’t remove on the grill side of the walnut.

IMG_1511.jpegIMG_1515.jpeg
IMG_1513.jpeg
IMG_1517.jpeg

Dreading this -
IMG_1518.jpeg
 
Last edited:
Lookin good Jim! What is your thoughts on the grills? Going to sew yourself or you have someone up to the challange.

Garry
 
Lookin good Jim! What is your thoughts on the grills? Going to sew yourself or you have someone up to the challange.

Garry

Thanks! I’m going to repair and repaint the frames right now. And then reach out to an upholstery shop I know locally. I actually bought a pair of Vandersteen speakers from the owner a few years ago that he had installed new grill cloths on. I guess it will come down to whether he feels like dealing with a pair of speakers (covers) again, and what it will cost for him to do the work. It’s such an important and visible part of the project, I definitely would not mind having a professional take care of it.
 
Last edited:
That's a wrap for this build session. Frames sanded and painted with flat black.

I'll need to track down the square stock - nothing at Home Depot or locally. I'll have to go online it looks like.

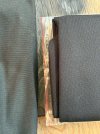
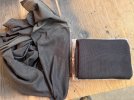
How does this grill cloth look? Looks like a good match to me. It is the Premium cloth from Parts Express. I have some here for a pair of L-710's I am doing next.

IMG_1540.JPGIMG_1548.JPGIMG_1552.JPGIMG_1553.JPG
IMG_1562.jpeg
 
Last edited:
That's a wrap for this build session. Frames sanded and painted with flat black.

I'll need to track down the square stock - nothing at Home Depot or locally. I'll have to go online it looks like.

How does this grill cloth look? Looks like a good match to me. It is the Premium cloth from Parts Express. I have some here for a pair of L-710's I am doing next.

View attachment 3718403View attachment 3718404View attachment 3718407View attachment 3718408
Looks real good! I had recommendations for you should you seek and upholsterer, based from personal experience, but you appear to have it all under control. Just make sure he understands where the stitching goes, and not to attach using staples. I'd suggest that you not assume he wouldn't. Take it away Jim, you got this!

Garry~
 
Back
Top Bottom