ikonw8
Active Member
I picked up a very nice Akai AA-1050 the other day for a very good price. Cabinet is in perfect shape, it works and sounds pretty good.
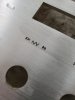
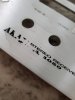
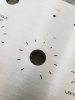
However, when I tried to clean the face plate, I found that the silk screen lettering came off easily... but only in some spots. Near the Power switch and logo, around the volume control and around the selector switch. In other areas it was still very durable. I only use dish soap and water to clean. I might be a thing with Akai - I have an Akai cassette deck with the same issue.
I quickly stopped the cleaning and let it all dry. I have had some success in replacing silk screen with slide off transfers, so I go to work on doing the same for the broken lettering on the Akai.
1. First, I had to locate the font that Akai used. www.identifont.com was very helpful for this. Most of the lettering is Eurostile Next Extended Regular. (or at least it is the very closest I could find). The Akai logo is ITC Cheltenham Ultra. The same for the "AA" in AA-1050. The 1050 I could not find the font for, so I used the ITC font.
2. I scanned the face plate into GIMP.
3. Then I placed the text into GIMP as different layers to make it easier to scale the fonts and overlay them on the image of the faceplate to get alignment.
4. Gimp is a great open source image editing application with tons of features, but does have a learning curve to get past to use it effectively.
5. In Gimp, I dropped out the image layer, to leave the lettering and printed it to some overhead transparency stock on my black and white laser printer at 600 dpi (maximum for my printer). This allowed me to test the fix and scale.
6. Then print to the waterslide decal paper. I used Sunnyscope waterslide decal paper, clear.
7. Cutting out the decals is time consuming and detailed work. I found that trimming as tightly as possible is important to ensure as clean a result as possible.
8. The cut outs are placed in water. Don't soak the decal until the decal slides off in the water - it is too flmsy to transfer then. Rather, leave in the water for 10-15 seconds then remove with the backing. Move the decal with backing to the faceplate and then slide off the decal and position it. A little water helps to keep things sliding around. Use cotton swaps to pad out the excess water.
9. Once it is all done, I let the faceplate dry.
10. Then, I sprayed with a clear gloss lacquer to fix the decal well. This will also help protect the remain silk screen from removing. Ironically, after testing three different kinds, the Varathane Premium Diamond Wood Finish had the best adhesion to brushed aluminum. I applied 5 coats.
11. Let the faceplate dry very well. At least 24 hours, but 3 days is even better
I hope this helps someone else!
However, when I tried to clean the face plate, I found that the silk screen lettering came off easily... but only in some spots. Near the Power switch and logo, around the volume control and around the selector switch. In other areas it was still very durable. I only use dish soap and water to clean. I might be a thing with Akai - I have an Akai cassette deck with the same issue.
I quickly stopped the cleaning and let it all dry. I have had some success in replacing silk screen with slide off transfers, so I go to work on doing the same for the broken lettering on the Akai.
1. First, I had to locate the font that Akai used. www.identifont.com was very helpful for this. Most of the lettering is Eurostile Next Extended Regular. (or at least it is the very closest I could find). The Akai logo is ITC Cheltenham Ultra. The same for the "AA" in AA-1050. The 1050 I could not find the font for, so I used the ITC font.
2. I scanned the face plate into GIMP.
3. Then I placed the text into GIMP as different layers to make it easier to scale the fonts and overlay them on the image of the faceplate to get alignment.
4. Gimp is a great open source image editing application with tons of features, but does have a learning curve to get past to use it effectively.
5. In Gimp, I dropped out the image layer, to leave the lettering and printed it to some overhead transparency stock on my black and white laser printer at 600 dpi (maximum for my printer). This allowed me to test the fix and scale.
6. Then print to the waterslide decal paper. I used Sunnyscope waterslide decal paper, clear.
7. Cutting out the decals is time consuming and detailed work. I found that trimming as tightly as possible is important to ensure as clean a result as possible.
8. The cut outs are placed in water. Don't soak the decal until the decal slides off in the water - it is too flmsy to transfer then. Rather, leave in the water for 10-15 seconds then remove with the backing. Move the decal with backing to the faceplate and then slide off the decal and position it. A little water helps to keep things sliding around. Use cotton swaps to pad out the excess water.
9. Once it is all done, I let the faceplate dry.
10. Then, I sprayed with a clear gloss lacquer to fix the decal well. This will also help protect the remain silk screen from removing. Ironically, after testing three different kinds, the Varathane Premium Diamond Wood Finish had the best adhesion to brushed aluminum. I applied 5 coats.
11. Let the faceplate dry very well. At least 24 hours, but 3 days is even better
I hope this helps someone else!