


LittleBill
New Member
Hi AKers!
I just finished my first receiver repair that involved more than just replacing bulbs. My goal was to repair the unit and replace electrolytic caps as a maintenance measure. I thought I'd post my notes and some photos. I've learned a ton from AK since being bitten by the vintage stereo bug almost 2 years ago. It's about time I contributed. Note: I have more photos from this project. If you want to see anything in particular, let me know.
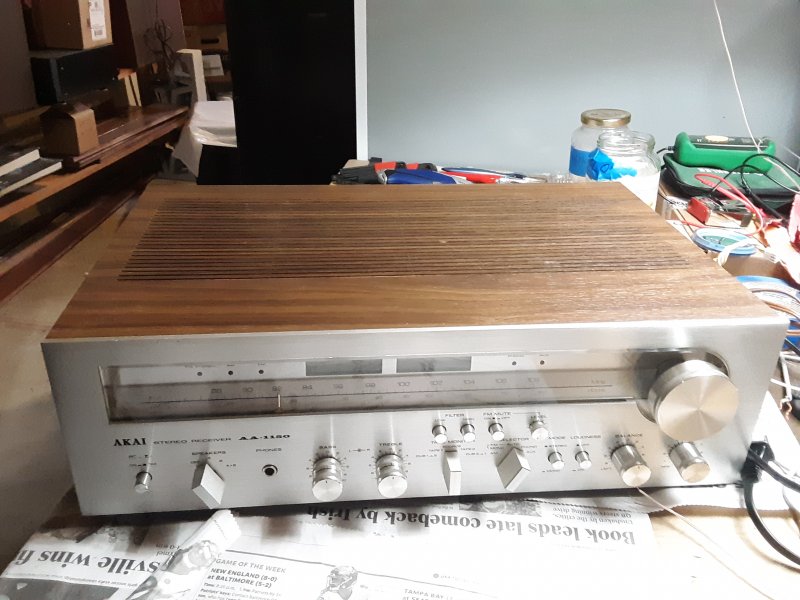
- I bought the receiver on that auction site for $25. Seller said the unit did not power on, no lights, no sound, cosmetically good though.
- I bought a hard-copy (i.e. legible) service manual with schematics. These were key since the circuit boards have no component markings or labels.
- I don't have a dim bulb tester (it's on my to-do list), so I turned on the unit and plugged in headphones. No sound from headphones.
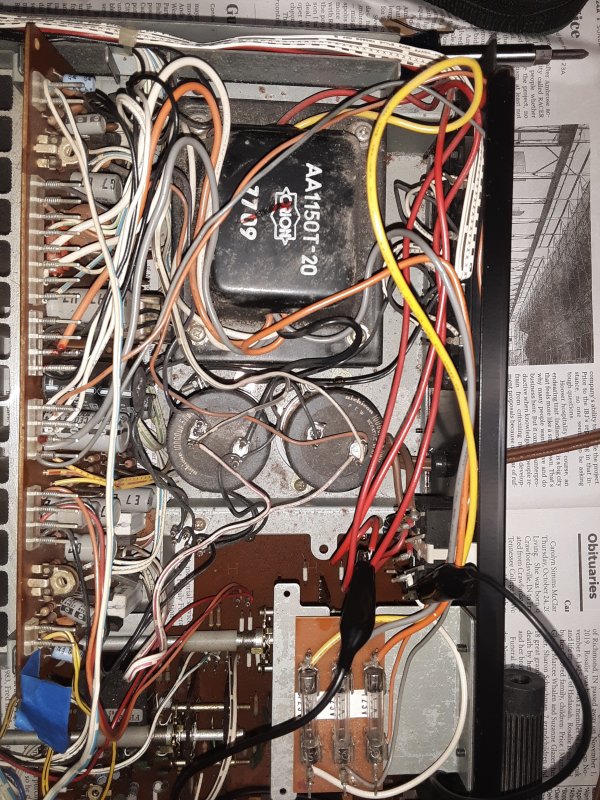
- I removed the cover and checked voltage levels starting with power supply circuit. (I also noticed that this thing was a rat's nest of wires inside. Boo!) This photo shows the power supply area.
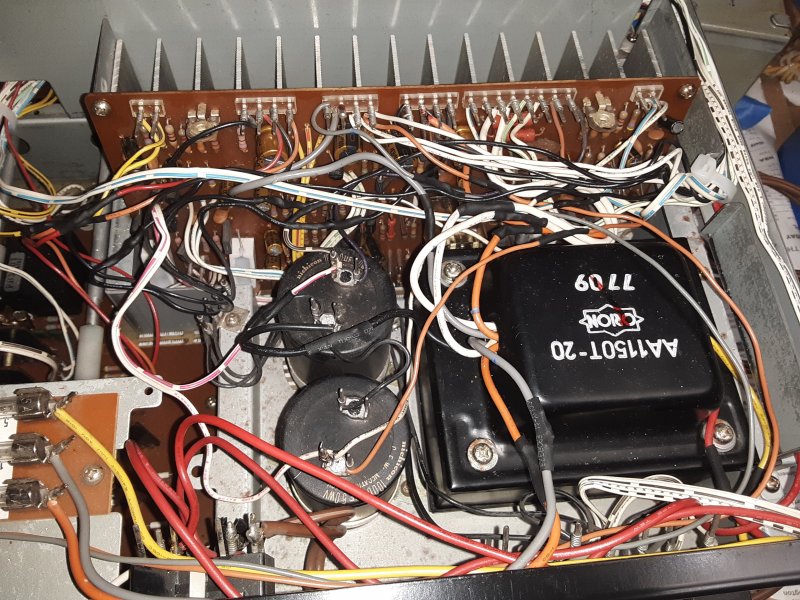
- I also noticed that amp board was wedged between the heat sink and the power supply. It would be nearly impossible to replace or check anything on it without removing it. This photo is a different angle, with heat sink at top of photo, power supply at bottom, and amp board in between.
- There was no voltage at the outputs of power transformer. So I removed the transformer, took it apart, and found an open circuit in the primary winding.
- Fixed the winding open circuit (soldered wire ends together) and reinstalled transformer
- Powered on, got relay click, but no lights.
- Replaced 3 dial lights 8 Vac, 300 mA. Those are the only lights.
- Adjusted idling current according to manual directions
- Checked output dc offset, less than 10 mV so they're OK.
- Connected speakers and got sound, knobs staticky
- De-oxited knobs and buttons to fix static
- I got a pop sound from speakers when powering off. Below are the things I tried. None of them got rid of the pop. So I just turn the speaker selector to Off before shutting down.
- Tested protection circuit transistors and diodes using DMM diode tester. Replaced bad transistor (TR16 in protection circuit, 2SB560. Replaced with KSA916YTA)
- Replaced relay
- Replaced all electrolytic caps except power filter caps. (Might replace them later?)
- Tried connecting Quencharc 104M06QC100 across power button
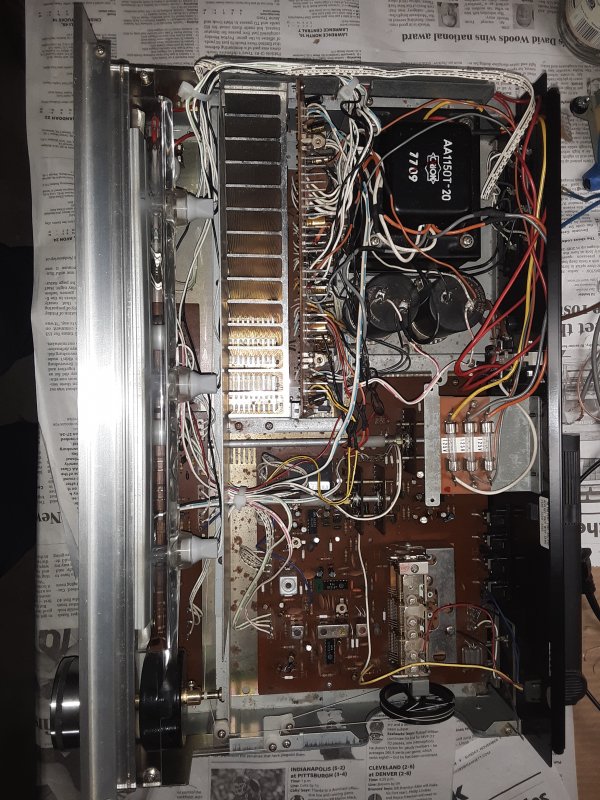
Here's a gratuitous shot of the innards:
And a shot of the exterior with lights working. It's not a flashy receiver, but I like the aluminum face.
--- Repair experience impressions---
- The Bad: Not the best receiver for a beginner.
- Very difficult to get to amp board. It's tucked between heat sink and input power circuit.
- Had to cut many wires to remove amp board and then, of course, re-connect them later.
- No markings on circuit boards to indicate C1, or R10, etc. Schematics were essential.
- Disappointed I couldn't fix pop sound.
- The Good:
- I learned a lot, first time doing more than just replacing bulbs and spraying deoxit.
- It was very satisfying finding and fixing the transformer open circuit.
--- Audio and visual impressions ---
- Love the look, aluminum face
- Nice big tuner knob that spins easily
- I don't have much to compare the sound to. To me, the sound is clear and uncolored but not as transparent as my Yamaha CR-840. It has a better tuner than my CR-840 though.
- Did the re-capping make any difference in the sound? I would have to hear side-by-side. I don't notice a difference.
Thank you for reading! I hope this helps someone.
I just finished my first receiver repair that involved more than just replacing bulbs. My goal was to repair the unit and replace electrolytic caps as a maintenance measure. I thought I'd post my notes and some photos. I've learned a ton from AK since being bitten by the vintage stereo bug almost 2 years ago. It's about time I contributed. Note: I have more photos from this project. If you want to see anything in particular, let me know.
- I bought the receiver on that auction site for $25. Seller said the unit did not power on, no lights, no sound, cosmetically good though.
- I bought a hard-copy (i.e. legible) service manual with schematics. These were key since the circuit boards have no component markings or labels.
- I don't have a dim bulb tester (it's on my to-do list), so I turned on the unit and plugged in headphones. No sound from headphones.
- I removed the cover and checked voltage levels starting with power supply circuit. (I also noticed that this thing was a rat's nest of wires inside. Boo!) This photo shows the power supply area.
- I also noticed that amp board was wedged between the heat sink and the power supply. It would be nearly impossible to replace or check anything on it without removing it. This photo is a different angle, with heat sink at top of photo, power supply at bottom, and amp board in between.
- There was no voltage at the outputs of power transformer. So I removed the transformer, took it apart, and found an open circuit in the primary winding.

- Fixed the winding open circuit (soldered wire ends together) and reinstalled transformer
- Powered on, got relay click, but no lights.
- Replaced 3 dial lights 8 Vac, 300 mA. Those are the only lights.
- Adjusted idling current according to manual directions
- Checked output dc offset, less than 10 mV so they're OK.
- Connected speakers and got sound, knobs staticky
- De-oxited knobs and buttons to fix static
- I got a pop sound from speakers when powering off. Below are the things I tried. None of them got rid of the pop. So I just turn the speaker selector to Off before shutting down.
- Tested protection circuit transistors and diodes using DMM diode tester. Replaced bad transistor (TR16 in protection circuit, 2SB560. Replaced with KSA916YTA)
- Replaced relay
- Replaced all electrolytic caps except power filter caps. (Might replace them later?)
- Tried connecting Quencharc 104M06QC100 across power button
Here's a gratuitous shot of the innards:
And a shot of the exterior with lights working. It's not a flashy receiver, but I like the aluminum face.

--- Repair experience impressions---
- The Bad: Not the best receiver for a beginner.
- Very difficult to get to amp board. It's tucked between heat sink and input power circuit.
- Had to cut many wires to remove amp board and then, of course, re-connect them later.
- No markings on circuit boards to indicate C1, or R10, etc. Schematics were essential.
- Disappointed I couldn't fix pop sound.
- The Good:
- I learned a lot, first time doing more than just replacing bulbs and spraying deoxit.
- It was very satisfying finding and fixing the transformer open circuit.
--- Audio and visual impressions ---
- Love the look, aluminum face
- Nice big tuner knob that spins easily
- I don't have much to compare the sound to. To me, the sound is clear and uncolored but not as transparent as my Yamaha CR-840. It has a better tuner than my CR-840 though.
- Did the re-capping make any difference in the sound? I would have to hear side-by-side. I don't notice a difference.
Thank you for reading! I hope this helps someone.

 Smart buy on the cosmetics. Do the speakers pop when powered on?

