• The move to the new server is done. There are some software and database maintenance updates in process. This has us passing the hat around to help out. We appreciate any donations. Seriously, even a dollar helps. The payment page may be found here - https://www.audiokarma.org/support.html

Altec 606-Inspired Build Using A-7 Components

I've had zero interest in anything that didn't include drums, bass guitar, electric guitar, and a Hammond organ


You just described "The Band" except Garth Hudson played a Lowrey. :)

GarthWails75_tag.jpg
 
You just described "The Band" except Garth Hudson played a Lowrey. :)

GarthWails75_tag.jpg
[/QU

OTE]
A Lowrey organ? I didn't know that. Looks like he has Leslie controls attached in the usual place, but I wonder what that contraption is just in front of the Leslie controls? Could that really be a rhythm machine? Cassette tape recorder? Regardless, I've never seen a Lowrey organ used in a rock n roll band. I wonder if he used it in the studio, too? I'll have to give their stuff another listen and see if I can hear the Lowrey sound signature. I've never paid any attention to it before, honestly. Thanks for the heads-up, buddy.

I had to travel to Little Rock this morning and stopped by the Habitat For Humanity "ReStore" on the way home. There was a shopping basket FULL of old 1960s and earlier record collection sets. You know the kind that have 4-6 LPs in a presentation case? I could not wait to tear thru it and see if there was any gold to be had. Whoever donated these collections, unfortunately, was a BIG fan of easy-listening mood music. There were collections from several well-known companies, such as Reader's Digest RCA-made issues and others. But not a single record of jazz or decent big band music. The closest thing to big band was a Glen Miller collection - in mono (as was most of it). There was one 4-LP collection of movie themes - again, all of the easy-listening type. I was really bummed, because the majority of them looked unplayed and perfect. I thought about buying a few of them just for the condition they were in, but I knew I would never listen to them. Bummer.

GeeDeeEmm
 
A Lowrey organ? I didn't know that. Looks like he has Leslie controls attached in the usual place, but I wonder what that contraption is just in front of the Leslie controls? Could that really be a rhythm machine? Cassette tape recorder? Regardless, I've never seen a Lowrey organ used in a rock n roll band. I wonder if he used it in the studio, too? I'll have to give their stuff another listen and see if I can hear the Lowrey sound signature. I've never paid any attention to it before, honestly. Thanks for the heads-up, buddy.

Yes, it's a cassette deck with controls to sync the organ.
Lowrey_Symphonic_Theatre_Organ_H25-3_(photo_Mike_Racioppa)_600.jpg


If you listen to Rock and Roll, you hear two other groups that also use Lowery organs.

Most notably, the Who use a Lowery Berkshire organ played through an ARP 2500 to produce the sounds you hear in "Baba O'Riley" and the rest of their songs with this similar sound (e.g., Won't Get Fooled Again, Who Are You).

And, while marketed under the Gibson name, Ray Manzarak of the Doors organ was actually produced by Lowery.

Note that both of these groups use the "Repeat Percussion" function that is not present on a Hammond B3. When you hear a Lowery, it sounds nothing like a Hammond, or even a VOX imitation of a Hammond.

You can hear the repeat percussion used by the Who:


And for the Doors:
 
Last edited:
Quick summary of what I accomplished today, along with a cool little surprise for you at the end. I'ts past my bedtime, so it's time to shut 'er down for today.

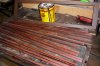
First, I cutout the HDF panels that will serve as homes for the grill cloth. Also seen is the twelve sticks I sized with the table saw, which will actually back the grill cloth frames' and will hold the panels in place and aligned. The backing sticks were made from solid oak planks, cut to size and stained.

Altec Grill Frames, Badges 001.JPG

Next, I sanded down the frames smooth and almost completely free of blems, then laid on the second coat of urethane. This time I used Satin spray polyurethane, simply for use of ease. I may cover them one more time depending on how nicely they dry out.

This is where the "surprise" comes in. In the bottom middle of each frame, I installed a 1/8" thin block of the same oak I've used on the rest of the cabinets. These blocks fit perfectly - in fact had to be wedge-fitted - and they look great, despite a small difference in shade.

There must be a reason for installing the blocks, right? Right. Take a look at the pics of the grills frames. Notice anything different? Yep. They are graced with a couple of beautiful brass name plates that proudly and defiantly declare the name: ALTEC!

Do you like them as much as I do?

Tomorrow, I stat laying in the beautiful grill cloth. Wait to see how nicely the grillcloth makes it POP!

GeeDeeEmm
 

Attachments

  • Altec Grill Frames, Badges 003.JPG
    Altec Grill Frames, Badges 003.JPG
    89.6 KB · Views: 61
  • Altec Grill Frames, Badges 008.JPG
    Altec Grill Frames, Badges 008.JPG
    96 KB · Views: 60
Spent the entire day today finishing up the front grills by cutting out the cloth, attaching it with auto upholstery contact cement in a spray can to the grill frame insert boards - rather than gluing and stapling them into place.

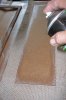
Once I had the grill cloth cut to size, I laid it and the frame inserts out on cardboard and coated the gluing surfaces with contact cement. I used the cutouts from the grill inserts to "mask" off the part of the grill cloth that should have no contact cement on it.

Altec GRILLS 001.JPG Altec GRILLS 002.JPG

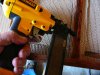
Using carpenter's glue and nails (from a pneumatic nail gun), I fastened the covered frame inserts into the routed-out areas on the grill frame. The glue was used to fasten the grill inserts/cloth assemblies to the oak strips I cut to secure them from behind.

Altec GRILLS 005.JPG

And . . . these suckers are FINISHED.

Altec GRILLS 007.JPG

Just a note: In the past, I've gone the traditional route of stapling the grill cloth to the frames, but the inserts are so thin that staples would not work well. The spray-on contact cement worked wonders. Of course, I had to spray the cloth and the inserts, but the cement allowed me great latitude in pulling the cloth tight on the inserts. Even though I didn't do it all the way around, it would be very, very easy to pull the cloth to equal tension around the perimeter. And that cloth is not coming loose. This is the way I'll be doing it in the future.

Eight hours of standing on my feet and no lunch, so I'm tired. Thanks to all for watching!

GeeDeeEmm
 

Attachments

  • Altec GRILLS 003.JPG
    Altec GRILLS 003.JPG
    142.2 KB · Views: 25
  • Altec GRILLS 004.JPG
    Altec GRILLS 004.JPG
    103.3 KB · Views: 24
Last edited:
That right there, folks, is some beautiful craftsmanship!
Gdmoore28, all I can say is WOW, they look amazing! I can't wait to see them on the cab's. :beerchug:
 
Thanks so much, guys! Mrs. GDM is off for the weekend and wants to do wifey stuff, so Monday plans are to build the supertweeter box, veneer and finish them. Oh, and need to install the grill attachments so I can put them aside in a safe place away from the cats.

GeeDeeEmm
 
Very nice work gdmoore!:bowdown:
I think you really nailed it with the finnishing touches-the decals and the vintage grill-cloth.
Thanks for taking the effort of sharing this project with us!
 
Thanks, guys!

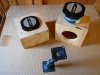
Yesterday I got five of the six panels (ie, everything except the back panels) of the supertweeter housings glued/stapled together. Nothing special about them, just a couple of boxes large enough to house the super tweeters. The only crossover elements involved will consist of a single 2mf condenser, which is calculated to give me a crossover point of approximately 10Khz with a 6dB rolloff. I've already installed a couple of L-pads for the super tweets. Haven't decided yet whether I should install the crossover capacitor in the main cab so that anything connected will have crossover protection, or, whether I should install it in the super tweeter boxes so that no matter what they are connected to, they will be protected.

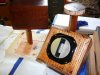
Super Tweeters, Altec 001.JPG
The front of the boxes is made from 3/4" solid oak, which will be rounded on all four corners. The body of the boxes are a mix of 3/4" solid oak and 1/2" MDF with mahogany veneer. I'll be covering the box bodies with my leftover mahogany veneer. The backs will likely be painted dark brown like the main speakers' back panels.

As you can see from the pics, I located several pairs of PanoVise adjustable brackets to attach the super tweeter cabinets to the tops. With these, I'll be able to align the voice coils on the horns (in the big horn boxes) and the super tweets.

I'm undecided whether to repaint the brackets in their current semi-gloss black, or in the same blue/green tint that is on the big horns. Opinions most welcome.

Super Tweeters, Altec 003.JPG

Guess that's it for today.

GeeDeeEmm
 

Attachments

  • Super Tweeters, Altec 002.JPG
    Super Tweeters, Altec 002.JPG
    91 KB · Views: 10
Last edited:
G'day, ladies and gents.

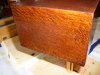
This morning was taken up by removing the poly finish from the supertweeter boxes I built. The front panel is made of solid 3/4" oak, with the remainder being made of the same and 1/2" mdf. I covered the body of the boxes with some kind of odd mahogany veneer sample that one of the venders I used sent me in my last veneer order. I'd run out of the beautiful mahogany used in the rest of the speakers, so decided to give this stuff a try. It's highly figured, red, but has deep, deep grain patterns. It's had three coats of polyurethane applied with very heavy sanding between coats, but I still haven't filled those deep grains.

This morning I decided to start from scratch by removing all of the poly and the stain, and simply applied a couple of coats of satin poly. They look much better now, but I'm still totally dissatisfied with the finish. I plan to use them as-is for now, and, when everything else is completed, build some other kind of boxes. No idea yet what that will be.

Crossover Wireup 005.JPG
Crossover Wireup 008.JPG

This afternoon I moved on to the process I was dreading - installing the crossovers and wiring up the controls. At this point, I remembered that I still hadn't ordered the two 2-ohm resistors I need for the midrange tone control, and the two 2-3mh capacitors that I need to form the "crossovers" for the supertweeters. While scavenging thru my parts on hand, I found a couple of heavy-duty 2-ohm resistors in a JBL SR4700 crossover plate that I had in the parts bin. I'm still digging to hopefully find a couple of caps.

Crossover Wireup 001.JPG

While I was at it, I took time to cut out the fiberglass panels that will be attached to the back panel boards. This stuff (which was originally part of insulated rigid ceiling panels) is super-easy to work with, easy to cut to size with a razor knife, and will actually adhere to panels with brushed-on heavy coats of contact cement. Very low levels of shedding, but my hands and arms were still itching when I finished.

Crossover Wireup 002.JPG

That's all for today . . . .

GeeDeeEmm
 
Today, I finished wiring in the crossovers and L-pads, then hooked everything up to an amp to make sure everything functioned. On the test cabinet I wired in the L-pad on the Altec 30923 horn attenuation circuit, following advice from the late, great Zilch. This gives one the ability to adjust the depth of the midrange attenuation of the 30923 circuit. Power up, and the horn sounds . . . AWFUL. :eek: It had very low output and the tone of a Zenith transistor radio from the 1970s. What the . . . . ???????

I removed the attenuator from the compensation network. Better, but still way far from normal. So I bypassed the 30923 network altogether. Better still, but no volume and very dull and lifeless. So I went back thru the wiring diagram to confirm that all was right. It was.

So, feeling frustrated and downtrodden :oops:, I decided to sit down and have a smoke and ponder things. I've found that simply sitting down, relaxing, and regrouping will usually give birth to a needed solution. But, not this time. So I got up, but, while walking back to the speaker I noticed the blue rags that I'd stuffed down the horn throat to protect the diaphragm during the paint touchup. By that point, I was too tired to even slap myself on the forehead and call myself the colorful names that usually come to mind under the circumstances. :dunno:

Removed the rags, fired up the receiver, and was rewarded with the sound signature that I was hoping for. Before calling it a day, I decided to add the supertweeter into the mix. Now we're talking! Crossing the supertweet over at 10K, the speaker came to life. Yeah, boy!

So, I'm relieved and contented now. This is not to say that the speakers are where I want them to be sonically, but all the elements are there. I'm hoping that within the next couple of days I can do the final assembly, take photos, install them in my room, and run a RTA on them to see what the FR curve looks like. Then, it will be on to trying them with tubes and solid states to see what sounds best (if there are any differences). Once they are sounding up to snuff, I'll try to make my first-time video and post it here and in Glen's thread.

We're gettin' close!

GeeDeeEmm
 
So I got up, but, while walking back to the speaker I noticed the blue rags that I'd stuffed down the horn throat to protect the diaphragm during the paint touchup. By that point, I was too tired to even slap myself on the forehead and call myself the colorful names that usually come to mind under the circumstances. :dunno:

GeeDeeEmm


Just made my day! :D
 
That sounds like something that I would do. Glad you got it figured out. Once you get the crossover tuned in, try it without the tweeter. I find I like a two way over a three way. Changing from Klipsch to Altec's was an eye opener for me. Properly setup, Altec's can play pretty far up.
Can't wait to see them all set up, been following this since you found some corner kitchen cabinets at a great price.

BillWojo
 
FAIT ACCOMPLI !!!

It dawned upon me this morning that, with just a little effort, I could finish assembling these speakers today. With that loose goal in mind (I suddenly began to feel a little sad that this project would be finished :(), I set about gluing in the last piece of fiberglass, the final seals around the panels, and soldering in a wire or two.

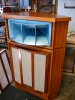
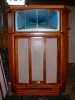
I shocked myself in that all of the brass threaded inserts were exactly aligned with the woofer mounting holes! Never had that happen before. I've always managed to misalign at least two inserts out of sixteen. So, the woofers slid right in with no problems at all.

Wish I could say the same about the grill inserts. I managed to misalign one insert on each panel. That required wallowing out the screw holes to compensate, but at least the nasty stuff is not visible from the front.

Altec Complete 003.JPG Altec Complete 004.JPG

With the grills on, these tall boys took on a new and refined look.

Altec Complete 011.JPG

With everything ready to go (except for the super tweeter, which I'll address later as I've changed my plans for them), I could not resist the temptation to listen to them. I grabbed an old Radio Shack mini-receiver rated at 15 watts and quickly hooked them up. I'll save an overall impression for later because I'm afraid I'm a little too emotionally involved right now to be even remotely objective. But, at this point, I'm smitten. Let's just leave it at that for now.

In the next few days I'll hook up my RTA and get a look at exactly what these are doing. But I'm up late and tired, so that's all for now. Goodnite, all.

GeeDeeEmm


Attachments

  • Altec Complete 002.JPG
    Altec Complete 002.JPG
    75.4 KB · Views: 46
  • Altec Complete 006.JPG
    Altec Complete 006.JPG
    65.7 KB · Views: 193
  • Altec Complete 015.JPG
    Altec Complete 015.JPG
    126.6 KB · Views: 1,386
They look awesome, :bowdown: GeeDee! Very nice indeed! I remember how excited I was when I was finished mine, I couldn't wait to hook them up and give them a listen, I eagerly await to hear your impression once you get them dialed in. :lurk:
 
Thanks, Denton!

Just a few rough first impressions of these speakers and my listening experience last night: I hate to use a word like "amazing," but that's the way I feel about the bass response of these cabs. Most specifically, the linearity of the response. It's been the experience of all of us, I'm sure, to notice that - whether due to room placement or the design of the speaker - certain notes of the response have a tendency to punch hard and loud compared to the remainder of the bass frequencies. Placed where they are, with no nearby room boundaries, these exhibit none of that. From the highest bass notes to the lowest, the bass response is uniform. I have bass in abundance, and of the exact quality that I've always wanted. I hope that the RTA will confirm my impressions, and that once placed in my room that quality remains true.

The horns are delicious, and sound completely different than they did when I initially tested them as they simply lay on top of the cabinets with foam to support them. In the initial test I was happy with them, but installing them in the cabinets with anchoring and voluminous and heavy foam stuffing has transformed the sound quality. There is a total lack of any hint at "horniness" or ringing - just a pure reproduction of what is fed to them. With one exception - the UHF.

Though the HF content is quite nice as is, it is easy to hear that they are rolling off fast above 10-12Khz. And I could easily live with them just as they are. But I'm one of those who really enjoys the "air" and crispness that good UHF extension gives. Temporarily adding the Beyma super tweets with a simple 1st order crossover at +/- 10Khz positively transformed the presentation to a true full-range experience. When I do a video of these speakers, I'll try to remember to record them with and without the super tweeter so that you can hear for yourselves what I mean. I want to hear your opinion.

So, I'm going to do some extended listening with the super tweets in their boxes sitting on top of the enclosures. That way, I can play with the positioning. I want to determine if any time-alignment issues arise with the tweeters at the very front of the cabinet. If the sound remains pleasing with that positioning, I'm going to complete this project by installing the super tweets in the motor boards, just above the woofers. I hope things will work well with this positioning, as installing the super tweets behind the grill will vastly improve the visual presentation, and will eliminate the unsightly tweet boxes from their perch on top of the enclosures.

Hope to finalize all this by Saturday or Sunday, then move the speaks into the house where I can begin dialing everything in. I'm very enthused and happy with what all this labor and time has wrought. Almost giddy looking forward to see what improvements I can wring out of these speakers - and braced to endure the fetching Mrs. GeeDeeEmm's complaints about how big and imposing these things are. :dunno:

It's time for some music appreciation exercises! :music: :music: :music:

More to come. Thanks so much for your support and encouragement, guys.

GeeDeeEmm
 
Back
Top Bottom