• Please note that Audiokarma will be offline briefly for updates early on Monday morning, September 28th.

an idiot's guide to 400 dial glass removal

madwing

AK Subscriber
Subscriber
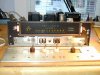
does any such thing exist? i have all four screws off, and can't see how it's held on. i am loathe to put a screwdriver between the dial glass and the...rubber? what?...just inboard of the lightbulbs on the sides of the dial glass.

any help? or am i just missing something obvious? :stupid:
 
Register to hide this ad
got it.

there are two hard rubber (?) spacers double-stuck to the back of the glass and the dark face of the 400. they leave a 3/16" or so gap behind the dial glass in which the tuning indicator needle rides. they were stuck on inversely proportional to the condition of the foam rubber that closes off three sides of the dial glass front.

i didn't want to crack the edge of the dial glass, so that ruled out metal. plastic i didn't have anything rigid enough to pry with, of that size, but hardwood scraps i have in abundance (from my woodshop). so i took a piece of thin quartersawn maple and pried gently up at the left edge, and suddenly it started to go...and pop, one side. then the other came off quickly. taa daa!

i have soaked the adhesive that held on the foam rubber with ammonia, and have scraped most of it off. i am going to leave the rubber spacers on, and then coat with rubber cement (as that seems to be what was on there in the first place). that will allow connection to the dark face, but allow for future prying if i ever feel the need to clean the backside of the dial glass.

another question. what kind of paint do you use on the bulbs on either side of the dial glass? modelmaker's (testers) enamel white?
 
I had the same experience removing the dial glass on my 400. I assumed years of pressure and outgassing caused that bond. I see no reason to use any kind of adhesive there, because the screws do just fine. Have you had yours restored? I've just gotten mine done, and I'm interested in comparing notes.
 
Get self adhesive D shaped weatherstripping from you local hardware store. Wrap it around the perimeter of the dial glass before putting the front panel on.

I've never tried to mask the lamps. Using the weatherstripping allows the festoon bulbs to backlight the dial glass well and that's as much as I've felt the need to do.
 
You'll need to use white heat paint if you want to redo the bulbs. Any good auto parts supply house should have it. Any regular paint will probably scorch.

And you're lucky you didn't break the glass. Prying isn't good, even with wood. The least dangerous method is to use a very thin, sharp, pointed blade, like an X-Acto knife. Slowly slide it gently under one end of the glass, between the glass and the rubber block. You don't need to go all the way. We're just partly unsticking the glass, a little bit at a time. Don't lift or twist, you could chip the edge. Move it over 1/8" or so, and slide it in again. Keep repeating until you've gone the length of one piece of rubber, then go to the other end of the glass and do that side. Then you can gently lift on one end of the glass, and it should pop right off.
 
Masking the festoons doesn't buy you a lot if you've wrapped the dial glass with something and your knobs are deep enough on the stalks but not touching the faceplate. Some units come with a felt surround for the knobs. Using them on the top tuning knob and the treble knob completes the masking.
Those incandescent festoon bulbs are very sensitive and are best left alone IMHO.
 
audiodon, the bulbs are already painted. the paint has heated away over the years, and i just want to refresh it.

and i thought the light went *in* the side of the dial glass, which is how the letters are illuminated so beautifully. the bulbs were oriented to shine directly into the side of the dial glass, and there is the foam on the outer surface and these two rubber blocks on the inner. the side of the glass is the *only* place for the light to get in there...so i don't understand "wrapping the edge"...

fisherdude, i am glad i didn't break it, but i was using wood in a way that would break the wood first, not allowing me to put that much torque on the glass. i also worked it very, very slowly. i didn't want to cut anything, so i didn't use a blade...mostly because i didn't know what that stand-off material *was*. however, point taken.

merrylander, that's where i am headed. i got all the adhesive off, and am going to finish cleaning the glass tonight.

bobby, i'm just starting my refurb. going to get it clean and shiny first. i have all my tubes, at least to start (still not happy with two of my four 7868s), my PIO caps, and some of my resistors. i'm making an order later in the week once i compare what's actually there to what's on the schematic (and differences noted on the schematic).

 
Wrap the weatherstripping around the circumference after the dial glass is in place. You can wrap the top and bottom strips on the backing metal plate, but the two vertical pieces stick to the dial glass. Then the light is pushed behind the dial glass, where it belongs. The D shaped weatherstripping should not be directly visible from the front, though you'll see the bottom strip because of the size of the gap there.
 
I use foam weather stripping and it works great and the exact size of the original, got it from wal mart. For the bulbs, I used white out, seems to work great. I love the way the dial looks at night, I think the paint that fisher used on its dials inculded a ingredient that illuminates with light strikes it. I wouldn't use ammonia on the dial glass, I use rubbing alcohol to clean mine and a razor blade to scrap the adhesive off.
 
jay, i used ammonia on the front side to get the foam gum off. i'll use some windex blotted with a paper towel on the back.

and don, i getcha. i'll look at that. but i will probably do it just the way it was done at the factory...
 
Here's the dealio. Courtesy of Larry's 400.

It doesn't matter if you use foam or d-shaped weatherstripping, really. I used what my local store had and I thought that, in my case, the foam was too thick and the d-shaped stuff crushed down easier.
 

Attachments

  • frontpreclean.jpg
    frontpreclean.jpg
    89.9 KB · Views: 52
Pleased as pie to see another Fisher 400 being restored.

I have two of them, and I;m looking for a case for my second one.

My second one is cleaned and the FM works real nice from the get go.

Classic pieces which deserve preservation and care.

Once updated, this should give you another 45 to 50 years of service.

Man, that Avery Fisher . . .:yes:
 
Back
Top Bottom