• The move to the new server is done. There are some software and database maintenance updates in process. This has us passing the hat around to help out. We appreciate any donations. Seriously, even a dollar helps. The payment page may be found here - https://www.audiokarma.org/support.html

Another Phase Tech PC60 / PC50 refoam thread (success with details)

dogwan

Dogwan
I just re-foamed a PC60/PC50 set and took lots of pics and foam measurements. This will take several posts to get it all in, so bear with me.

Hey all,
I recently picked up a very nice matching set of PC-60's satellites and a PC-50 sub. All in need of foam replacements. Originally advertised as PC60's only, when I showed up the seller said his dad had just dropped off the PC50 sub so I was pleasantly surprised. The satellites were advertised as one of them having dropped in volume (a sure sign of a failed tweeter), but the woofer surrounds were still intact ('ish). The subwoofer surround was already failed. However, the casework and grills were in great shape. Only one of the sat's had some water spotting, but no swelling or other veneer damage.

Sure enough, when I got them home I found one of the tweeters dead. I managed to pull that tweeter and disassemble the diaphragm from the magnet structure and found the joint between one end of the VC magnet wire and the tinsel lead had failed. I was able to just get it soldered back together and the tweeter re-assembled. So, all drivers worked. Even the Subwoofer (played gently in a vertical position).

Note: jumping ahead to after the successful re-foam of all drivers, the other tweeter failed in exactly the same fashion (tinsel/magnet wire joint). So I repaired that one as well. However, I figured at this point both tweeters are compromised (if playing), so I ordered 2 new ones from Phase Tech and they should be here around the end of the week.

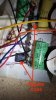
Here's a pic of the Tweeter (part no. T-636) diaphragm and the suspect joint.
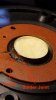
20211205_170628.jpg

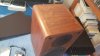
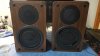
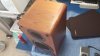
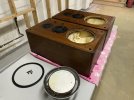
Here's pics of the cabinets of the PC60's
Sorry, no pic of PC50 case, but it is excellent. When the weather gets warmer I am going to refinish them all and will post pics then.
20220120_131821.jpg

20220120_131816.jpg
 
Last edited:
Register to hide this ad
The first one I tackled for re-foaming was the PC50 subwoofer.

Here are the measurements of the existing foam requirements:

A=inside diameter (or inside diameter of circumferential rabbeted edge of foam cone*)
B=inside roll diameter (or outside diameter of cone)
C=outside roll diameter (or inside diameter of frame lip)
D=outside diameter (or max foam diameter to frame lip)

I couldn't get good measurements of the existing foam due to degradation, so the following measurements are actual hard measurements of the cone and basket.

A ≥ 182mm
B = 198mm
C = 230mm
D = 254mm

Note: due to the flat rabbet of the foam cone, it would be ideal to get a "flat attach" foam, but I couldn't find any that matched the dimensions required so I went with an angled foam. More on that in the gluing description.

I scoured eBay for the closest match that I could find. The ones I went with were advertised as "2 pcs 10" horn foam surrounds BMB woofer bass speakers" and had the following measurements:

A=185mm
B=195mm
C=225mm
D=245mm

Here's the sub driver before removal.
20220118_173904.jpg

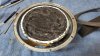
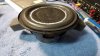
Here's the driver out with the old foam removed. Removing the old foam was a pretty delicate operation. Getting the remnants off the baskets wasn't that bad. But, removing it from the foam cone took a lot of patience. What I ended up doing was using a "chiseling blade" on an exacto knife to gently remove the bulk of the old foam. And then using some very fine point needle nose pliers to work my way around the cone pulling up the old glue as best I could without removing too much foam.
20220118_184844.jpg

Here's the foam glued down on the cone only. I used some foam blocks wedged in between the basket and the back side of the foam cone to lift it up so that the new foam was sitting on the cone only while I glued the inner edge down.


Note: I used a glue very similar to Aileen's Tacky glue so that I had plenty of working time, and also so it wouldn't have any issues with melting the foam cone. Also, it has good gap filling qualities so that it didn't matter if I had an uneven surface on the rabbet edge of the cone (although I was diligent about making sure I didn't have any "raised bumps", only divots to fill).

Notice how the inner diameter of the surround is slightly larger that the raised inner edge of the rabbet. I was careful to try and keep this gap centered. I found out later on the satellite woofers how important this would be due to the trim rings. More on that later.
20220118_185810.jpg

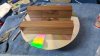
Now, it's important to note that gluing an "angled" edge to a "flat" surface turned out to be a little tricky. What I ended up doing was putting a laser disc on the foam and putting a little weight on it to press the attachment edge flat. This worked because of the way I wedged the cone upward. With a little gap between the outer edge of the surround and the basket, the added weight was able to press the inner edge flat.

BUT! because of the slow set of the tacky glue you can't just weight it down and leave it. You need to keep checking it and keep pressing any wrinkles flat, and keeping it centered. This meant that I spent about an hour alternating weighting it for 5 minutes and checking it without weight on it. I was doing other stuff nearby at the same time, so it wasn't a big deal. After about an hour, maybe 90 minutes I had a good solid joint that didn't seem to be going anywhere (but still needed a full cure).
20220118_193928.jpg

Here's the outer edge glued down. This was pretty straight forward. I used the 50hz test tone method (no shimming on the Phase Tech cones...obviously).
20220119_104527.jpg

Here's with the flat surface foam (?) disc glued down. I'll post about that material in the next post.
20220119_131830.jpg

Here's the driver mounted back in the cabinet with the trim ring.
20220119_133254.jpg

Here's testing the driver with an iPod feeding an amp. Wanted to make sure all was good before hooking up to a good amp.
20220119_133719.jpg
 
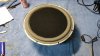
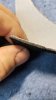
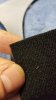
Here's the material I used for the foam disc that covers the flat surface.

Initially I went to the local "Mill End" store for some automotive headliner material. But, on a roll near the headliner I found this material. It was about 1/2 the thickness and had a material backing on the back, and a fuzzy sort of woven facing. I actually thought it was just a different headliner material. But the store person that helped me said that it was actually a "Velcro" material meant for doing a big Velcro bulletin board or similar?

Anyway, I thought it would work great. I used an exacto knife and an appropriate sized bowl to cut the disc. I then used a lighter to clean up any stray edges (on one of the woofers of the satellites I got heavy handed with the lighter and you'll see that in the pics when I get there).
20220119_134204.jpg

20220119_134210.jpg

20220119_134256.jpg

20220119_134323.jpg
 
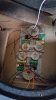
Oh, and while I had the Sub-woofer opened I removed the stuffing to do a quick visual inspection of the crossovers. All looked good. I was happy to see only a couple electrolytics with small film bypass caps on each one. I may replace the EC's when I do the re-finishing this spring.

The EC caps are 100uf/100v and 310uf/100v. There are two (2) crossover boards. One for each channel. Later I would like to map out the crossovers to see if they run the satellites on a high-pass filter or let them roll off naturally. As far as I can tell the subwoofer is run as an 8Ω and with the satellites are 4Ω, and combined I think they are a 6Ω load. I'll post my DCR measurements later.
20220118_174814.jpg

20220118_174836.jpg


20220118_174930.jpg
 
So after practicing on the subwoofer I tackled the satellites.

Here's they are before starting.
note: when brought them home the surrounds were intact, but on their last legs. I pulled a trim ring to take measurements and the surround pulled up with it. That's the one you see with the big tears in the surround. So be careful with yours if you start messing with them.

20220119_135421.jpg

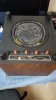
And here's pics of the crossovers before I forget. Again, happy to see only 1 Electrolytic with a small film bypass cap.
20220119_140705.jpg

20220119_140725.jpg
 
The measurements I got for the 6.5" satellite woofers are as follows:

A ≥ 98mm
B = 115mm
C = 140mm
D = 160mm

The ones I found on eBay were advertised as follows: "2 pcs 6" 6.5" horn foam surround for repair KENWOOD SONY woofer bass speaker" and had the following measurements:

A=101mm
B=110mm
C=141mm
D=155mm


Same thing goes re: the angled vs flat attachment. However, you will find the smaller diameter creates many more wrinkles as you try to press the angled edge flat, so it will take even more attention.

Also BIG WARNING: The inner diameter of the trim ring is only about 0.5mm larger than the outer diameter of the roll on the foams I ordered. So, if you don't keep the surround absolutely centered on the cone it, there will be an interference fit which could push the cone off center when you bolt the driver back into the cabinet. I didn't really realize this when I ordered them. You could always skip the trim ring. What I did was glue the inner edge 1st, and while I was working the foam flat I put the trim ring down over the frame and the unglued outer edge. Then I played short bursts of test tones to make sure I wasn't getting any VC rub. When all was done it worked out great. I just want anyone reading this to be aware of the possible pitfall. (see finished pics)

Here's the drivers with old surrounds removed.
20220119_144247.jpg

Here's one of them getting the inner edge glued. Notice the foam blocks I wedged under the cone to lift it. I did do the same weighting technique at first with some not overly heavy larger format paperbacks (club editions?). However, I found that due to the smaller diameter this tended to push up far more wrinkles due to leverage than on the 10" subwoofer driver. So I didn't follow through as before and just kept working the surround flat by hand.
20220119_145939.jpg

Here's both drivers with both edges glued.
20220119_184635.jpg

And here's both drivers mounted back in the cabinets with the foam discs glued on. You can see the one on the left is where I got a little over zealous with the lighter trimming back the frays. but it still looks pretty good.

Edit: you can also see how tight the trim ring is to the roll.
20220119_190009.jpg

Initial test with an iPod feeding a spare Hafler DH-120.
20220119_190508.jpg
 
Last edited:
That's about it. Hopefully someone will find this info useful.

I think I paid less than $25 for both sets of surrounds (couldn't order just one 10" woofer). They all came from the same seller "zhzy5500" on eBay if that's helpful.

So, after I finished them up I had them playing and after about 30 minutes I heard a bunch of sudden distortion out of one of the tweeters then it just dropped out. I figured it was the one I re-soldered the lead on, but no, it was the other one. It has severed in the same place as the 1st tweeter. I managed to get it repaired as well. However, I might be hearing some distortion out of both tweeters now. This wouldn't surprise me since the clearance where I soldered the connections is minimal there is a distinct chance that when reassembled, my less than elegant connection may be slightly rubbing or vibrating. Luckily Phase Tech still stocks the correct tweeter and they are only $50 each. I went ahead and ordered a pair and they should be here by the end of the week. Otherwise they sound great. And I really like the subwoofer integration since it's a bespoke fit with the satellites. No adjustments to sit there and obsess over or 2nd guess. It just plays and plays right.

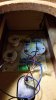
This set is a very early set of the 1st generation (no revisions) series with the really cool push button plunger type connections (see pics of subwoofer bottom). Not the later cheaper spring clip terminals. There's a Stereophile review of the 1st gen PC60's that mentions a problem with the initial run up to serial 3801 (?) or so. These are after that so have the corrected crossovers. The serials are sequential.

This spring when the weather warms up I will do a finish re-fresh on them. So far I have roughly $157 into them (including the new tweeters).

OH, and I also have a pair of the PC-60 CA (30th anniversary limited edition) and am looking forward to doing a head to head comparison between the original design and the no-holds barred version of the same design!
 
Follow up:

I received the replacement tweeters from Phase Tech on Monday. Popped them in and they are sounding very lovely indeed. The old tweeters are still working, but the new ones do distinctly sound a bit smoother. Less stressed? Did my kludgy repair somehow interfere with the fit between the diaphragm and magnet structure? Were they just old and worn out? Has Phase Tech improved the design somehow? I don't know, but they sound great now!

Man I love Phase Tech's customer service. Date codes on the original tweeters were 1986. The PC-60s went through a couple revisions and the tweeter mounting changed. It's amazing that they had the correct pair for these original pre-revision series in stock! They dropped right in without a hiccup.
 
Great thread!
I had the same tweeter experience, I think the new ones are better.

The material you used for the cones looks great, but worried it might be a little heavier than original.
 
The material you used for the cones looks great, but worried it might be a little heavier than original.

I thought about that, but came to the conclusion that no matter what I would never really know what the original material is or weighed. I do have a pair of the 30th anniversary Phase Tech PC60 CA's and they use an uprated version of the same woofer design. The material they faced the woofer has a Kevlar facing on the outward surface over the foam of the disc. I'm sure that weighs much more than the material I used. Although the driver also has a massively oversized magnet, rubber surrounds, and a cast basket. So it's not apples to oranges, but still the same family. Anyway, I'm guessing the difference is negligible over the diameter of a 4 1/2" facing disc. But I do get your point.

https://www.stereophile.com/content/phase-technology-pc60-ca-loudspeaker
 
Wow good timing on all this... I have a pc 50 in need of foam that I've been considering doing. After using it for a while, would you say that it's worth the effort for the subwoofer? I don't actually have pc 60s to match, and I'm not sure I have a use for the sub at the moment.
 
Wow good timing on all this... I have a pc 50 in need of foam that I've been considering doing. After using it for a while, would you say that it's worth the effort for the subwoofer? I don't actually have pc 60s to match, and I'm not sure I have a use for the sub at the moment.

Of course it's worth it, if at least to save it from the landfill.
 
The foam on my pc 50 has been dust for years. Just pulled the box from the tv setup, but had the idea to simply replace the driver with some available sub driver... my pc 60s are doing fine still. Just noticed that Phase Tech has the limited edition pc 60s in stock for $792.00 usd each!
 
The foam on my pc 50 has been dust for years. Just pulled the box from the tv setup, but had the idea to simply replace the driver with some available sub driver... my pc 60s are doing fine still. Just noticed that Phase Tech has the limited edition pc 60s in stock for $792.00 usd each!

I have a pair of the PC-60 CA's (30th anniversary limited edition) and they are really, really good. I've compared them to the standard PC-60 and they really take the Phase Tech sound to the next level. There's a Stereophile review you can find on the web.

Using them with a Hafler 9270 (200w into 4Ω) and they just soak up the power and are probably the ballsiest bookshelf I've ever heard. I have no need for a sub with them on good quality powerful amplification. I've used them on a 15w tube amp with a sub and they sounded good. Used them with an 80w PSE amp and no sub and they sounded better. But it was the 200w Hafler that really brought out the best in them.

If you replace the sub with an off the shelf driver you'll need to do your research to make sure it's a good match for the original driver. Especially since there are no adjustments on the PC-50. At the risk of stating the obvious; it is not a simple matter of plopping any old driver that will fit the hole into the box. If the replacement driver has different response characteristics and/or efficiency, it will throw the internal crossover out of whack. The chances of success going that route are pretty slim. Better to just order a new driver from Phase Tech if you're not up to re-foaming it.

Best of luck.
 
Thanks very much... I noted the driver appears to be dual 4 ohm voice coils, inputting left and right channels into each. More than just finding a suitable characteristic driver, not many dual 4 ohm speakers available fit the 10.125 inch flush opening. While I am not beyond routing out that opening, I do have a request in to Phase Tech regarding replacement driver. I have always been amazed by the quality of the speakers. May end up running just the PC 60s, or going with a separate sub with them.
 
The first one I tackled for re-foaming was the PC50 subwoofer.

Here are the measurements of the existing foam requirements:

A=inside diameter (or inside diameter of circumferential rabbeted edge of foam cone*)
B=inside roll diameter (or outside diameter of cone)
C=outside roll diameter (or inside diameter of frame lip)
D=outside diameter (or max foam diameter to frame lip)

I couldn't get good measurements of the existing foam due to degradation, so the following measurements are actual hard measurements of the cone and basket.

A ≥ 182mm
B = 198mm
C = 230mm
D = 254mm

Note: due to the flat rabbet of the foam cone, it would be ideal to get a "flat attach" foam, but I couldn't find any that matched the dimensions required so I went with an angled foam. More on that in the gluing description.

I scoured eBay for the closest match that I could find. The ones I went with were advertised as "2 pcs 10" horn foam surrounds BMB woofer bass speakers" and had the following measurements:

A=185mm
B=195mm
C=225mm
D=245mm

Here's the sub driver before removal.
View attachment 2463179

Here's the driver out with the old foam removed. Removing the old foam was a pretty delicate operation. Getting the remnants off the baskets wasn't that bad. But, removing it from the foam cone took a lot of patience. What I ended up doing was using a "chiseling blade" on an exacto knife to gently remove the bulk of the old foam. And then using some very fine point needle nose pliers to work my way around the cone pulling up the old glue as best I could without removing too much foam.
View attachment 2463180

Here's the foam glued down on the cone only. I used some foam blocks wedged in between the basket and the back side of the foam cone to lift it up so that the new foam was sitting on the cone only while I glued the inner edge down.


Note: I used a glue very similar to Aileen's Tacky glue so that I had plenty of working time, and also so it wouldn't have any issues with melting the foam cone. Also, it has good gap filling qualities so that it didn't matter if I had an uneven surface on the rabbet edge of the cone (although I was diligent about making sure I didn't have any "raised bumps", only divots to fill).

Notice how the inner diameter of the surround is slightly larger that the raised inner edge of the rabbet. I was careful to try and keep this gap centered. I found out later on the satellite woofers how important this would be due to the trim rings. More on that later.
View attachment 2463181

Now, it's important to note that gluing an "angled" edge to a "flat" surface turned out to be a little tricky. What I ended up doing was putting a laser disc on the foam and putting a little weight on it to press the attachment edge flat. This worked because of the way I wedged the cone upward. With a little gap between the outer edge of the surround and the basket, the added weight was able to press the inner edge flat.

BUT! because of the slow set of the tacky glue you can't just weight it down and leave it. You need to keep checking it and keep pressing any wrinkles flat, and keeping it centered. This meant that I spent about an hour alternating weighting it for 5 minutes and checking it without weight on it. I was doing other stuff nearby at the same time, so it wasn't a big deal. After about an hour, maybe 90 minutes I had a good solid joint that didn't seem to be going anywhere (but still needed a full cure).
View attachment 2463182

Here's the outer edge glued down. This was pretty straight forward. I used the 50hz test tone method (no shimming on the Phase Tech cones...obviously).
View attachment 2463183

Here's with the flat surface foam (?) disc glued down. I'll post about that material in the next post.
View attachment 2463184

Here's the driver mounted back in the cabinet with the trim ring.
View attachment 2463186

Here's testing the driver with an iPod feeding an amp. Wanted to make sure all was good before hooking up to a good amp.
View attachment 2463187

you can apply a small amount of wood glue around the styrofoam edges of the driver and let it dry, afterwards, it will except the normal adhesive that comes with most speaker surrounds without any damage to the styro
 
What a great informative thread, I recently picked up some larger PC70's, Initially I thought "PhaseTech" what is this some white van crap? Then im like these are dome mid, dome tweeter, hardwood corners with real wood veneers.. Not possible, turns out these are great speakers designed by Bill Hecht and still in business.. Picked these up my PC70s for $15, just need to secure the proper foam surrounds and re-create the centers... Do you have a link or a better description on the material you used for the center piston? Yours turned out great and id love to replicate it..

Pics of my speakers : No way I could pass these up for $15 ( this is after a light sand & stain ).

IMG_9437.JPG
 
Last edited:
What a great informative thread, I recently picked up some larger PC70's, Initially I thought "PhaseTech" what is this some white van crap? Them im like these are dome mid, dome tweeter, hardwood corners with real wood veneers.. Not possible, turns out these are great speakers designed by Bill Hecht and still in business.. Picked these up my PC70s for $15, just need to secure the proper foam surrounds and re-create the centers... Do you have a link or a better description on the material you used for the center piston? Yours turned out great and id love to replicate it..

Pics of my speakers : No way I could pass these up for $15 ( this is after a light sand & stain ).

View attachment 2915499
You might also check with Phase Tech. I was able to get new woofers for my PC60s.
 
Back
Top Bottom