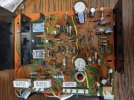
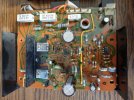
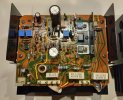
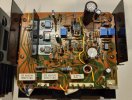
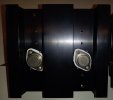
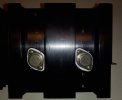
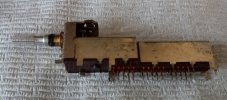
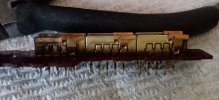
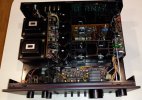
Here are some pictures of my Sansui AU-717 I restored earlier this year. I'm posting them here for prosperity, since they will end up sitting on my PC for all eternity, but also because I sadly sold the amp earlier this year.
When this amp came to me, it had been "restored" by somebody else, and had issues. What I found was, original noisy small signal transistors had not been replaced, and neither had the original trimmers. Where there was the option to upgrade capacitors, this had not been followed. So I basically started from scratch again.
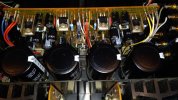
All new silicon was fitted, with the exception of the driver and output transistors. By all new, I also mean the rectifiers for the power amp stage. Often, these are left in despite having many years of surge current passing through them to charge the main capacitors, whenever the amp is switched on. Since I upgraded the main caps anyway, I thought it would be prudent to replace these diodes.
Speaking of the power supply, this board often suffers from the dreaded conductive glue problem. Most people would often replace two or three resistors that have been corroded by the glue. But think about the whole system. We now have a modern resistor sitting amongst a bunch of older carbon types. What I did was replaced all the resistors in the regulated power supply section with 1% metal film. You think you've heard an amp with a quiet background, you haven't heard nothing yet.
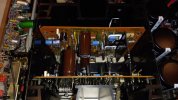
Fancy caps are used throughout. Looks at the pics. Wima films, Nichicon EP Muse, KL low leakage, Panasonic and Nichicon low impedance for the power supply. It's all there. Pretty much the same recipe as some of the other restorations on here, but with a few little tweaks of my own.
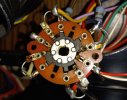
The source and record output selector switches were removed from the boards, dismantled, and given a thorough cleaning and polishing of the contacts. If you've ever taken one of these apart, you'll realize that DeOxit isn't going to do a thing. The speaker selector switch was also cleaned and polished. Not as difficult as those source and record out switches, but still tricky. The preamp power amp bridging switch was also taken apart and cleaned, but I can't find those pictures.
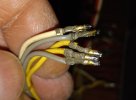
Sansui used crimped pins to attach the wires onto the board. These can and do corrode, and there is no way of knowing how good of a connection is inside. The solution? Cut off those old connectors, strip back to some clean wire, and recrimp new pins on.
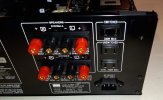
The rear panel was updated with speaker binding posts, purchased from a fellow AKer. The grounds for the speakers are connected in series, meaning that if you have two pairs of speakers playing, both sets go through the same piece of wire to ground. Not any more. I ran a two new wires from the speaker A ground terminals right back to the main capacitors.
The old, thin power cord was cut off and removed. I carefully cut out a hole in the back panel and mounted an IEC socket. I also swapped the wires over on the accessory outlets to match the hot and neutral pins on the IEC socket. Should I decide to use the accessory outlets, I now know where the hot terminal is, since it's the same as the IEC socket.
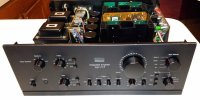



When this amp came to me, it had been "restored" by somebody else, and had issues. What I found was, original noisy small signal transistors had not been replaced, and neither had the original trimmers. Where there was the option to upgrade capacitors, this had not been followed. So I basically started from scratch again.
All new silicon was fitted, with the exception of the driver and output transistors. By all new, I also mean the rectifiers for the power amp stage. Often, these are left in despite having many years of surge current passing through them to charge the main capacitors, whenever the amp is switched on. Since I upgraded the main caps anyway, I thought it would be prudent to replace these diodes.
Speaking of the power supply, this board often suffers from the dreaded conductive glue problem. Most people would often replace two or three resistors that have been corroded by the glue. But think about the whole system. We now have a modern resistor sitting amongst a bunch of older carbon types. What I did was replaced all the resistors in the regulated power supply section with 1% metal film. You think you've heard an amp with a quiet background, you haven't heard nothing yet.
Fancy caps are used throughout. Looks at the pics. Wima films, Nichicon EP Muse, KL low leakage, Panasonic and Nichicon low impedance for the power supply. It's all there. Pretty much the same recipe as some of the other restorations on here, but with a few little tweaks of my own.
The source and record output selector switches were removed from the boards, dismantled, and given a thorough cleaning and polishing of the contacts. If you've ever taken one of these apart, you'll realize that DeOxit isn't going to do a thing. The speaker selector switch was also cleaned and polished. Not as difficult as those source and record out switches, but still tricky. The preamp power amp bridging switch was also taken apart and cleaned, but I can't find those pictures.
Sansui used crimped pins to attach the wires onto the board. These can and do corrode, and there is no way of knowing how good of a connection is inside. The solution? Cut off those old connectors, strip back to some clean wire, and recrimp new pins on.
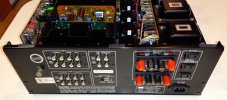
The rear panel was updated with speaker binding posts, purchased from a fellow AKer. The grounds for the speakers are connected in series, meaning that if you have two pairs of speakers playing, both sets go through the same piece of wire to ground. Not any more. I ran a two new wires from the speaker A ground terminals right back to the main capacitors.
The old, thin power cord was cut off and removed. I carefully cut out a hole in the back panel and mounted an IEC socket. I also swapped the wires over on the accessory outlets to match the hot and neutral pins on the IEC socket. Should I decide to use the accessory outlets, I now know where the hot terminal is, since it's the same as the IEC socket.