

Arcam CD73 bad caps, Sony KSS-213C laser and tray tips.
Disclaimer, The below is just info for the technically competent, with no need to follow at all, all steps if followed are at you own risk, it's you doing it.
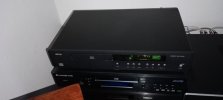
Bought a second hand Arcam CD73 £100, supposedly working, but of course not, there was crackling on both channels. Other posts say that's a sign that the Sony KSS-213C needs a new laser and that it doesn't respond to turning up.
This is a great player with lots of nice touches like quality fine gold, silmic2, cerafine and wima capacitors (and some appalling ones too, more later), damping pads on crystal, top cover and relays, inductors before DAC.
Originally about £500, said by Arcam to sound like twice that price, absolutely and the rest.
The output is direct coupled (no caps) through three op amps per channel one removing dc bias. I have to say it's very fine sounding, huge, expansive, dynamic.
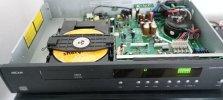
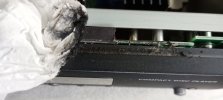
First issue was the disintegrating black foam front strip, cleaned off majority and covered with insulation tape.
Fitting the new laser (£7 from a well known auction site), anti static solder blob circled. this must be removed on install.
Take anti static measures.
Unplugged obviously.
Four screws holding the mech to the case.
Four sprung screws holding the metal mech to the housing.
The silver rod that the sledge slides on will slide out when the plastic end stop is moved aside. Clean rod.
Slide new laser on, reassemble.

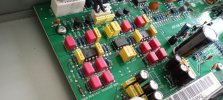
The player has some very dodgy capacitors the manufacturer is actually listed on bad caps.
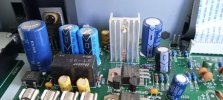
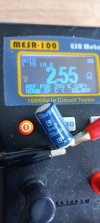
C519 (right of heatsink below) slightly bulging is supposed to be 2200uf but measured at less than 22uf, replaced.
C110 same issue but not as bad, replaced.
Later I also replaced the big Elna on the left, it's fine but faces the mains.
Some minor tweaks.
Noticed the two Rubycons circled were only 100uf albeit ZA ultra low impedance, but marked at 1000uf in the service guide. They measured fine but I was there so replaced with 470uf Panasonic FM's. Frankly not sure if that's right or wrong. Even though the crystal had a pad, added a bit of white tack.

I ran into a bit of trouble with the mech (these things are a pain) as when trying to release the transport connector the board dropped down with the limit switches and then the drive tray started acting up, so below just some tips on the KSS-213 drive mechanism. Hope it helps, good luck!
The drawer faceplate slides on and off to the side once the screw in the back has been loosened, 1/4 turn.
Limit switches on the right in transparent plastic, one is for open and one for closed. The closed one is triggered by the cog above.
The limit on the open one is controlled by a small lift out T shaped prong on the upside of the tray.
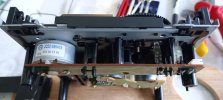
The tab on the left indicated with the screwdriver releases the tray, one on the right as well.
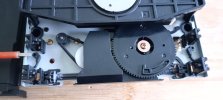
The main black cog above which engages with the tray has a section without teeth which allows the sled ramp to raise the laser, the tray will move in and out freely when in that section.
Basically to synchronise, with the tray in the freewheel section of the cog, make sure the tray is in before switch on at which point the mech should sort itself out, hopefully!
Disclaimer, The below is just info for the technically competent, with no need to follow at all, all steps if followed are at you own risk, it's you doing it.
Bought a second hand Arcam CD73 £100, supposedly working, but of course not, there was crackling on both channels. Other posts say that's a sign that the Sony KSS-213C needs a new laser and that it doesn't respond to turning up.
This is a great player with lots of nice touches like quality fine gold, silmic2, cerafine and wima capacitors (and some appalling ones too, more later), damping pads on crystal, top cover and relays, inductors before DAC.
Originally about £500, said by Arcam to sound like twice that price, absolutely and the rest.
The output is direct coupled (no caps) through three op amps per channel one removing dc bias. I have to say it's very fine sounding, huge, expansive, dynamic.
First issue was the disintegrating black foam front strip, cleaned off majority and covered with insulation tape.
Fitting the new laser (£7 from a well known auction site), anti static solder blob circled. this must be removed on install.
Take anti static measures.
Unplugged obviously.
Four screws holding the mech to the case.
Four sprung screws holding the metal mech to the housing.
The silver rod that the sledge slides on will slide out when the plastic end stop is moved aside. Clean rod.
Slide new laser on, reassemble.
The player has some very dodgy capacitors the manufacturer is actually listed on bad caps.
C519 (right of heatsink below) slightly bulging is supposed to be 2200uf but measured at less than 22uf, replaced.
C110 same issue but not as bad, replaced.
Later I also replaced the big Elna on the left, it's fine but faces the mains.
Some minor tweaks.
Noticed the two Rubycons circled were only 100uf albeit ZA ultra low impedance, but marked at 1000uf in the service guide. They measured fine but I was there so replaced with 470uf Panasonic FM's. Frankly not sure if that's right or wrong. Even though the crystal had a pad, added a bit of white tack.
I ran into a bit of trouble with the mech (these things are a pain) as when trying to release the transport connector the board dropped down with the limit switches and then the drive tray started acting up, so below just some tips on the KSS-213 drive mechanism. Hope it helps, good luck!
The drawer faceplate slides on and off to the side once the screw in the back has been loosened, 1/4 turn.
Limit switches on the right in transparent plastic, one is for open and one for closed. The closed one is triggered by the cog above.
The limit on the open one is controlled by a small lift out T shaped prong on the upside of the tray.
The tab on the left indicated with the screwdriver releases the tray, one on the right as well.
The main black cog above which engages with the tray has a section without teeth which allows the sled ramp to raise the laser, the tray will move in and out freely when in that section.
Basically to synchronise, with the tray in the freewheel section of the cog, make sure the tray is in before switch on at which point the mech should sort itself out, hopefully!
Last edited: