ToniCH
Well-Known Member
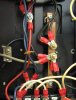
Some time ago somebody was asking in another thread that how can one use new solder lug caps in place of the original screw mounts. See pic 1 for the original setup.
There is several ways. Here is how Kale did it with great pics.
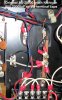
My goal was to stay screw mount. So I searched and found small M3 screw brackets from my local diy-store. Pic 2.
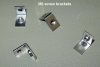
I test fitted them with screws to check alignment. The original copper rails have some possibility for fine tuning because of oval screw holes. Also the capacitor to frame bracket has similar possibility. And I can install the brackets to the solder tabs in a couple different ways to allow small adjustment there also. To my surprise on my first try the fit is perfect. See pic 3.
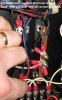
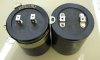
So, I took the screws off and soldered the M3 -screw brackets on. New setup (on left, 100V 22000uF) vs the original, pic 4.
I will post the final installation pic tomorrow after I have bought some M3 star-washers.
EDIT Note to all who plan to swap the caps: the originals are Nichicon 80V 22000uF 76x100mm. I chose Nichicon Gold Tune 100V 22000uFs because they are good quality, the same size and were on sale at Percy
There is several ways. Here is how Kale did it with great pics.
My goal was to stay screw mount. So I searched and found small M3 screw brackets from my local diy-store. Pic 2.
I test fitted them with screws to check alignment. The original copper rails have some possibility for fine tuning because of oval screw holes. Also the capacitor to frame bracket has similar possibility. And I can install the brackets to the solder tabs in a couple different ways to allow small adjustment there also. To my surprise on my first try the fit is perfect. See pic 3.
So, I took the screws off and soldered the M3 -screw brackets on. New setup (on left, 100V 22000uF) vs the original, pic 4.
I will post the final installation pic tomorrow after I have bought some M3 star-washers.
EDIT Note to all who plan to swap the caps: the originals are Nichicon 80V 22000uF 76x100mm. I chose Nichicon Gold Tune 100V 22000uFs because they are good quality, the same size and were on sale at Percy
Attachments
Last edited: