


I thought I would share my experience of my first Sansui AU-555a rebuild inspired by
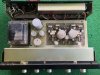
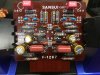
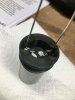
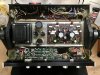
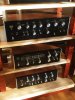
Leestereo's original post. It all started when I bought my first 555 from a coworker. It was in our pressroom gathering dust and otherwise pretty much in need of some TLC. I cleaned it up, fixed the case and deoxed the controls and it worked pretty well. I then reached out to Leestereo offline to see if he would rebuild both units I had. (I bought another from ebay in the interim) He encouraged me to rebuild them myself and helped with parts selection. I'm glad he did! What a fantastic learning experience! The only modification from his plan was how the output caps were mounted to the amp board. I 3D printed risers so I did not have to solder lugs or drill holes in the original board. I finished the 555 in July but I am only posting now because I stumbled upon a pristine 888 that I could not pass up and rebuilt it as well.
The bottom line is the 555, using Leestereo's methodology, sounds fantastic! The once tired and muddy bass sounds clean and with authority. In fact, the entire range has detail far beyond the original unit. My next project is to recap and adjust the QS-1 and revive the second 555!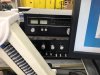


Leestereo's original post. It all started when I bought my first 555 from a coworker. It was in our pressroom gathering dust and otherwise pretty much in need of some TLC. I cleaned it up, fixed the case and deoxed the controls and it worked pretty well. I then reached out to Leestereo offline to see if he would rebuild both units I had. (I bought another from ebay in the interim) He encouraged me to rebuild them myself and helped with parts selection. I'm glad he did! What a fantastic learning experience! The only modification from his plan was how the output caps were mounted to the amp board. I 3D printed risers so I did not have to solder lugs or drill holes in the original board. I finished the 555 in July but I am only posting now because I stumbled upon a pristine 888 that I could not pass up and rebuilt it as well.
The bottom line is the 555, using Leestereo's methodology, sounds fantastic! The once tired and muddy bass sounds clean and with authority. In fact, the entire range has detail far beyond the original unit. My next project is to recap and adjust the QS-1 and revive the second 555!


