


LoWatt
New Member
Hi all, first post here. I’ve just completed my first receiver restoration, and thanks to the wisdom found here on AudioKarma, it was a success, despite a couple near disasters. I had a huge learning curve, and spent most of my time on AK trying to fix my mistakes. To pay it forward, here are a few things I wish I knew that might benefit other new-comers. Maybe some vets can add to the list.
First, the problem.
Distortion, popping, and both channels dropping out on all inputs. Some dead lights. Also, the inside was incredibly dirty.
After some AK research, I figured the problem was likely in the relay or the mono, volume, or tape monitor switches. (Each of these did indeed in their own ways play into the problem.)
To solve the problem, I figured I may as well do it right and recap it as well as replace the relay.
I purchased an eBay kit. After a couple of months or so of tinkering, life is good. But here’s what I wish I knew BEFORE I started.
1. You probably don’t need a kit, though it made life easier, and for my first job, helped lessen the learning curve. That said, the service manual has all the components listed section by section, as well as their values, so you can definitely save money if you choose to purchase caps on their own. A great list can be found via @patfont here:
https://audiokarma.org/forums/index.php?threads/marantz-2220b-capacitor-list-suggestions.372300/
2. Different eras of Marantz 2220b came with different relays. One, as best I can tell, is obsolete. Find out which one you have before buying the kit. The one I had was the obsolete one, and while the new one can be used, the pins will not line up and require some finessing. As it is, I chose to clean my old relay, and that has so far done the trick, but I’ve got a brand new relay laying around for some future project. A good discussion of this can be found here thanks to @Redemoinho :
https://audiokarma.org/forums/index.php?threads/marantz-2220b-speaker-relay-replacement.881545/

3. Take loads of pictures. Flood your phone with photos from every angle, more than you think you’ll need. But don’t use them in place of the schematic. I took loads of photos, and in the end this saved me, although I do wish I had taken more.
4. About those big filter caps: Read the schematic. It MATTERS which way they go in. Double check. Triple check. Read the schematic. I relied on pictures for this, and it nearly cost me. Here’s why I was faked out. Most filter caps have a band going down the negative side. The caps in my Marantz have markings going down one side that say “Negative” and below that, “Black”. I assumed, without carefully studying the schematic, that this was the negative side. What you don’t realize if you haven’t removed all the old solder from the terminals is that one of the terminals has a black dot on it. THAT is the negative terminal. The markings on the casing of the old cap mean nothing. I didn’t look at the schematic carefully. I looked at my pictures instead, and put the caps in backwards. Blew a fuse, lost one of my new caps, and I’m lucky that was all the damage. I wound up putting the old caps back in…according to the schematic.
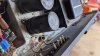
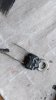
5. Be very, VERY careful when removing the power amp P700 board. Connecting the two are two very important, very fragile, very hard to find, expensive bias diodes known as an STV-3h. You DO NOT want to break these. I broke them both. And I was careful after breaking the first one. These regulate the amount of heat being sent from the circuit to the heat sink. If you break them, good luck finding them on eBay (I bought two that turned out to be STV-4h diodes…keeping them just in case). The best thing to do is follow this genius level advice from @EchoWars found here and build your own: https://audiokarma.org/forums/index.php?threads/replacing-the-stv-3h-and-4h-diodes.279530/ I rebuilt both from the recommended UF1004 diodes and they have thus far worked like a charm. Pictures attached.
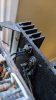
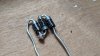
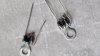
6. Read the schematic and the service manual, but, be aware, Marantz are notorious for errors in their service manuals. A list of errors and correct info can be found here via @Jailtime : https://audiokarma.org/forums/index.php?threads/marantz-service-manual-error-thread.375907/
In the end, when it is finished, you’re going to feel like a rock star. Be patient, don’t get frustrated, double check your work, and remember, Audio Karma is your friend. A big thank you to everyone whose wisdom guided me through this first project. I’m already looking to the next.
- Mike
First, the problem.
Distortion, popping, and both channels dropping out on all inputs. Some dead lights. Also, the inside was incredibly dirty.
After some AK research, I figured the problem was likely in the relay or the mono, volume, or tape monitor switches. (Each of these did indeed in their own ways play into the problem.)
To solve the problem, I figured I may as well do it right and recap it as well as replace the relay.
I purchased an eBay kit. After a couple of months or so of tinkering, life is good. But here’s what I wish I knew BEFORE I started.
1. You probably don’t need a kit, though it made life easier, and for my first job, helped lessen the learning curve. That said, the service manual has all the components listed section by section, as well as their values, so you can definitely save money if you choose to purchase caps on their own. A great list can be found via @patfont here:
https://audiokarma.org/forums/index.php?threads/marantz-2220b-capacitor-list-suggestions.372300/
2. Different eras of Marantz 2220b came with different relays. One, as best I can tell, is obsolete. Find out which one you have before buying the kit. The one I had was the obsolete one, and while the new one can be used, the pins will not line up and require some finessing. As it is, I chose to clean my old relay, and that has so far done the trick, but I’ve got a brand new relay laying around for some future project. A good discussion of this can be found here thanks to @Redemoinho :
https://audiokarma.org/forums/index.php?threads/marantz-2220b-speaker-relay-replacement.881545/
3. Take loads of pictures. Flood your phone with photos from every angle, more than you think you’ll need. But don’t use them in place of the schematic. I took loads of photos, and in the end this saved me, although I do wish I had taken more.
4. About those big filter caps: Read the schematic. It MATTERS which way they go in. Double check. Triple check. Read the schematic. I relied on pictures for this, and it nearly cost me. Here’s why I was faked out. Most filter caps have a band going down the negative side. The caps in my Marantz have markings going down one side that say “Negative” and below that, “Black”. I assumed, without carefully studying the schematic, that this was the negative side. What you don’t realize if you haven’t removed all the old solder from the terminals is that one of the terminals has a black dot on it. THAT is the negative terminal. The markings on the casing of the old cap mean nothing. I didn’t look at the schematic carefully. I looked at my pictures instead, and put the caps in backwards. Blew a fuse, lost one of my new caps, and I’m lucky that was all the damage. I wound up putting the old caps back in…according to the schematic.
5. Be very, VERY careful when removing the power amp P700 board. Connecting the two are two very important, very fragile, very hard to find, expensive bias diodes known as an STV-3h. You DO NOT want to break these. I broke them both. And I was careful after breaking the first one. These regulate the amount of heat being sent from the circuit to the heat sink. If you break them, good luck finding them on eBay (I bought two that turned out to be STV-4h diodes…keeping them just in case). The best thing to do is follow this genius level advice from @EchoWars found here and build your own: https://audiokarma.org/forums/index.php?threads/replacing-the-stv-3h-and-4h-diodes.279530/ I rebuilt both from the recommended UF1004 diodes and they have thus far worked like a charm. Pictures attached.
6. Read the schematic and the service manual, but, be aware, Marantz are notorious for errors in their service manuals. A list of errors and correct info can be found here via @Jailtime : https://audiokarma.org/forums/index.php?threads/marantz-service-manual-error-thread.375907/
In the end, when it is finished, you’re going to feel like a rock star. Be patient, don’t get frustrated, double check your work, and remember, Audio Karma is your friend. A big thank you to everyone whose wisdom guided me through this first project. I’m already looking to the next.
- Mike


