• The move to the new server is done. There are some software and database maintenance updates in process. This has us passing the hat around to help out. We appreciate any donations. Seriously, even a dollar helps. The payment page may be found here - https://www.audiokarma.org/support.html

Beveridge S2 OTL power amps...Help!

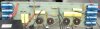
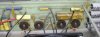
Today I got 1½ of the amps cleaned up and ready to be evaluated as it sits prior to hooking it up. I took some before and after pics and a picture of the reason I have not gotten more done. A loaner rescue puppy that is probably a good bit Thai Ridgeback. She's nice but wants to be involved. She had fun this weekend, though.

The boards are cleaned as shown as are the rest of the amp chassis which are shown in other pictures I've posted. Maybe I can get to the e-panels tomorrow.
 

Attachments

  • Board Dirty.jpg
    Board Dirty.jpg
    46.5 KB · Views: 89
  • Board clean.jpg
    Board clean.jpg
    41.4 KB · Views: 86
  • Mabel.jpg
    Mabel.jpg
    105.8 KB · Views: 76
Looks more respectable now.

She's well behaved though. Our last two sets of dogs have been pre-owned and they've all had some odd quirks. Of course, terriers tend to be somewhat more high strung than a larger breed anyway, and I suspect Jack Russels are half brain damaged under the best of circumstances.
 
First let me thanks Grainger49 for his assistance in getting these units ready to go. I'm almost there. He provided knowledge of electrostatic speakers so I could clean them much more easily that I thought it would be and some help with the schematic (which is for the 2SW, not he 2 so it is not correct but helpful).

The amps are clean, many components checked and rebuilt back to original with the parts they came with and a handful of bolts to make them complete. My intent is to evaluate the system and if they speakers are all that and they work right as well as the amps, I will recap the amps. The 'lytics had the capacitance they were rated, but I don't have an ESR meter just a capacitance meter able to do these. And we all know it is time to replace them, anyway. This is why my plan is to bring them up slowly on a powerstat over a number of hours.

The first speaker, the one that is shown open has been disassembled and each element cleaned of the foam that was on the front of the panel. This deteriorated grille material was lodged between the grid and the Mylar and using a small vacuum and the air compressor I was able to remove a good bit of the foam, all that was visible or showed up when the panel was hit with the compressed air.

This speaker has the panel back in and reconnected as well as one banana stud has been repaired after it was 'peeled' during installation into the amp. This part will be replaced also with the caps when the time comes. I will install this speaker on the amp and power it up slowly soon and maybe get a listen tomorrow. I'll probably leave the back off the speaker and listen to both sides. (Almost stereo, right?)

I'll get a picture of the complete amps and maybe one of the speaker with an amp tomorrow. If all goes well I have a Mouser order to place and a good bit of woodwork to do.
 
Stay aware of ticking coming from the electrostatic panels. If it is really sharp sounding you may have arcing.

As the panels charge there might be some slight ticking like heat dissipating. If there is a snap, that is an arc.
 
The first speaker has played successfully for a while earlier today. Initially, the bottom panel of that speaker had the center section of the Mylar looking like it was stuck to one of the grids. Higher power released this and the speaker sounded fine for the signal it was getting. So one amp works just fine as does the speaker. This amp received a closely matched set of tubes, all measuring 110 or 112.

I am now powering up the second amp. This will take the day as I do a couple hours each at 3 voltages before going full volts (about 115) with the powerstat. I'm using the first speaker for this since the second speaker is still in pieces.

Removing the back panel of each speaker is 28 screws and washers.
Removing each e-stat panel is 4 bolts and 12 bolts with nuts, washers and lock washers. Under each of these 16 bolts is a washer. Additionally the power connections need to be removed for the two grids and the Mylar, another three connections at the top and two at the bottom of each panel except the last one which only has connections at one end. This is repeated 3 times to get all three panels out. Then the cleaning begins.

One issue I see with these panels is two of them have a loose section of Mylar about 1-square inch, in one corner of the panel. If the Mylar is loose enough to allow it to contact the stator/grid it would not be good. I was wondering if anyone knows of a method to repair/bypass this section of the Mylar since it is so small compared to the size of the panel?

I was thinking of gluing the Mylar in place, between the grids which would prevent it from moving or coming in contact with the grids but it would need to be a glue that does not conduct electricity. I'm open to suggestions on how to handle this, other than rebuilding these panels.
 
The latest on the Beveridge speakers is that one speaker and both amplifiers work. The second speaker has two panels that have a bit of looseness in the corner of the Mylar and do not work.

It appears one panel wants to try to work because when the volume is increase there is a little bit of volume coming from the panel and there are parts that are attracted to one of the grids. Unfortunately, the sound is distorted in this panel and the second non-working panel remains silent. This distorted panel has arced a few times, more and louder with the second amp.

As far as the amps are concerned, one has a set of nearly matched tubes in it, 110 and 112 on the tester. The other amp has 130, 110, 102 and 98. This amp had louder arcs in one of the non-working panels than the amp with the matched set of tubes.

Next is to pull the panels that are not working and try to figure it out. Additionally, I will install the top two panels in each speaker and leave the bottom panel area empty and listen to 2/3rds of the speakers as they should be listened to with the back panels on and the sound deadening installed.

This will give me a good idea of the possibilities while I evaluate the drivers, repair options and such.

Don't forget I have to get to cabinet refinishing as these are kinda rough.
 
If i ever get around to modding my tube tester to monitor plate current, I can bring it back over and more accurately match those things. The emission percentage isn't the best indicator. Plate current at a fixed grid voltage would be a better measurement to work from. That may be part of the arcing problem. If there are significant differences between the sides, the currents may be uneven and causing some odd problems.
 
Don't forget I have to get to cabinet refinishing as these are kinda rough.

Cool stuff Blue Shadow.... this gives a whole new meaning to speaker restoration. I never knew there could be this level of complexity in an electro-stat. Maybe that's why I have never played with them before!

More power to ya (literally and figuratively)... keep the posts coming as you make progress...

And you still suck! ;)
 
Five years later……
I just picked up a pair of these model 2’s…..
They have been sitting for 15 years, lots of work to do!
Blue Shadow…. Was all the work worth it? Did you ever finish?
 
I got them to two panels in each working and made those the top panels. Matched with bottom panel not operating. They have a special sound to them. I wasn't able to send the panels out for repair and don't know the tension needed. Mark might have helped feline the driver if the tension was something people can do. But for now, I've enjoyed the 2/3 of full sound and a while ago one amp started screeching. They need a recap, I'm sure. It's another project now, along with some work on the finish.
 
Back
Top Bottom