• The move to the new server is done. There are some software and database maintenance updates in process. This has us passing the hat around to help out. We appreciate any donations. Seriously, even a dollar helps. The payment page may be found here - https://www.audiokarma.org/support.html

Bose 901 series 1 grille re-cover

hrtattckcity

AK Subscriber
Subscriber
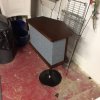
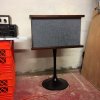
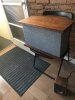
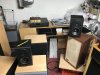
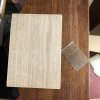
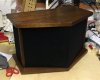
i came across some Bose 901 series i, with stands, no eq, while walking the dog a while back. A little water damage and dinged corners, but all drivers worked--sanding and patching with Mohawk epoxy stick had them looking reasonable.

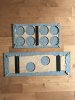
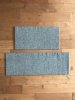
The grilles looked pretty rough, and I tore them up pretty badly removing them--so I laser cut new Masonite panels and wrapped them in guilford of Maine, attached with Velcro instead of staples.
 

Attachments

  • IMG_2563.JPG
    IMG_2563.JPG
    77.2 KB · Views: 164
  • IMG_2585.JPG
    IMG_2585.JPG
    55.5 KB · Views: 164
  • IMG_2598.JPG
    IMG_2598.JPG
    69.8 KB · Views: 161
  • IMG_2595.JPG
    IMG_2595.JPG
    70.8 KB · Views: 162
Register to hide this ad
Beautiful job there, HeartAttack! How does one happen to have access to a laser cutter? Is that part of your job?

Will the lasers cut thicker material, such as 3/4" mdf? I'm having all kinds of visions of cutting speaker panels without the usual mdf dust in the air and down the back. That would be heavenly.

You need to PM TudorTurtle asap and take him up on that equalizer. Bring those puppies to life again!

GeeDeeEmm
 
Beautiful job there, HeartAttack! How does one happen to have access to a laser cutter? Is that part of your job?

Will the lasers cut thicker material, such as 3/4" mdf? I'm having all kinds of visions of cutting speaker panels without the usual mdf dust in the air and down the back. That would be heavenly.

You need to PM TudorTurtle asap and take him up on that equalizer. Bring those puppies to life again!

GeeDeeEmm

3/4" is probably too thick for our laser cutter--which we primarily use for making architectural models. Thick materials either take too long for multiple passes, or burn badly.
You might be able to find someone with a cnc router that would work much better.
 
Now that's a great restoration story. thrown out to be beatified and used again. Listen Hrtattcity (I hate screen names) if you do get an EQ I do know of a guy that actually specializes in rehabbing them. He does all my speaker re foaming and any x-over work and his work is amazing. I'll give you his link.His name is Dave.

dhsspeaker@hotmail.com,
 
Now that's a great restoration story. thrown out to be beatified and used again. Listen Hrtattcity (I hate screen names) if you do get an EQ I do know of a guy that actually specializes in rehabbing them. He does all my speaker re foaming and any x-over work and his work is amazing. I'll give you his link.His name is Dave.

dhsspeaker@hotmail.com,

My "other car" is a pair of Polk monitor 10's so I'm well familiar with "westmassguy"--he was nice enough to give me some advice for fixing those up.
 
I just helped @Chr1sR re-wrap his series 2 grilles using my laser template and more guilford of Maine fabric.

Slightly refined technique:
We laid the Masonite face down on the fabric with a little bit of overhang on the fabric. Made a hinge of duct tape between the Masonite boards. With about an 1/8” gap.
Then we sprayed a controlled line of 3m high strength 90 along each edge, so that it hit both the fabric and the perimeter of the Masonite-making sure we masked all of the driver holes to keep any spray out of the transparent portion of the grille. Then we waited for the 3m 90 to get tacky, and rolled each edge over to bond. Pulling the corners tight and folding them down with one staple in each corner. Make sure you use a 1/4” or shallower staple to prevent poke through or excessive dimpling.
Grilles were attached with adhesive backed Velcro in the old staple points.
 

Attachments

  • 6542C07B-104E-4871-8AEC-469804729894.jpeg
    6542C07B-104E-4871-8AEC-469804729894.jpeg
    61.8 KB · Views: 72
  • 95DDB504-B3A4-4DAE-9039-69788C686B91.jpeg
    95DDB504-B3A4-4DAE-9039-69788C686B91.jpeg
    65 KB · Views: 66
  • EA7E044B-72B1-4CEF-99DA-C6DF721ED1BD.jpeg
    EA7E044B-72B1-4CEF-99DA-C6DF721ED1BD.jpeg
    65 KB · Views: 70
  • 875D3973-F7F5-4E24-B5F3-3CF6E989D762.jpeg
    875D3973-F7F5-4E24-B5F3-3CF6E989D762.jpeg
    58.3 KB · Views: 67
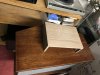
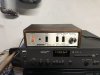
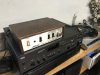
@TudorTurtle was nice enough to fix me up with a slightly cosmetically challenged series I eq from his junk box.

You might not be able to see in the overall photo but a piece of the wood surround was broken off and the faceplate was extremely yellowed.

I just finished sculpting the broken frame out of Mohawk epoxy stick and re-veneering the wood surround, staining and shellacking.

I also replaced the primary 4 binding posts with gold plated posts and replaced the main electrolytic capacitors.

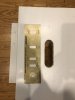
The face plate was soaked over night in a paste of vinegar salt and flour, and then rinsed with rubbing alcohol after that was removed. It did a great job of de-yellowing while leaving the text intact.
 

Attachments

  • 535870A0-F6B9-4F6B-87B2-D29F18E3A775.jpeg
    535870A0-F6B9-4F6B-87B2-D29F18E3A775.jpeg
    88.4 KB · Views: 59
  • A4D2EBA6-0703-4501-B2C4-C3B9C7728671.jpeg
    A4D2EBA6-0703-4501-B2C4-C3B9C7728671.jpeg
    92.5 KB · Views: 53
  • 605A6925-5392-4944-BF74-CB909F698421.jpeg
    605A6925-5392-4944-BF74-CB909F698421.jpeg
    31.3 KB · Views: 51
  • 8CF881CB-4B1F-448D-AD78-DC435355F387.jpeg
    8CF881CB-4B1F-448D-AD78-DC435355F387.jpeg
    72.6 KB · Views: 53
Holy moly the speakers look great!!! I got a 1975 memories frisson going...a buddy's Dad had 901s and they were just so sexy/modern, and your resto really hit the mark. Thumbs up on EQ too, it was a messed up messy thing.
Now knowing the story of your street find WITH STANDS no less - I get the labor of love, and glad that EQ found it's right home after years in the pile. Job well done!
 
Holy moly the speakers look great!!! I got a 1975 memories frisson going...a buddy's Dad had 901s and they were just so sexy/modern, and your resto really hit the mark. Thumbs up on EQ too, it was a messed up messy thing.
Now knowing the story of your street find WITH STANDS no less - I get the labor of love, and glad that EQ found it's right home after years in the pile. Job well done!

Thanks! And Thanks again for the EQ!
 
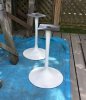
So much wish I'd come across this thread before I started on my own project! While I wasn't lucky enough to find mine on the street, I got a pair of 901s (first series), with stands and EQ, for a good price a few weeks ago. Sanded the cabinets and filled in a few dings with Minwax wood putty, then treated with Howard. I replaced the stained grille cloth (finding the staples was a real pain), used a wire wheel and sandpaper to get the stands down to bare metal, then primed and painted.

Nothing like new, but I'm happy with how they turned out.

I'm a little curious about how you built up the broken EQ frame with epoxy stick. Some of the smaller pieces of Minwax didn't adhere, mostly on the edge of the cabinest, and I want to make sure my repair works when I get around to tackling the EQ this weekend. I'm thinking of using JB Weld wood epoxy, since I'm going to re-veneer.

Also have to second (or third) the recommendation of Dave at DHSS. I sent him another Bose EQ a year or so ago for a basic renovation . This time, I'm going to go for some of the upgrades. He's a nice guy, and more than willing to share his expertise.

Bose.jpg
Stands.jpg
EQ2.jpg
 
Glad to hear this thread was of Interest.

A furniture maker friend turned me onto Mohawk epoxy sticks. This stuff is incredible. All other putty and wood filler products I have tried seem less durable. It’s a little expensive-10-12$ a tube. But lasts a long time as you just cut the amount of putty off the rod that you need. It takes stain a little bit, but is much easier if you get a color that approximates your desired result. You can knead multiple colors together to blend.

You can shave it down with an Olfa and sand it once it has hardened.

Walnut is pretty close match to the old 901 veneer.

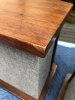
Attached a photo of a pretty bad corner chip that was patched recently on another pair. It’s not perfect, but it is clean

Dave at DHSS has been super generous with advice on my Polk and Bose projects.


So much wish I'd come across this thread before I started on my own project! While I wasn't lucky enough to find mine on the street, I got a pair of 901s (first series), with stands and EQ, for a good price a few weeks ago. Sanded the cabinets and filled in a few dings with Minwax wood putty, then treated with Howard. I replaced the stained grille cloth (finding the staples was a real pain), used a wire wheel and sandpaper to get the stands down to bare metal, then primed and painted.

Nothing like new, but I'm happy with how they turned out.

I'm a little curious about how you built up the broken EQ frame with epoxy stick. Some of the smaller pieces of Minwax didn't adhere, mostly on the edge of the cabinest, and I want to make sure my repair works when I get around to tackling the EQ this weekend. I'm thinking of using JB Weld wood epoxy, since I'm going to re-veneer.

Also have to second (or third) the recommendation of Dave at DHSS. I sent him another Bose EQ a year or so ago for a basic renovation . This time, I'm going to go for some of the upgrades. He's a nice guy, and more than willing to share his expertise.

View attachment 1221607
View attachment 1221608
View attachment 1221609
 

Attachments

  • C82461F4-291E-47A9-8FCC-E1EA17B2EC54.jpeg
    C82461F4-291E-47A9-8FCC-E1EA17B2EC54.jpeg
    48.5 KB · Views: 34
Looks great!.. I also use the Mohawk epoxy with great results...and use markers with it when doing veneer repairs.

As far as holes being cut, one can use hole saws with drill. Does a nice job. I have them up to six inch.
 
looks really nice. Which color did you use?
"Medium Grey" I am nearing the end of a big roll--but if anyone was interested I could possibly make some more grilles. I just did three sets to help out some friends with their series I and II's, and have the method down pretty well now.
 
Last edited:
Back
Top Bottom