• The move to the new server is done. There are some software and database maintenance updates in process. This has us passing the hat around to help out. We appreciate any donations. Seriously, even a dollar helps. The payment page may be found here - https://www.audiokarma.org/support.html

Boston Acoustics A200 - help with midrange drivers

nimM

AK Subscriber
Subscriber
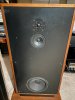
Hello everyone. I recently acquired a pair of Boston Acoustics A200s from an antique shop. Here’s a rundown of their apparent condition:
  • Cabinets are in great condition, but the base is pretty broken up – will need to remove what’s left and rebuild.
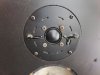
  • Tweeters appear to be pristine
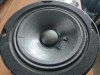
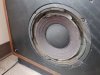
  • Midrange drivers also look very good with the exception of one that has a small tear in it extending from the outer cone to part of the surround (included close-up in the pictures)
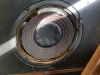
  • Both woofers need to be refoamed (pretty much a given for all old speakers)
  • Speaker terminals on one of the cabinets rotates endlessly (probably a broken connection inside)
My biggest concern is the one mid with the tear in it. What’s the best way to go about it? From what I gather, the A200s shared the same midrange driver as the BA A150’s. Is this correct? A200 spares seem to be difficult to find, but A150 OEM drivers appear easier to come by. So could I just replace the A200 mids with A150 mids?

Next, I read that both mids and tweeters have ferrofluid in the drivers. How do I check if the ferrofluid needs to be replaced/replenished?

Lastly, How do I access the speaker terminals from the inside? I noticed the entire backside of the cabinet is one big panel that can be removed. Is this the only way to get to the terminals?

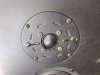
Attached some pictures for additional reference:
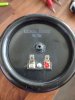
mid_back.jpg mid_front.jpg mid_tear.jpg tweet1.jpg tweet2.jpg woof1.jpg woof2.jpg

Thanks in advance for any and all input!
 
Register to hide this ad
BA A series woofer surrounds are notorious for short life, but are easy to do. And inexpensive.
The mid is tough to call. I would try laying it flat and working glue into the tear. Mids don't work as hard as woofers, it most likely will work fine.
Aleens tacky glue would be what I would use, it stays somewhat pliable after curing.
Those are great speakers, especially for the money. I have the 150's and 200's but the 200's are with my son. If you need dimensions of drivers on the 150 shoot me a PM.
 
The A200's were BA's first speaker ever. Owning them is like owning a piece of history

I don’t think they were, despite the Wikipedia claim. I bought my series one A200s in 1982 (I still have them). The binding posts are unusual and as I said before, I’ve never seen any like that on BAs.
 
I don’t think they were, despite the Wikipedia claim. I bought my series one A200s in 1982 (I still have them). The binding posts are unusual and as I said before, I’ve never seen any like that on BAs.
Looking at the Orion Blue Book it lists the 200 coming out in 1979 with veneer cabs, 1980 in Oak or Walnut. The 60,70 and 100 came out in 80 also, followed by the 400 in 83.
Orion is far from being a definitive source. I've owned every model "A" but the 120.

Edit: 150 debuted in 1981
 
Last edited:
These are the binding posts on my A200s...
 

Attachments

  • IMG_0219.jpg
    IMG_0219.jpg
    66.9 KB · Views: 54
  • IMG_0217.jpg
    IMG_0217.jpg
    101.2 KB · Views: 52
Hi nimM
To get to the terminals you need to remove the woofer and then the insulation/stuffing and you'll be able to expose the back side of the terminals and the crossover components. You might consider drilling out the 2 rivets and remove the spring clip terminals and replace with a good set of 5 way binding posts w 3/4" spacing (Parts Express ) This will allow you to use banana plugs ,spades or bare wire for a good connection.
As far as the midrange - your unit is a closed back unit and is enclosed in a plastic or metal cup The midrange itself is a typical metal open frame with fiber insulation or dampening material in this cup and it is screwed down to the back of the frame. If I remember correctly - see the screw in the center - remove/scrap away the glue and unscrew the Philips head screw a few terns . Next look at the edge of the mid frame and you should see a seam or where the cup meets the surface of the frame flange. You'll need to scour or loosen this seam and gently pry the cup away from the frame. Inside on most of these are 2 wires from the back of the mid range terminals running up to the terminals on the cup. You'll need to desolder the connections (just mark you wires and midrange terminal for correct polarity). You should now be able to loosen the cup and remove it and able to access the rear of the cone and surround. Cut a small piece of tissue paper and soak it in the tacky glue. Starting from the surround work in down into the ridges and finally onto the back of the cone - effectively creating a patch This piece of tissue should be just slightly larger than your crack. From the front of the midrange use a small tool such a back side of a pen and lighty press the edges of the crack onto the patch assuring a good seal (support the back side of the cone with your finger while gentling pressing on the cone.) If you do this correctly you'll end up with a repair to the seam that will be virtually invisible and glued from the rear. Reassemble in reverse order and enjoy your work and the music! I've repaired many mids - Philips, Peerless, KLH, Snell ,Boston Acoustics, Infinity, McIntosh etc all using a cup to isolate the midrange in this manner.

Mr Pajamas - Keen Classics
 
You might consider drilling out the 2 rivets and remove the spring clip terminals and replace with a good set of 5 way binding posts w 3/4" spacing (Parts Express ) This will allow you to use banana plugs ,spades or bare wire for a good connection.

I ended up doing this to my pair years ago, as the cheap spring loaded terminals had failed on one speaker. Whoever owns them now can thank me.;)

jeff
 
That tear is so tight that I'd just work some PVA glue into it and try to make sure
the two sides are even/flush. You could use a more flexible glue like E6000 on
the surround but it doesn't look like it goes very far into the surround so probably
not needed.
 
Here's some pictures of what was described earlier in taking off the midrange back cup.
 

Attachments

  • IMG_6975.jpg
    IMG_6975.jpg
    84.6 KB · Views: 29
  • IMG_6976.jpg
    IMG_6976.jpg
    105.6 KB · Views: 30
Last edited:
Back
Top Bottom