Hello,
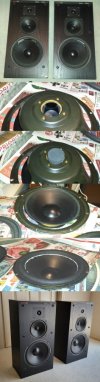
Nearly 17 years ago, I bought a pair of used Boston Acoustics HD10 loudspeakers on Ebay. Luckily I had a buddy of mine pick them up locally for me, so they never had to get shipped - or more precisely never got damaged during shipping.
I've had them ever since, but haven't used them in quite a while, up until just recently anyway.
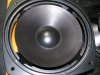
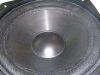
About 13 years ago, I shipped the passive radiators to a place that did speaker repair. I can't even remember the name of the company anymore. But they did a fantastic job of re-foaming the surrounds and are still in perfect condition to this day. The cost was kinda high though; I DO remember that. Almost not worth it unless you are a big big fan of these speakers, or Boston speakers in general I suppose.
Now fast-forward to today, and I just finished up some more upgrades to my HD10s:
1) I replaced those stupid worthless spring-clip speaker terminals with modern 5-way binding posts.
2) Replaced the old electrolytic capacitors on the crossover networks with new modern Dayton Audio Caps
All the parts I bought from PARTS EXPRESS. Here are the part names and numbers:
(2 EA) 260-292 Round Speaker Terminal Cup 2-15/16" Binding Post Banana Jack $5.50
(2 EA) 027-230 Dayton Audio PMPC-4.7 4.7uF 250V Precision Audio Capacitor $4.20
(2 EA) 40027-242 Dayton Audio PMPC-8.2 8.2uF 250V Precision Audio Capacitor $5.99
(2 EA) 98027-342 12uF 100V Electrolytic Non-Polarized Crossover Capacitor $0.73
The speaker terminal cups are a direct replacement. Just reuse the same screws from the old plastic terminal cups. Even the speaker wire clips fit! You do not have to modify a thing. Easy as pie! A 10 minute job. Plug and play.
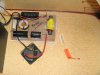
The crossovers are a different matter altogether. There's some modding involved. You will need a soldering iron and related materials. Basically, you are gonna have to reuse the old speaker wires, resistors and the old coils from the original Boston crossover networks, and build a new pair of crossovers using the new capacitors. The original crossover networks were point-to-point wiring. I built the new crossovers in the same manner using a piece of 3/16 in. thick fiberboard as a base. I used zip ties instead of hot glue to secure the components to the fiberboard. This project took about three hours. I secured the new crossover networks to the speaker cabinets using screws, but perhaps gluing them in would work better.
As for the sound. Nothing to report, really. The speakers sounded great before, and they STILL sound great now after performing these mods.
Basically, all I really wanted to do with my HD10s was modernize them so that they will perform their best for the next 20 years. The 5-way binding posts helped tremendously in this regard. The capacitor/crossover network upgrade may not seem like much now, but I'd like to think that replacing old dried-up electrolytic caps with newer better-er ones is like a form of insurance/speaker protection if nothing else.
Nearly 17 years ago, I bought a pair of used Boston Acoustics HD10 loudspeakers on Ebay. Luckily I had a buddy of mine pick them up locally for me, so they never had to get shipped - or more precisely never got damaged during shipping.
I've had them ever since, but haven't used them in quite a while, up until just recently anyway.
About 13 years ago, I shipped the passive radiators to a place that did speaker repair. I can't even remember the name of the company anymore. But they did a fantastic job of re-foaming the surrounds and are still in perfect condition to this day. The cost was kinda high though; I DO remember that. Almost not worth it unless you are a big big fan of these speakers, or Boston speakers in general I suppose.
Now fast-forward to today, and I just finished up some more upgrades to my HD10s:
1) I replaced those stupid worthless spring-clip speaker terminals with modern 5-way binding posts.
2) Replaced the old electrolytic capacitors on the crossover networks with new modern Dayton Audio Caps
All the parts I bought from PARTS EXPRESS. Here are the part names and numbers:
(2 EA) 260-292 Round Speaker Terminal Cup 2-15/16" Binding Post Banana Jack $5.50
(2 EA) 027-230 Dayton Audio PMPC-4.7 4.7uF 250V Precision Audio Capacitor $4.20
(2 EA) 40027-242 Dayton Audio PMPC-8.2 8.2uF 250V Precision Audio Capacitor $5.99
(2 EA) 98027-342 12uF 100V Electrolytic Non-Polarized Crossover Capacitor $0.73
The speaker terminal cups are a direct replacement. Just reuse the same screws from the old plastic terminal cups. Even the speaker wire clips fit! You do not have to modify a thing. Easy as pie! A 10 minute job. Plug and play.
The crossovers are a different matter altogether. There's some modding involved. You will need a soldering iron and related materials. Basically, you are gonna have to reuse the old speaker wires, resistors and the old coils from the original Boston crossover networks, and build a new pair of crossovers using the new capacitors. The original crossover networks were point-to-point wiring. I built the new crossovers in the same manner using a piece of 3/16 in. thick fiberboard as a base. I used zip ties instead of hot glue to secure the components to the fiberboard. This project took about three hours. I secured the new crossover networks to the speaker cabinets using screws, but perhaps gluing them in would work better.
As for the sound. Nothing to report, really. The speakers sounded great before, and they STILL sound great now after performing these mods.
Basically, all I really wanted to do with my HD10s was modernize them so that they will perform their best for the next 20 years. The 5-way binding posts helped tremendously in this regard. The capacitor/crossover network upgrade may not seem like much now, but I'd like to think that replacing old dried-up electrolytic caps with newer better-er ones is like a form of insurance/speaker protection if nothing else.
Attachments
![0620191315b[1].jpg](/forums/data/attachments/1415/1415533-bfbd044a986968067f714f340c7c08e3.jpg?hash=v70ESphpaA)
![0620191317a[1].jpg](/forums/data/attachments/1415/1415534-6f773312f0795c31300fc7900dd9cdf1.jpg?hash=b3czEvB5XD)
![0620191316[1].jpg](/forums/data/attachments/1415/1415535-3e5dad6c6fdfbe94389a8b47004e3f49.jpg?hash=Pl2tbG_fvp)
![0620191342[1].jpg](/forums/data/attachments/1415/1415570-34b8db2ba927d716497798ad67dde505.jpg?hash=NLjbK6kn1x)
Last edited: