Tom (catrafter) was kind enough to show me this procedure years ago when I was about to attempt to change out an entire 5 wafer selector switch.
Rather then try to unsolder 50 connections - a herculean task to undertake - he said to just swap out the shaft itself!
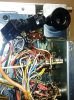
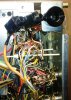
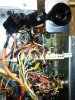
Here's what we all dread!

The business end...

The donor switch....

Broken switch pulled out in preparation.
Remove the two nuts and lockwashers from the back of the switch but do not pull out the shaft just yet....

Carefully remove both nuts from the ends of the long screws on the donor and pull the front shaft out making sure that the donor switch shaft is turned to the EXACT SAME position as the broken switch.
This will insure that it slides right into the existing switch wafers....

You have to carefully pull the broken shaft out with one hand while your other hand keeps a small amount of "clamping force" holding the front and back wafers together.
Doing that will keep all the spacers between each wafer from falling out and you do NOT want that to happen!
Since you previously made sure that both switch shafts were in the same detented position you can carefully and slowly insert the new shaft assembly while watching that all the spacers line up.
When fully inserted go ahead and install the end nuts with lockwashers.
I was extremely nervous the first time but as I did more of them I became more comfortable.
It is an extreme time saver vs. changing out the entire switch assembly.
( Sorry - I couldn't take a pic of the existing switch with the shaft pulled out without letting all the spacers falling out! )

Here's the old switch shaft...

Thanks Tom for a great time saving tip!!
Bob
Rather then try to unsolder 50 connections - a herculean task to undertake - he said to just swap out the shaft itself!
Here's what we all dread!
The business end...
The donor switch....
Broken switch pulled out in preparation.
Remove the two nuts and lockwashers from the back of the switch but do not pull out the shaft just yet....
Carefully remove both nuts from the ends of the long screws on the donor and pull the front shaft out making sure that the donor switch shaft is turned to the EXACT SAME position as the broken switch.
This will insure that it slides right into the existing switch wafers....
You have to carefully pull the broken shaft out with one hand while your other hand keeps a small amount of "clamping force" holding the front and back wafers together.
Doing that will keep all the spacers between each wafer from falling out and you do NOT want that to happen!
Since you previously made sure that both switch shafts were in the same detented position you can carefully and slowly insert the new shaft assembly while watching that all the spacers line up.
When fully inserted go ahead and install the end nuts with lockwashers.
I was extremely nervous the first time but as I did more of them I became more comfortable.
It is an extreme time saver vs. changing out the entire switch assembly.
( Sorry - I couldn't take a pic of the existing switch with the shaft pulled out without letting all the spacers falling out! )
Here's the old switch shaft...
Thanks Tom for a great time saving tip!!
Bob