
• The move to the new server is done. There are some software and database maintenance updates in process. This has us passing the hat around to help out. We appreciate any donations. Seriously, even a dollar helps. The payment page may be found here - https://www.audiokarma.org/support.html

Cheapest DIY fix for broken hinges on Thorens' dust covers

doctor fuse

Super Member
The hinges to my 160's dust cover broke last week, so I crazy glued them back on. Tonight they broke off again while changing a record.

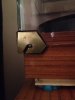
I decided to do a DIY fix, so I drew a template and cut two braces out of the lids to tin cans (Chef-Boy-Ar-Dee Ravioli!
icon_lol.gif
). I crazy glued the broken plastic hinges back on, then crazy glued my DIY tin braces over top, making sure to first check that they fit over the plug-in metal lid hinge holders on the plinth.

The result isn't pretty, but I doubt the hinges are going to break again any time soon.
IMG_1349.JPG
 
Register to hide this ad
I have the same Loctite epoxy, but haven't used it yet 'cause I was worried about the "Opague Amber" color listed on the label. Does it have a yellow tint when it dries?
 
I have the same Loctite epoxy, but haven't used it yet 'cause I was worried about the "Opague Amber" color listed on the label. Does it have a yellow tint when it dries?
Why would that make any difference on this repair? Or you going to us it on something else?
 
Not orangey as I recall or obvious as seen in the pics. I'll look later.
 
Why would that make any difference on this repair? Or you going to us it on something else?

In Montycat's pics above, you'll see that he used 2 supports for each side, sandwiching the plexiglass (and epoxy) between the metal plates.
On mine, I'll just be using one plate on the outside of the plexiglass, and my plates are powdercoated a dark, mossy green color. So I'm hoping to avoid an obvious big ol' glob of glue when viewed from the inner side of the dustcover.
Probably not a worry, but still, would be nice if it were clear and un-obtrusive.
 
In Montycat's pics above, you'll see that he used 2 supports for each side, sandwiching the plexiglass (and epoxy) between the metal plates.
On mine, I'll just be using one plate on the outside of the plexiglass, and my plates are powdercoated a dark, mossy green color. So I'm hoping to avoid an obvious big ol' glob of glue when viewed from the inner side of the dustcover.
Probably not a worry, but still, would be nice if it were clear and un-obtrusive.
Smith industries epoxy is clear
 
In Montycat's pics above, you'll see that he used 2 supports for each side, sandwiching the plexiglass (and epoxy) between the metal plates.
On mine, I'll just be using one plate on the outside of the plexiglass, and my plates are powdercoated a dark, mossy green color. So I'm hoping to avoid an obvious big ol' glob of glue when viewed from the inner side of the dustcover.
Probably not a worry, but still, would be nice if it were clear and un-obtrusive.

No. It's a single plate per side as in pic 1. In pic 3 you are seeing a reflection. There is actually not enough space between the cover and plinth for a second plate anyway.

I just had another look and see no evidence of orange or yellow tint to the glue. It's essentially clear and very unobtrusive.
 
Gotcha. And thanks for taking a second gander at the glue.
Any glue you use you're going to see if it's strong enough for the job
There are some for glass and acrylic repair that do in fact cure crystal clear but they're not going to give you the strength you need for this patch
 
Well, my repair job didn't hold up forever. :(

I think a factor is how much material was broken off as you see above. That meant there was leverage on the new joint and the metal plate broke off about a month ago. Today I got around to fixing it and I think I have it this time. :)

I went a different route with the glue but also carved up a chunk of another broken dustcover to glue and reinforce the plate, sort of to buttress it against the broken off stub of the old hinge area. I shaped a couple of pieces to mimic the 2 parts on either side of the slot and also Dremeled flat the broken edges on the lid so they were going to fit each, more or less.

Thorens dustcover fixing tools by Buhduh, on Flickr
 
Last edited:
Oops, I hit enter too fast. Here are the other views of the repair.

The lid I grabbed the other pieces from is thinner than the hinge area of the Thorens but with this UV activated Bondic glue I could build up a layer of reinforcement around the joints. Yes it is ugly from the inside but installed you can't see this. The black line is from a marker I used in the shaping process for the parts I glued on. I didn't feel any need to remove it.

Thorens dustcover repair inside view by Buhduh, on Flickr

Outside looks good:

Thorens dustcover reinforcement plate by Buhduh, on Flickr

And if you look at it closely from this angle once installed, it's not the prettiest but it seems to work well so far.

Thorens hinge area by Buhduh, on Flickr
 
That hinge pin area is not the most robust. Mine aren't broken but I also try to not actually rely on them because there is a slight crack on one of them. I just pull the cover off when I use the Thorens. My hinge pins were actually missing when I got it, but I made new ones from some stainless welding rod.
 
That hinge pin area is not the most robust. Mine aren't broken but I also try to not actually rely on them because there is a slight crack on one of them. I just pull the cover off when I use the Thorens. My hinge pins were actually missing when I got it, but I made new ones from some stainless welding rod.

If you glue plates on preemptively before the tabs break they probably never will. I have extras if you are interested.
 
Back
Top Bottom