• The move to the new server is done. There are some software and database maintenance updates in process. This has us passing the hat around to help out. We appreciate any donations. Seriously, even a dollar helps. The payment page may be found here - https://www.audiokarma.org/support.html

Check out my new 4344 Crossovers!!

Lynn Allen

New Member
My 4345 crossover project
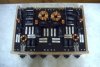
What started out to be a fairly strait forward charged coupled crossover project, turned out to be much more than I ever expected. I reviewed several designs from LHS and Audiokarma members looking for a solution that would allow for an external crossover which could be used with my custom built 4344’s. My main criteria was to end up with a good looking, great sounding design which could be displayed on top of my 4344’s and retain the period correct look of my listening room. I reviewed the following design and liked the look, however, was not quite sure this was exactly what I was looking for.

Very nicely built crossovers by Dave at Katzass audio
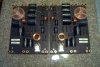
 

Attachments

  • f2.JPG
    f2.JPG
    62.7 KB · Views: 235
Register to hide this ad
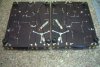
Further research found this version from Dave that seemed a potential candidate for the project, but I was still not sure if this was really what I was looking for.

Another variation of crossovers by Dave at Katzass Audio
 

Attachments

  • network.jpg
    network.jpg
    45.3 KB · Views: 128
Last edited:
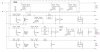
With the basic criteria was set I still was looking for something that was unique in design and allowed for the crossovers to be installed separately with one crossover on top of each speaker. Since the speakers are bi-amped I wanted a design to provide the best sound possible. More research found this charged coupled design by Giskard for the 4345. Even more research revealed that this was not only a great design, but was an upgrade for the 4343’s, 4344’s and the 4345’s. All my research kept directing me to Giskard and his charged coupled designs. With the experience and expertise he brings to the LHS forum and crossover designs, it didn’t take much coaching to realize that his design would be the best choice from my custom built 4344 crossover build. Thanks again Giskard for all your posts and help to everyone on the LHS forum!! This would not be possible without your help.

Giskards charge coupled 4 way crossover design
 

Attachments

  • Z-Giskard_cc_3145.JPG
    Z-Giskard_cc_3145.JPG
    77.4 KB · Views: 121
After finalizing the electrical design I called upon another LHS member Mbottz, a fellow LHS forum member. Mbottz is a JBL resource in the Dallas area that has rebuilt and restored JBL cabinets and grills for me to better than new condition over the years. He can also repair and build electronics for vintage equipment as well as anyone I have found. Working with him was a pleasure. He was able to take my ideas, refine them, and create a design that met all my expectations.
In our lunchtime brainstorming sessions at Hooters and Twin Peaks we discussed designs and options. (Sure we did!!) It was there I decided that the finished product must have a cabinet that would contain the l-pads on the front and the speaker connections on the back. While never straying from the task at hand, we relentlessly brainstormed on how to best design and build my “ultimate crossover” without compromising looks and sound. (An occasional look at the scenery helped keep the project from getting boring), a few beers later our design was complete. Knowing the quality of work Mbottz produces and with Giskards charged coupled design there was no doubt it would look and sound great.
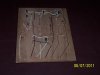
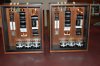
With the concept clearly in our minds, (as well as the Flannel wrapped Twin Peaks memory) the first thing was to lay out was the components in a neat and orderly fashion. The layout had to be functional as well as pleasing to look at. (Again memories of Hooters waitresses did not cloud our thinking at all) I think our design is spot on. Further research and a couple more beers, determined our build warranted a walnut mounting case which would show off the components. All wiring was concealed to further promote the professional and neat appearance of the design. Here are pictures of the build from start to finish.

Neat Component Layout shown off with a walnut base
 

Attachments

  • DSC_0001.jpg
    DSC_0001.jpg
    86.4 KB · Views: 142
After finishing the component placement and wiring, an enclosure was built which would complement the 4344’s and retain the style of a JBL product from the same era. After a few more discussions, it was decided that larger rear binding posts would be installed to support a large gauge wire. (Up to 6 AWG if required) Separate terminals for input and outputs mere a must. The faceplate would be removable to provide for the installation of the l-pads. Mbottz came up with the design which used rare earth magnets to hold the front plates securely on the cabinet. These unique magnets are glued with epoxy into holes drilled in the cabinet and faceplate. When finished they hold with the strength of nails while allowing for the removal of the faceplate. The L-pads while part of the crossover are hidden to provide the cleanest look possible for the finished project. A removable top trim cover was designed, which sets on top of the crossovers, hiding the l-pads, yet allows the main components to still be visible.
The front trim around the l-pads was styled to closely resemble the front trim of my custom 4344’s. To achieve that factory JBL look I wanted a logo and control graphics panel to resemble the original used on the 4345’s.
RJ Timmerman of the sign shop (another LHS member) was called upon to make the front labels for the controls. For those not familiar with RJ’s work you simply cannot find a better quality graphic for restoring your JBL projects. He also sells grill pegs, knobs, and screws which are exact replacements for JBL restoration projects. (Shameless plug) Thanks RJ for a quality product to finish this build. The next pictures are the results of the combined efforts of Mbottz, Giskard, and RJ Timmerman. I am extremely pleased with the outcome.

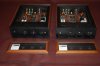
Components shown installed in the finished case.
 

Attachments

  • DSC_0004a.jpg
    DSC_0004a.jpg
    75.5 KB · Views: 124
The cases with the front removed, showing the magnets and l-pad covers. A ¼ inch recess was left on top for the installation of the smoked glass.
 

Attachments

  • DSC_0002a.jpg
    DSC_0002a.jpg
    54.1 KB · Views: 96
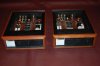
Final assembly before installing the smoked glass. Cant wait to get them hooked up for a listen!!
 

Attachments

  • DSC_0001a.jpg
    DSC_0001a.jpg
    50.9 KB · Views: 93
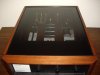
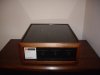
Lastly, being displayed on top of my speakers it seemed only fitting to provide a smoked glass top to finish off the build. This allows for a finished look, a change of the occasional battery, while still providing a peek at the components inside. Here is the finished product, sounding awesome and proudly displayed. I actually purchased and had the glass cut, so no one can say I did not contribute to this project. Thanks again to all the folks from LHS that helped make this a successful project.

Smoked glass installed. See the components inside. Cool!!
 

Attachments

  • DSC_ 014.jpg
    DSC_ 014.jpg
    53.5 KB · Views: 90
Wow, those are pretty! I especially love the smoked glass. Very, very attractive. Nice attention to detail!
 
Excellent work! Post a pic of the entire speaker, lots of guys here have probably never seen a 4344.
 
I have to say, I see things like this on AK and I always think the same thing: I wish I had a mentor that could have taught me how to do work like that. Absolutely gorgeous! Congrats!
 
Rebuilding a pair of JBL 4344 speakers, got the drivers re-coned by JBL, cabinets are in ruff shape, large mounting holes on sides when used at CBS in NYC for NFL programs. I'm looking for a schematic for the crossover, this speaker is not the Mark II version. I was going to replace the caps and binding posts, fill in scraped cabinet gouges and paint with a flat black and haven't decided to keep the soundboard as blue, if so would need a grill ...saw where a member in Dallas area did build grills and that sort, I'm currently located south Dallas. Was thinking of driving it with a pair of McIntosh MC-60 tube amps (starting my rebuild of those) with a Mac C-28 (highly mod'd) preamp, or I've got various SS amps, With that much cone material I'm thinking a tube amp would not have the control, but I'm looking for advice. My primary system is stock Dunlavy 5 speakers, with an Edge M10 (factory updated, latter I repaired), Hovland 100 preamp (factory updated, latter I repaired), Technics SP-10 turntable (I repaired electronics) with Grace 714 tonearm, and new PS Direct Stream DAC (bloody dam good DAC).
I got the JBL4344 pair from a CBS Engineer for free as the cones were ripped and the cabinets were horrible looking, just building a library stereo .....will place on walnut blocks for tweeter height matching chair height for ears.
 
Back
Top Bottom